Hello and welcome to another creative ride with The Morphic Studio. If you are reading this, you are probably looking to level up your statistical design game. Real-time rendering has totally changed the way we look at Patchwork 3D models. It is no longer just about making a flat picture; it is about creating a visual twin that feels completely alive.
Today, we are focusing on software that is making huge waves in the industry right now. We are going to walk you through a complete Patchwork 3D tutorial. know that jumping into new software can feel a bit overwhelming at first, but do not worry. We have broken it down into simple, easy-to-follow pieces.
By the end of this Morphic Studio information, you will know exactly how to turn your raw CAD files into stunning, photorealistic masterpieces.
This guide is crafted specifically for you, our amazing readers at The Morphic Studio, to help you master this incredible tool without any stress. Let us get right into it.
Welcome to The Morphic Studio Guide to Patchwork 3D
Here at The Morphic Studio, we always want to bring you the best and most practical tools for your creative workflows. We spend a lot of time testing out different software so we can tell you what actually works. Patchwork 3D is one of those tools that truly caught our eye. Why? Because it bridges the gap between technical engineering data and beautiful marketing visuals. Normally, you have engineers working in their own technical world, and designers struggling to make those technical files look good for clients. It is usually a very messy process, with lots of back and forth. But this software changes the whole game. It allows you to take those heavy, complex files and instantly start making them look like real, physical products. It is perfect for industrial design, automotive rendering, fashion, and basically anything where you need the product to look flawless before it even exists in the real world. We are super excited to share this with you because we think it will save you a ton of time and headache.
Patchwork 3D
What exactly is Patchwork 3D?
So, what is this software all about? In simple terms, Patchwork 3D is a powerful real time rendering software created by Lumiscaphe. It takes your standard 3D CAD models and turns them into highly realistic visual twins.
A visual twin is basically a statistical copy of a product that looks and behaves exactly like the real thing.
You can use it to review designs with your team, show off different configurations to clients, or even create stunning virtual reality experiences.
The best part is that it does all of this in real time. You do not have to click render and then go drink three cups of coffee while you wait for the image to load.
Every change you make, like swapping out a color or moving a light, happens right in front of your eyes instantly.
It is built to handle huge industrial files without slowing down your computer.
Whether you want to make interactive web configurators or high quality marketing videos, this software gives you the tools to do it all in one place.
The 7 Ultimate Steps for Amazing Real time Rendering with Patchwork 3D
Now that we know what the software does, let us roll up our sleeves and get to the fun part. Creating an amazing real time render might sound like magic, but it is actually a very logical process.
We have divided this workflow into seven ultimate steps. If you follow these steps carefully, you will be able to take any basic 3D model and turn it into a photorealistic scene. Just take it one step at a time, and do not be afraid to experiment a little bit along the way. Here is how you do it.
Step 1, Importing Your CAD Data into Patchwork 3D
The very first step in our Patchwork 3D tutorial is bringing your model into the software. This is where it all begins. You might have a model from SolidWorks, Maya, Blender, or any other modeling program. The software supports a wide range of standard formats, so getting your file in is usually very smooth. Simply open the software, go to the file menu, and choose import.
When you bring your CAD data in, the software does a great job of preserving your original engineering data. It keeps your object hierarchy clean, which means all your separate parts will stay organized just like you built them.
Sometimes models can be very heavy, so the software will give you options to optimize the geometry as it comes in. This helps your computer run smoothly later on when you are adding textures and lights.
Take a moment to check your model once it is loaded. Make sure no parts are missing and that the scale looks correct. A good import sets the foundation for a great render.
Patchwork 3D
Step 2, Setting Up Your Workspace in Patchwork 3D
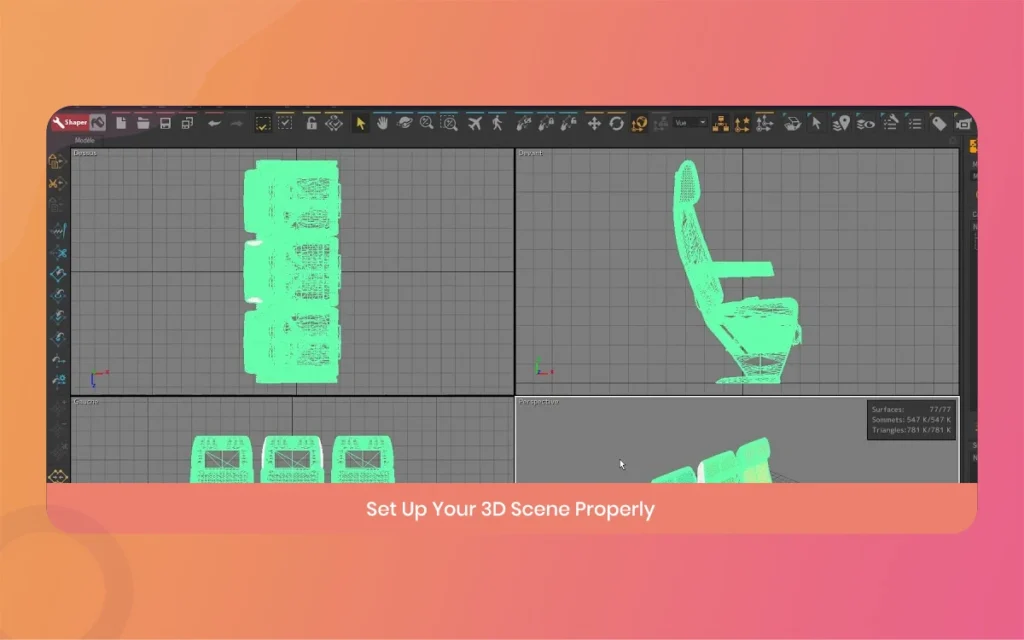
Once your model is safely imported, the next step is to organize your statistical workspace. Working in Patchwork 3D is much easier when you have everything exactly where you need it. The user interface is quite flexible.
You can drag and drop different panels, like your material library or your lighting settings, to wherever feels most comfortable for you. We highly recommend grouping your model parts logically in the scene outliner.
For example, if you are rendering a car, group all the wheels together, the windows together, and the interior parts together. This simple organization saves you a massive amount of time later when you want to apply a specific material to multiple objects at once.
Also, take a minute to set up your basic camera angle. Find a nice, energetic view of your product and save that camera position.
This way, no matter how much you spin the model around while working, you can always snap right back to your main presentation view with just one click.
Patchwork 3D
Step 3, Applying Realistic Materials with Patchwork 3D
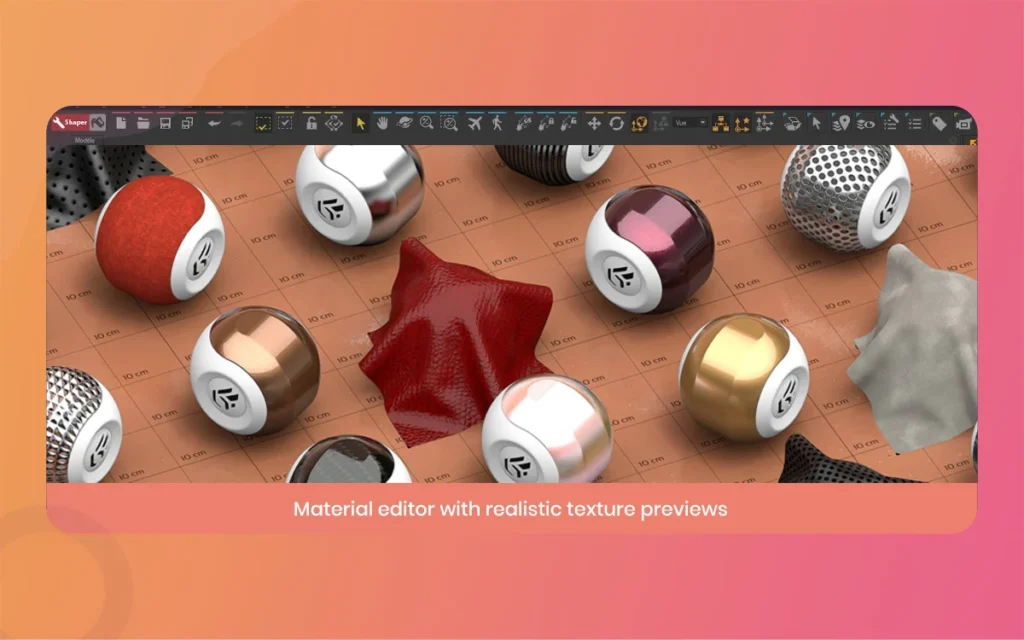
This is where your model finally starts to come alive. Applying realistic materials is a huge part of the magic. The software comes with a fantastic library of built in materials that you can use right out of the box.
You will find everything from shiny car paint to soft fabrics and brushed metals. To apply a material, you literally just drag it from the library and drop it right onto your 3D object. But you are not stuck with the defaults.
You can tweak every little detail. You can change the base color, adjust how reflective it is, and even add bumps and scratches to make it look like a real, used object. If you are working on something like furniture or fashion, the software has a really cool stitching workshop feature.
This lets you add 3D seams and stitches along the edges of your fabrics in just a few minutes, which adds a crazy amount of realism. Take your time here, playing with materials is the most creative part of the process.
Step 4, Perfecting the UV Unfolding in Patchwork 3D
Okay, this step sounds a bit technical, but it is actually very important for making things look natural. UV unfolding is basically the process of taking a 2D image, like a picture of wood grain or a logo sticker, and wrapping it perfectly around your 3D shape.
Imagine trying to wrap a present that has a very weird shape, you have to cut and fold the paper so it lays flat without wrinkling. That is exactly what UV unfolding does statistically.
Patchwork 3D has a very powerful and precise unfolding technology. It lets you flatten the surfaces of your model so that your materials wrap around them flawlessly.
If you apply a wood texture to a curved chair and the wood grain looks stretched or warped, you use the UV tools to relax the texture and make it flow naturally along the curves of the chair. It takes a little bit of practice, but mastering this step is what separates a beginner looking render from a truly professional one.
Patchwork 3D
Step 5, Lighting Your Scene in Patchwork 3D
Lighting is the secret ingredient that makes a 3D model look like a real photograph. Even the best materials will look completely flat and fake if the lighting is bad. In Patchwork 3D, you have a complete palette of lighting tools to play with. You can use standard lights like spotlights and omnidirectional lights to says specific details of your product. But the fastest way to get amazing realism is by using HDRI environments.
An HDRI is basically a 360 degree photograph that wraps around your whole scene and lights your model using the real world light captured in that photo. You can drop your product into a virtual studio, a sunny outdoor street, or a moody dark room, and the lighting and reflections will instantly match that environment.
Do not be afraid to mix things up. Use an HDRI for your base lighting, and then add a few hidden spotlights to make the edges of your product pop and stand out from the background.
Step 6, Configuring Variations in Patchwork 3D
One of the biggest reasons professionals choose this software is because it handles product variations better than almost anything else. Let us say you are designing a pair of headphones.
Your client wants to see them in black leather, brown leather, and maybe a sporty red version. Instead of making three entirely different files, you can use the configuration tools in Patchwork 3D to set up all these variations inside one single project.
You can arrange different materials, different parts, and even different lighting setups onto what the software calls aspect layers. Once everything is set up, you can instantly click between the different versions.
This is incredibly useful for client presentations because you can change the look of the product live while they are watching. It is also the exact same technology you use if you want to export your model to a 3D web configurator, where customers on a website can customize the product before they buy it.
Patchwork 3D
Step 7, Exporting Your Real time Rendering from Patchwork 3D
You have imported your model, applied stunning materials, set up perfect lighting, and configured your variations. Now it is time to share your hard work with the world. Exporting in Patchwork 3D gives you tons of options.
If you just need a standard picture, you can easily export high resolution still images that are perfect for magazines or website banners.
If you want to show off the product from all angles, you can render out a cinematic video with smooth camera movements. But the most exciting export options are the interactive ones.
You can export your scene directly into a format that works on virtual reality headsets. Imagine handing your client a VR headset and letting them walk around the product you just built.
You can also export the data to web based viewers, so anyone with a phone or a computer can rotate the product and play with the variations you set up in step six. Just choose your format, click export, and you are completely done.
Patchwork 3D
Exploring the Latest 2026 Updates for Patchwork 3D
Technology moves fast, and Lumiscaphe has brought some really exciting updates to Patchwork 3D for the year 2026. The biggest news in the 3D industry right now is their focus on the 3D Statistical Backbone.
This new technology was heavily showcased at the Laval Virtual 2026 event. Basically, the 3D Statistical Backbone is a massive improvement in how different software programs talk to each other.
It includes new drivers and bridges that allow Patchwork 3D to connect flawlessly with other popular tools like Blender, Unreal Engine, and VRED. This means you have much better interoperability and collaboration across your entire team.
If someone is animating in Blender, they can easily push that data into your real time visual twin without losing any quality.
They have also improved their material rendering systems to make surface textures look even more photorealistic than before. It is clear that the 2026 updates are all about making the software fit perfectly into larger, more complex industrial workflows while keeping the real time performance blazing fast.
Patchwork 3D
Essential Specifications for Patchwork 3D Real time Rendering
Before you jump in, it is always a good idea to know what kind of computer hardware you will need. Real time rendering is powerful, but it does require a decent machine to run smoothly. Instead of a boring table, here are the most important hardware details you should keep in mind broken down into simple points.
Operating System Requirements: The software is designed to run on Windows platforms. It is optimized for modern Windows environments to ensure stability during heavy rendering sessions.
Graphics Card (GPU): This is the heart of real time rendering. You need a dedicated, professional grade graphics card. High end NVIDIA RTX cards are highly recommended to handle complex lighting and realistic materials smoothly.
Processor (CPU): While the GPU does the heavy lifting for visuals, a strong multi core processor is needed to handle the complex CAD data conversions and software operations.
System Memory (RAM): Working with large industrial models takes up a lot of memory. A minimum of 16GB of RAM is needed, but 32GB or more is much better if you want a totally smooth experience.
Storage Space: Fast storage is crucial. You should definitely use a Solid State Drive to install the software and store your project files, which ensures fast loading times for heavy 3D assets.
Deployment Options: You can choose between running the software locally on your Windows machine, or utilizing cloud hosted options for easier team access and remote work flexibility.
Patchwork 3D
Final Thoughts on Patchwork 3D
We really hope this guide has been helpful for you. Jumping into real-time rendering can completely change the way you present your creative work.
Patchwork 3D stands out because it takes the stress out of dealing with heavy technical files and lets you focus entirely on making things look beautiful.
By following our 7 ultimate steps, you will be well on your way to creating stunning visuals that will absolutely wow your clients and your team.
Remember, the best way to learn is by doing. So get out there, import a model, and start playing with those materials and lights.
Thank you so much for reading this tutorial here at The Morphic Studio. We are always looking for the best tools to help you succeed, and we cannot wait to see the amazing visual twins you are going to create next. Keep designing, keep experimenting, and stay creative.
Related Article
September 1, 2026
Augmented Reality News: 7 Exclusive Breakthroughs for an Incredible Year | The Morphic Studio
Navigating the Latest Augmented Reality News Environment Welcome to another exciting deep dive into the statistical universe brought to you by The Morphic Studio. If you have been keeping up with tech headlines lately, you already know that statistical overlays and spatial computing are changing how we interact with our physical surroundings. The year 2026 […]
September 1, 2026
VR Horror Games: 13 Incredible Titles for a Brutal Scare – The Morphic Studio
Welcome to the ultimate guide for anyone looking to test their nerves inside a headset. When you strap a display to your face, flat screen rules no longer apply. VR Horror Games You are no longer watching a character run from danger on a distant monitor, because you are right there in the middle of […]
August 31, 2026
Meta Quest 4 Release Date: The Master Guide to 2026’s Most Incredible VR | The Morphic Studio
Virtual reality has traveled a long road over the last few years. We have moved from bulky, tethered headsets that needed expensive gaming computers to sleek, standalone machines that fit right inside a small travel backpack. If you follow immersive technology here at The Morphic Studio, you already know that Meta has been leading the […]