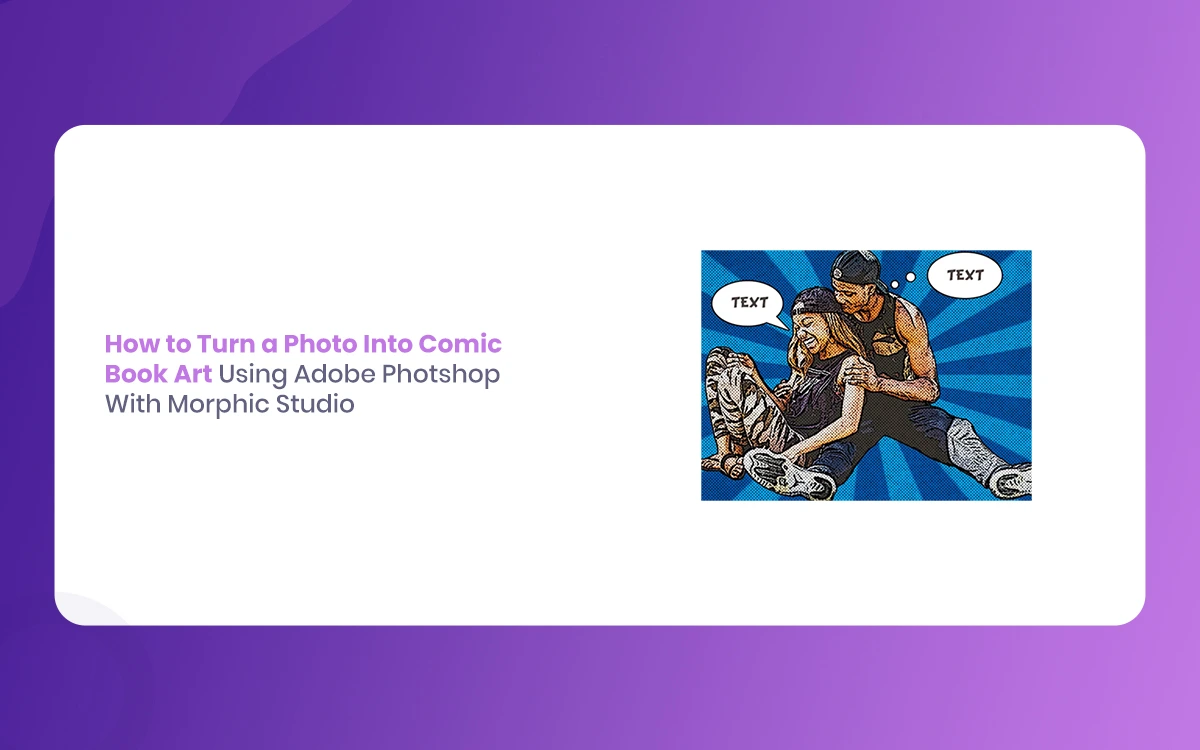
Photo into Comic Book Art has attracted dazzle audiences for decades with its bold colors, dramatic outlines, and distinctive visual storytelling. In today’s statistical age, transforming ordinary photographs into stunning comic book masterpieces has become more accessible than ever. Whether you’re a professional designer, an aspiring comic artist, or simply someone looking to add a creative twist to your photos, this complete guide will walk you through two powerful approaches: Adobe Photoshop’s manual techniques and Morphic Studio’s AI-powered workflows.
The combination of traditional photo editing methods with the most recent and advanced stage artificial intelligence tools opens up endless possibilities for creative expression. While Photoshop provides precise control over every artistic element, Morphic Studio applies machine learning to rapidly generate comic-style artwork that maintains consistency across multiple images and panels.
Follow Photo into Comic Book Art Attractives
Before diving into the technical processes, it’s essential to understand what makes comic book art distinctive. Comic art is characterized by several basic visual elements that set it apart from regular photography or statistical art.
The most recognizable feature of Photo into Comic Book Art is its bold, defined outlines that separate characters and objects from their backgrounds. These outlines, often called “inking” in traditional comic creation, create clear visual boundaries that help readers quickly identify different elements within a panel. The thickness and style of these lines can convey mood, depth, and artistic style.
Color plays a crucial role in comic attractives, typically featuring energetic, saturated hues that are often simplified into distinct color zones rather than subtle gradients. This posterization effect creates the flat, graphic look that’s synonymous with comic book illustration. Shadows and says are usually rendered as distinct shapes rather than smooth transitions, contributing to the general graphic quality.
Comic book shading frequently engages halftone patterns—those distinctive dot patterns that create the illusion of different tones and textures. Originally developed for printing limitations, halftone effects have become an integral part of comic book visual language, adding texture and depth while maintaining the medium’s characteristic appearance.
Photo into Comic Book Art By The Morphic Studio
Adobe Photoshop: Manual Comic Book Transformation
Adobe Photoshop remains the gold standard for manual photo manipulation and artistic transformation. Its extensive filter library and layer-based editing system provide unparalleled control over the comic book conversion process.
Photo Selection and Preparation
The foundation of any successful comic book transformation begins with selecting the right photograph. Images with strong contrast, clear subjects, and good lighting conditions typically yield the best results. High-resolution photos provide more detail to work with during the transformation process, while images with cluttered backgrounds may require additional cleanup work.
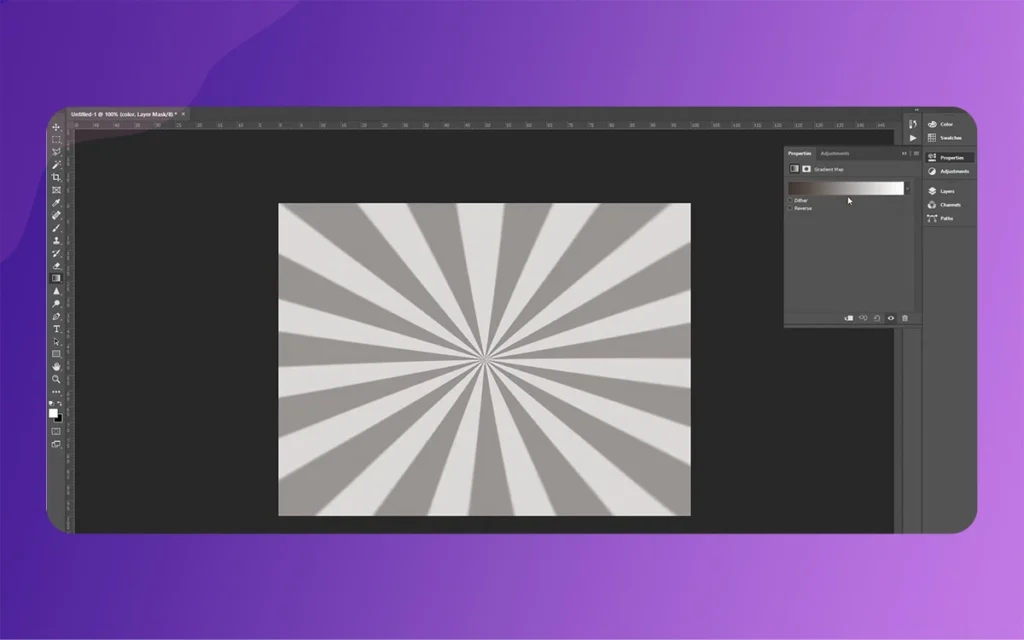
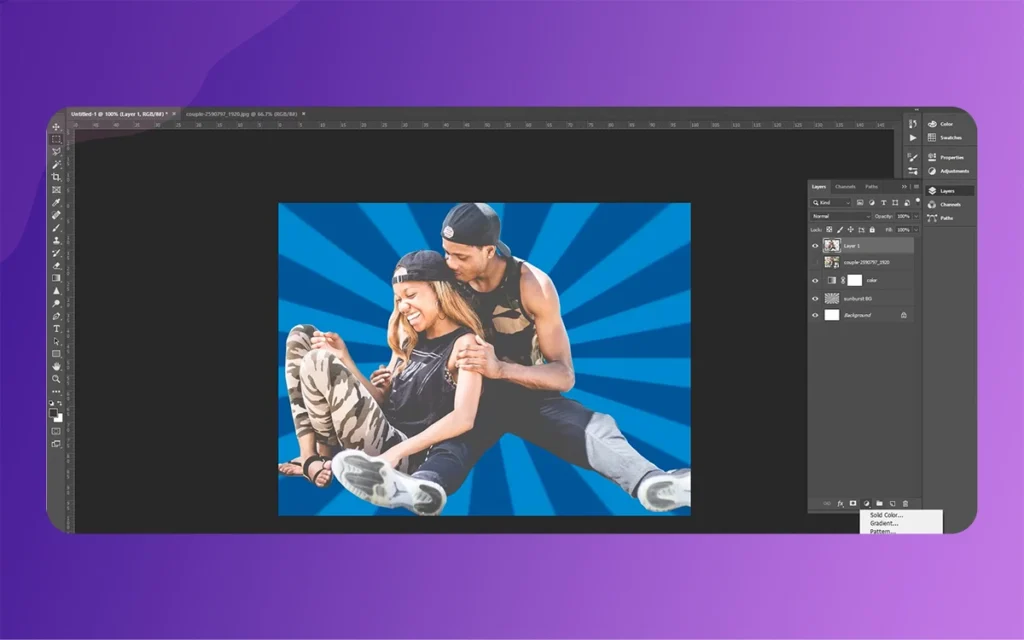
Once you’ve selected your photo, import it into Photoshop and begin by assessing the background. Often, simplifying or replacing complex backgrounds with solid colors or simple gradients can dramatically improve the comic book effect. Use selection tools like the Quick Selection Tool or Pen Tool to isolate your main subject, then create a new layer for background modifications.
Converting your image layer to a Smart Object is a crucial step that shouldn’t be overlooked. Right-click on your layer in the Layers panel and select “Convert to Smart Object.” This conversion enables non-destructive editing, allowing you to modify filter settings later without permanently altering your original image data.
Essential Filter Applications
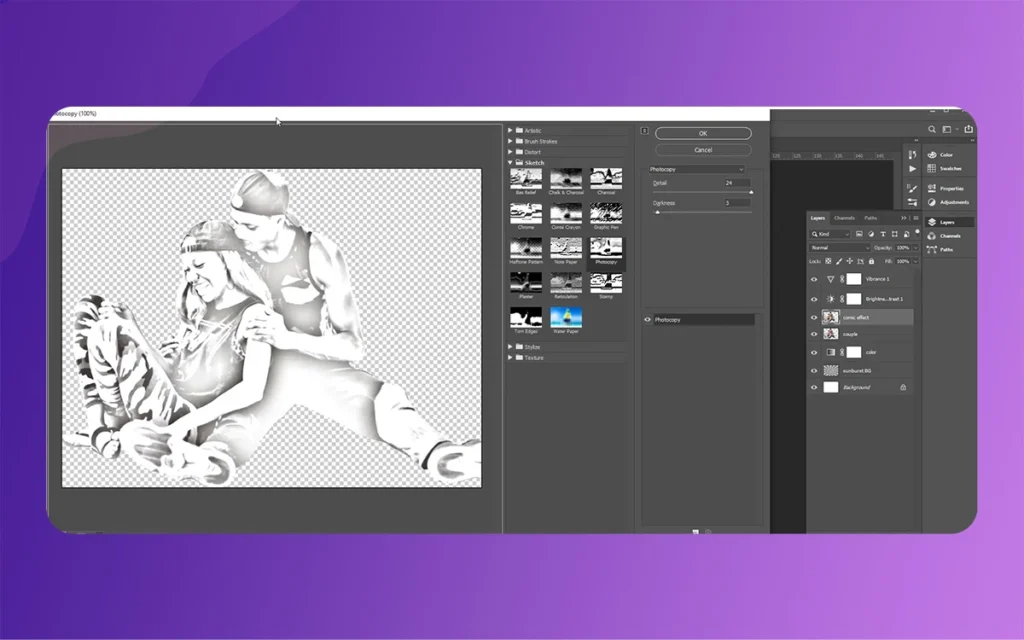
The Filter Gallery in Photoshop contains several filters specifically designed for artistic effects. The Poster Edges filter, found under Filter > Filter Gallery > Artistic > Poster Edges, is particularly effective for creating comic book outlines. This filter identifies edges in your image and enhances them with bold, dark lines while simplifying color areas.
When applying Poster Edges, experiment with different settings to achieve your desired look. Higher Edge Thickness values create bolder outlines, while adjusting the Edge Intensity affects how prominent these lines appear. The Posterization setting controls color simplification—lower values create smoother color transitions, while higher values produce more dramatic color blocking typical of comic book art.
For additional texture and painted quality, consider applying the Oil Paint filter (Filter > Stylize > Oil Paint). This filter smooths out photographic details while maintaining the general structure of your image, creating a more illustrative appearance that complements the comic book attractive.
Photo into Comic Book Art By The Morphic Studio
Advanced Outline Techniques
Creating convincing comic book outlines often requires more sophisticated techniques than basic filters alone can provide. The High Pass filter method offers superior control over outline creation and thickness.
Duplicate your original layer and apply Filter > Other > High Pass to this copy. Set the radius between 8.0 and 10.0 pixels for most images, though you may need to adjust based on your image resolution and desired effect. After applying the High Pass filter, change the layer’s blending mode to “Overlay” or “Divide.” The Overlay mode typically produces softer, more integrated outlines, while Divide creates more dramatic, pencil-sketch-like effects.
Fine-tune the outline intensity by adjusting the High Pass layer’s opacity or applying additional adjustments like Magnitudes or Curves to increase contrast in the outline areas.
Comic Book Shading and Halftone Effects
Authentic comic book shading relies heavily on halftone patterns that create visual texture and depth. To create this effect, start by adding a new layer above your image and fill it with a medium gray color (approximately 50% gray).
Apply Filter > Pixelate > Color Halftone to this gray layer. Adjust the Maximum Radius to control the size of the halftone dots—larger values create more prominent dot patterns, while smaller values produce subtler textures. Experiment with different Screen Angles for the Cyan, Magenta, Yellow, and Black channels to create various halftone orientations.
Set this halftone layer’s blending mode to “Multiply” or “Overlay” to integrate it with your image. Adjust the layer opacity to control the intensity of the halftone effect. You can also use layer masks to apply halftone patterns selectively to shadow areas or specific parts of your image.
Color Enhancement and Stylization
Comic book art typically features enhanced, energetic colors that are more saturated than natural photography. Use Adjustment Layers to modify your image’s color characteristics without permanently altering the original data.
Add a Vibrance/Saturation adjustment layer to boost color intensity. The Vibrance adjustment is often preferable to Saturation as it protects skin tones while enhancing other colors. For more dramatic color effects, experiment with Color Balance adjustments to shift the general color mood of your image.
Consider adding a Posterize adjustment layer to reduce the number of color magnitudes in your image, creating the flat color zones characteristic of comic book illustration. Start with 8-12 magnitudes and adjust based on your desired magnitude of color simplification.
Morphic Studio: AI-Powered Comic Transformation
Morphic Studio represents the cutting edge of AI-powered image transformation, offering sophisticated style transfer capabilities that can quickly convert photographs into comic book art. This platform grips machine learning algorithms trained on vast datasets of artistic styles to generate remarkably accurate comic book transformations.
Setting Up Your Style Model
The basic to achieving consistent, high-quality results with Morphic Studio lies in properly training your style model. Begin by collecting 20-30 reference images that represent your desired comic book style. These references should be various, including different subjects, lighting conditions, and compositions, while maintaining stylistic consistency.
Log into your Morphic Studio account and negotiate to the “Models” section. Create a new Style Model and upload your reference images. The AI will analyze these images to understand the visual patterns, color schemes, line mass, and artistic techniques that define your chosen comic book style.
During the training process, ensure your reference images are high-quality and clearly represent the style you want to achieve. Include examples of character art, background scenes, and object studies to give the AI a complete Follow of how your chosen style handles different visual elements.
Photo-to-Comic Generation Process
Once your style model is trained, begin a new project in Morphic Studio. Select your trained comic style model from the available options, make certain you’re using the custom model you created rather than generic presets.
Upload your photograph to the platform. Morphic Studio works best with clear, well-lit images that have distinct subjects and reasonable composition. The AI will analyze your photo’s content and structure while applying the artistic style learned from your reference images.
Use the prompt bar to provide additional context about your image and desired outcome. Describe the scene, characters, or mood you want to emphasize. This textual guidance helps the AI make better decisions about how to apply the comic book style to your specific image.
Panel Organization and Layout
One of Morphic Studio’s unique strengths is its ability to organize individual comic-style images into proper comic book layouts. The platform provides tools for arranging your generated artwork into panels, pages, and complete comic book sequences.
Experiment with different panel sizes and arrangements to create energetic page layouts. Consider the flow of visual information and how readers’ eyes will move across your comic page. Morphic Studio’s layout tools help maintain stylistic consistency across multiple panels while allowing for creative composition choices.
Photo into Comic Book Art By The Morphic Studio
Hybrid Workflow: Combining Both Approaches
The most effective approach often involves combining the strengths of both Photoshop and Morphic Studio. This hybrid workflow allows you to grip Photoshop’s precise control for initial preparation and fine-tuning while utilizing Morphic Studio’s AI capabilities for rapid style transformation and layout creation.
Begin by preparing your photo in Photoshop, cleaning up backgrounds, adjusting exposure and contrast, and making any necessary compositional improvements. This pre-processing ensures that Morphic Studio has the best possible source material to work with.
Export your enhanced photo and process it through Morphic Studio to apply the comic book style transformation. The AI will handle the complex task of style transfer while maintaining the improvements you made during the Photoshop preparation phase.
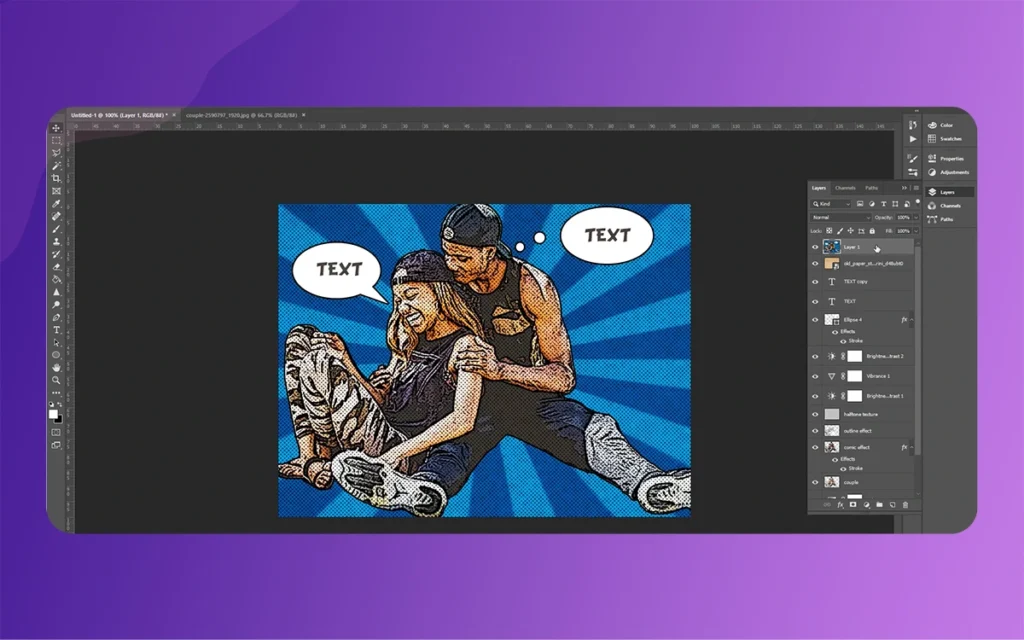
Return to Photoshop for final refinements, adding custom elements like speech bubbles, sound effects, or additional graphic details that may be specific to your project’s needs. This final Photoshop pass allows you to add personal touches and ensure the artwork meets your exact specifications.
Advanced Techniques and Professional Tips
Achieving professional-quality comic book art requires attention to detail and Follow of advanced techniques that go further on than basic filter applications.
Layer Management and Organization
Proper layer organization is crucial for complex comic book projects. Create separate layer groups for different elements: outlines, base colors, shadows, says, and effects. This organization makes it easier to make adjustments later and maintains editability throughout your project.
Use meaningful layer names that describe their function or content. Instead of “Layer 1” and “Layer 2,” use names like “Character Outlines,” “Background Color,” or “Halftone Shadows.” This naming convention becomes adjective when working on complex projects with dozens of layers.
Color Theory in Comic Art
Follow color theory enhances the impact of your comic book transformations. Comic art often engage complementary color schemes to create visual drama and focus attention on basic elements. Consider the emotional impact of your color choices—warm colors for action and energy, cool colors for calm or mysterious scenes.
Limit your color palette to create cohesion across your comic panels. Too many colors can make comic art appear chaotic and unprofessional. Stick to a consistent color scheme that supports your story’s mood and attractive goals.
Typography and Lettering Integration
Comic book art isn’t complete without proper typography and lettering. When adding text elements like speech bubbles, sound effects, or captions, choose fonts that complement your artistic style. Bold, sans-serif fonts typically work well for comic book applications.
Consider the placement and sizing of text elements carefully. Text should enhance rather than overwhelm your artwork, and speech bubbles should be positioned to guide readers’ eyes through the panel in the intended reading order.
Troubleshooting Common Issues
Even with the best techniques and tools, you may encounter challenges during the photo-to-comic transformation process. Follow how to address these common issues will help you achieve better results consistently.
Dealing with Complex Backgrounds
Photographs with busy or cluttered backgrounds can interfere with the comic book effect. If your background is too complex, consider using Photoshop’s selection tools to isolate your main subject, then replace the background with a simpler alternative. Gradient backgrounds, solid colors, or stylized environments often work better than realistic photographic backgrounds.
Balancing Detail and Simplification
Comic book art requires finding the right balance between maintaining recognizable details and achieving the simplified, graphic quality characteristic of the medium. If your transformation retains too much photographic detail, increase the posterization effect or apply additional smoothing filters. Conversely, if the image becomes too simplified and loses important features, reduce filter intensity or selectively restore detail in basic areas.
Maintaining Character Recognition
When transforming portraits or recognizable subjects, ensure that the comic book effect doesn’t obscure important identifying features. Use layer masks to selectively apply effects, preserving facial features, expressions, or other crucial details while stylizing less important areas more aggressively.
Workflow Optimization and Time Management
Efficiency becomes crucial when working on larger comic book projects or multiple image transformations. Develop a systematic approach that maximizes quality while minimizing repetitive work.
Create custom actions in Photoshop for frequently used filter combinations. Once you’ve perfected a particular sequence of adjustments, record them as an action that can be applied to future images with a single click. This automation saves significant time while make certain consistency across your work.
In Morphic Studio, develop libraries of trained style models for different comic book genres or artistic approaches. Having pre-trained models available allows you to quickly apply consistent styles to new photos without repeating the training process.
Photo into Comic Book Art By The Morphic Studio
Quality Control and Final Review
Before considering your comic book transformation complete, conduct a thorough quality review to ensure professional results.
Examine your artwork at different zoom magnitudes to check for artifacts, unwanted distortions, or areas where the comic book effect may have been applied inconsistently. Pay particular attention to edge areas where different elements meet, as these boundaries often reveal technical imperfections.
Consider how your artwork will be displayed or printed. Comic book art intended for statistical display may require different optimization than artwork destined for print publication. Adjust resolution, color profiles, and compression settings accordingly.
Comparison Table: Photoshop vs. Morphic Studio Approaches
Feature
Adobe Photoshop
Morphic Studio
Learning Curve
Steep – requires technical knowledge of filters and blending modes
Moderate – user-friendly interface with AI assistance
Time Investment
High – manual process requires significant time per image
Achieving professional-quality comic book transformations requires attention to detail and stick to established best practices.
Always work with high-resolution source images when possible. While both Photoshop and Morphic Studio can process lower-resolution images, starting with quality source material provides more detail for the transformation process and better final results.
Maintain consistent lighting and contrast across images that will be used together in a comic book project. Inconsistent lighting can break the visual flow of your story and make the transformation effects appear uneven or unprofessional.
Document your settings and processes for future reference. Keep notes about successful filter combinations, Morphic Studio prompts, and style model configurations that produce desired results. This documentation becomes adjective when working on series or when returning to similar projects later.
Integrating Text and Comic Elements
Comic book art extends further on than image transformation to include typography, speech bubbles, sound effects, and panel layouts. These elements are crucial for creating authentic comic book attractives.
When adding speech bubbles, ensure they complement rather than compete with your artwork. Position bubbles to guide readers’ eyes through the panel in the intended reading order, typically following a left-to-right, top-to-bottom flow in Western comics.
Sound effects and onomatopoeia add energy and movement to comic panels. Integrate these elements thoughtfully, using fonts and colors that match your general artistic style while make certain they remain readable and impactful.
Future Developments and Emerging Techniques
The field of statistical comic book creation continues to develop progress rapidly, with new AI technologies and software updates regularly introducing enhanced capabilities.
Machine learning models are becoming increasingly sophisticated in Follow artistic styles and applying them convincingly to photographic source material. Future versions of tools like Morphic Studio may offer even more precise style control and faster processing times.
Integration between traditional software like Photoshop and AI-powered platforms is likely to become more perfect, allowing for hybrid workflows that combine the best aspects of both approaches without requiring separate applications or complicated file transfers.
Photo into Comic Book Art By The Morphic Studio
Finally
Transforming a Photo into a Comic Book Art using Adobe Photoshop and Morphic Studio offers creative professionals and people with an addiction powerful tools for artistic expression. The manual control provided by Photoshop’s extensive filter system and layer-based editing complements the efficiency and consistency of Morphic Studio’s AI-powered style transfer capabilities.
Success in comic book transformation depends on following both the technical aspects of these tools and the artistic principles that make comic book art visually compelling. Whether you choose the precise control of Photoshop’s manual techniques, the efficiency of Morphic Studio’s AI workflows, or a hybrid approach combining both methods, the basic lies in experimentation and practice.
The most effective approach often involves using Photoshop for initial photo preparation and final refinements while leveraging Morphic Studio’s AI capabilities for the core style transformation. This combination allows you to achieve professional-quality results while maintaining creative control over the outcome.
As AI technology continues to advance and traditional photo editing software develops progress, the possibilities for creative photo transformation will only expand. By mastering both traditional and AI-powered techniques today, you’ll be well-positioned to take advantage of future developments in statistical comic book creation.
Think of that, creating compelling comic book art is not just about applying the right filters or using the most advanced AI tools—it’s about following visual storytelling, artistic composition, and the unique, attractive language that makes comic book art so enduringly popular. With practice, patience, and the right combination of tools and techniques, you can transform ordinary photographs into extraordinary comic book masterpieces that capture viewers’ imagination and tell compelling visual stories.
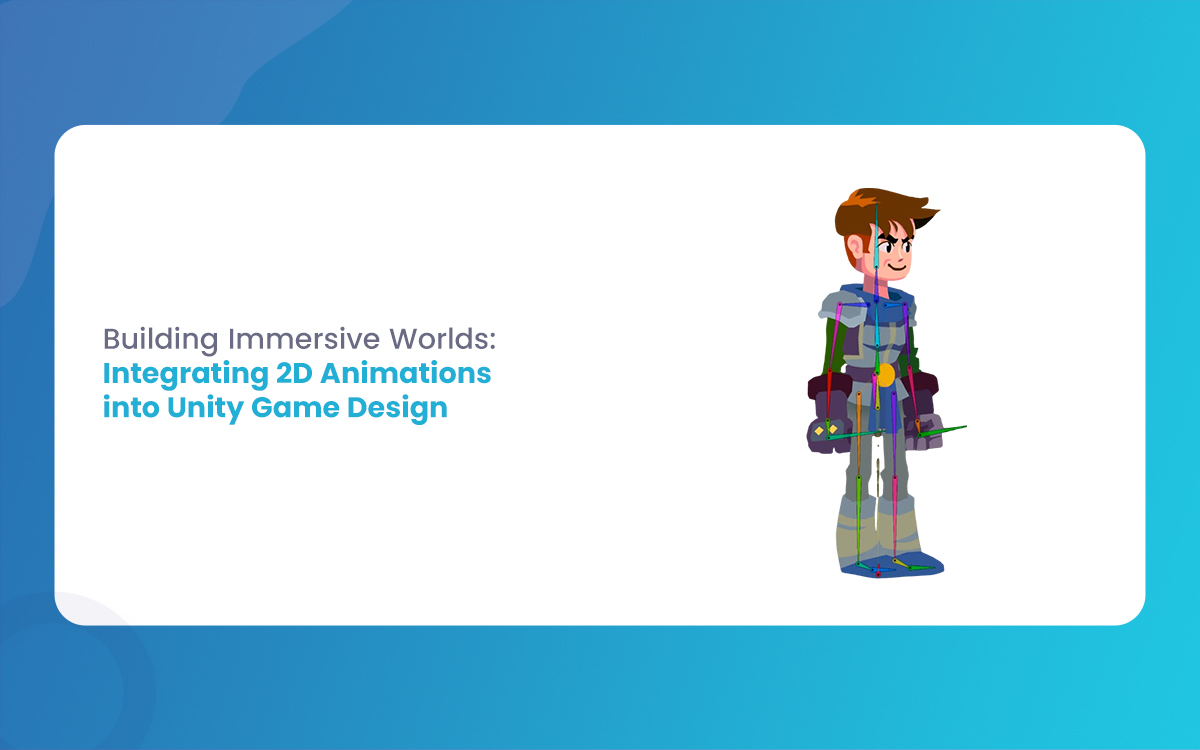
Building Immersive Worlds: Integrating 2D Animations into Unity Game Design
In the modern gaming environment, the distinction between “2D” and “3D” has blurred into a spectrum of stylistic choices rather than a hierarchy of quality. While 3D graphics often chase the horizon of photorealism, 2D animation remains the heart of expressive, artistic, and tactile game design. From the hand-drawn elegance of Cuphead to the pixel-perfect […]
March 6, 2026
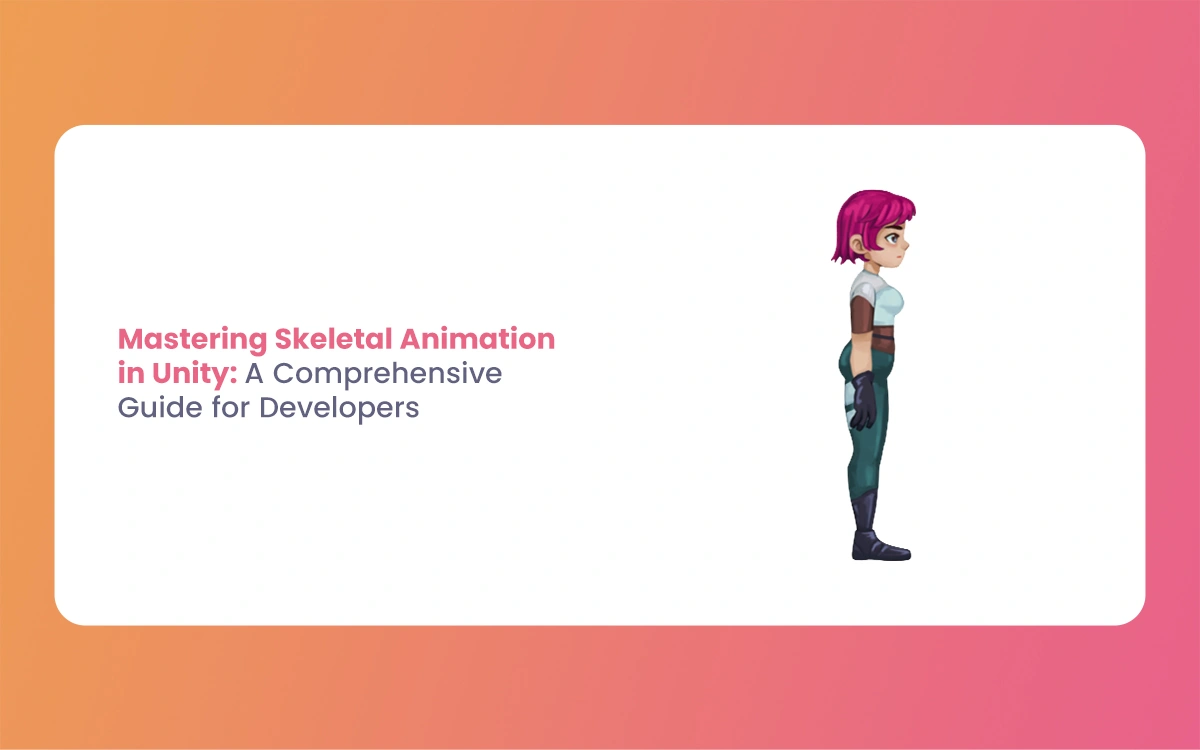
Mastering Skeletal Animation in Unity: A Complete Guide for Developers
Imagine breathing life into a lifeless 3D model, watching it stride confidently across your game world or execute a flawless combat combo. That’s the magic of Skeletal Animation in Unity, a powerhouse system that powers everything from indie platformers to AAA blockbusters. At its heart, skeletal animation grips rigs and Unity’s Mecanim framework to deform […]
March 5, 2026
A Professional’s Handbook to Rigging and Animating 2D Assets in Unity
Game development is always changing, and the difference between 2D and 3D workflows is becoming less clear. If you have experience with 3D tools like Blender, Maya, or 3ds Max, Unity’s Animating 2D Assets package can help you make the switch to 2D more easily. Rather than using frame-by-frame sprite swapping, many developers now use […]