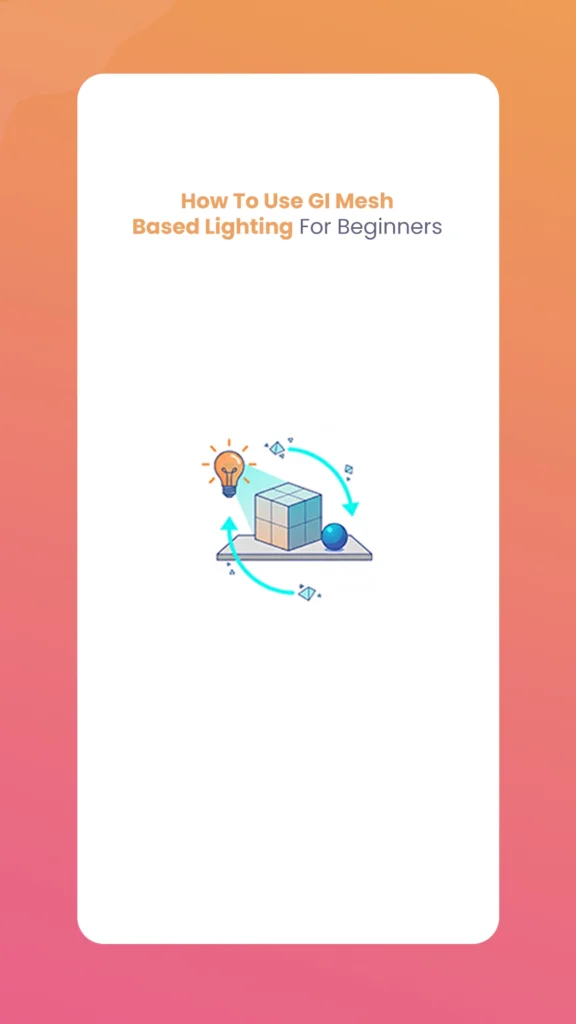
Global Illumination GI Mesh Based Lighting For Beginnersrepresents a game-changing technique in 3D animation and rendering, particularly within software like iClone. This innovative approach transforms ordinary props and meshes into energetic light sources, creating realistic indirect lighting that breathes life into virtual environments. For beginners venturing into the world of 3D lighting, following GI mesh-based techniques opens doors to professional-quality results without requiring extensive technical expertise. The Morphic Studio shares the information about the aspect of implementing mesh-based lighting, from fundamental setup to advanced practical applications.
Follow GI Mesh-Based Lighting Fundamentals
GI mesh-based lighting operates on a revolutionary principle: converting standard 3D objects into functional light emitters. Unlike traditional lighting systems that rely exclusively on dedicated light fixtures such as directional lights, spotlights, or point lights, mesh-based lighting harnesses the emissive properties of surfaces themselves. This technique simulates Global Illumination—the realistic bouncing of light throughout a scene—creating natural-looking indirect illumination that mirrors actual lighting behavior.
The beauty of this system lies in its versatility. Any prop, mesh, or surface can theoretically become a light source, from television screens and computer monitors to glowing orbs, neon signs, and even particle effects. This flexibility allows creators to design lighting setups that would be impossible or impractical using conventional lighting methods alone.
Regardless of how, beginners must understand one critical prerequisite: GI mesh-based lighting cannot function independently. The Global Illumination system must be activated within your software settings before any mesh can emit light. Without this foundational activation, your carefully configured emissive materials will remain visually inert, producing no illumination effect whatsoever on surrounding objects.
Enabling GI Mesh-Based Lighting: The Essential First Step
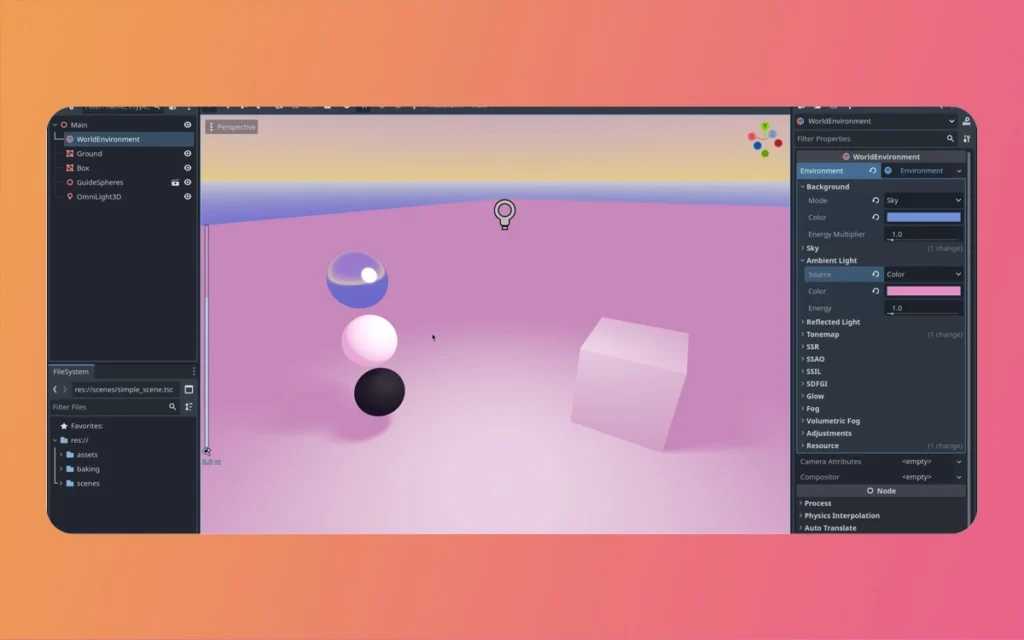
Before diving into creative lighting design, you must properly enable the GI system within iClone. This activation process serves as the gateway to unpicking mesh-based lighting capabilities. Negotiate to your project’s rendering or lighting settings panel and locate the Global Illumination toggle. Activating this option initializes the calculation algorithms necessary for indirect light simulation.
Once enabled, the GI Intensity slider becomes your primary control mechanism for managing general brightness magnitudes. This parameter determines how powerfully mesh-based lights influence the surrounding environment. Beginners should start with moderate values—typically between 30-60 percent—to avoid overexposure or unrealistic brightness magnitudes. As you gain experience, you’ll develop an intuitive sense for appropriate intensity values based on scene requirements.
The GI system works by calculating how light bounces from surfaces, accumulates in enclosed spaces, and gradually illuminates shadowed areas. This computational process demands more processing power than standard lighting, which explains why it remains an optional feature. Regardless of how, the visual payoff—soft, natural-looking illumination with realistic falloff and ambient fill—justifies the performance investment for quality-conscious creators.
Basic Setup Steps for Your First Mesh Light
Creating your first mesh-based light source requires methodical execution of several straightforward steps. Following this structured approach ensures consistent results while building your foundational Follow of the technique.
GI Mesh Based Lighting For Beginners
Step 1: Preparing Your Workspace
Begin by temporarily disabling iClone’s default lighting system. The standard workspace illumination, while helpful for general modeling and scene composition, can obscure the effects of your mesh lights during testing. By starting from complete darkness, you’ll clearly observe how each mesh light contributes to the general illumination, preventing confusion and facilitating precise adjustments.
Step 2: Adding and Configuring Your Light Mesh
Access the Create tab within iClone’s interface and select an appropriate prop or primitive mesh. Simple geometric shapes like spheres, cubes, or planes work excellently for initial experiments. Once imported into your scene, the real configuration begins in the texture and material settings panel.
Negotiate to the self-illumination or emission properties of your selected mesh. Here you’ll apply glow maps or adjust emission values to transform the surface into an active light source. Glow maps provide targeted control, allowing specific areas of a complex mesh to emit light while leaving other regions non-emissive. For beginners, starting with uniform emission across simple shapes simplifies the learning process.
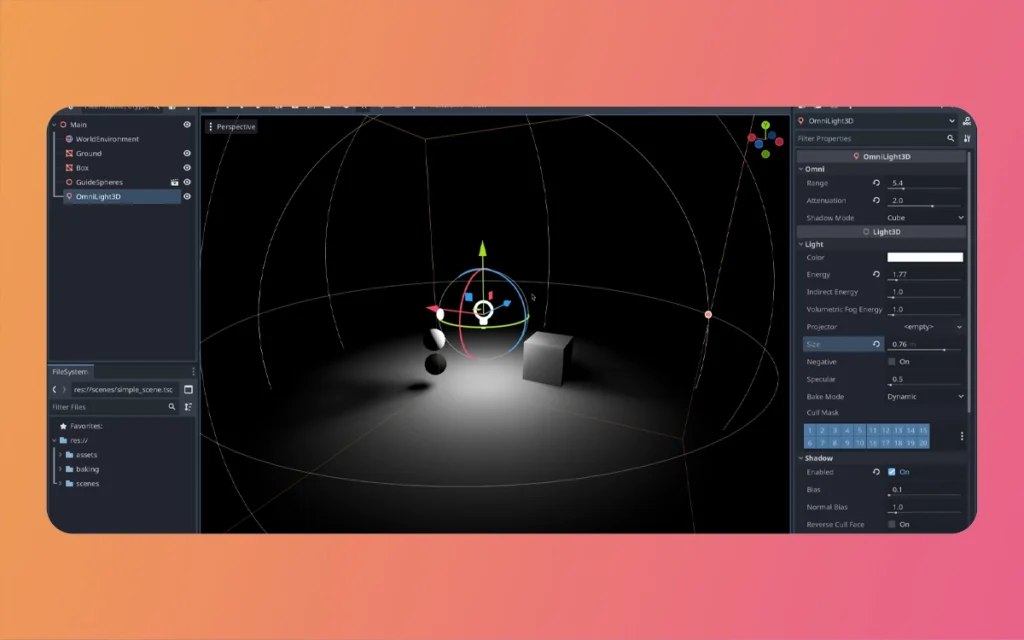
Step 3: Strategic Positioning and Fine-Tuning
Placement significantly impacts the effectiveness of mesh-based lighting. Consider realistic scenarios: position a glowing sphere beneath a lampshade to simulate a practical lamp, or place an emissive plane behind a character to create rim lighting effects. Strategic positioning enhances realism while maximizing illumination efficiency.
After positioning, return to the GI Settings panel to adjust color temperature and intensity sliders specific to your mesh light. These parameters control not just brightness, but also the quality of light falloff—how quickly illumination diminishes with distance. Realistic falloff typically follows inverse-square laws, with light intensity decreasing rapidly as distance increases. Experimenting with these settings develops your Follow of natural lighting behavior.
Leveraging Stock Lights for Rapid Implementation
iClone streamlines the mesh lighting process by providing pre-configured emissive props specifically designed for lighting purposes. These stock assets, accessible through the Create > Light menu, include various geometric configurations such as the GI Emissive Plane Oval, Round, and Square options.
These ready-made solutions offer immediate deployment advantages. Rather than manually configuring emission properties on arbitrary meshes, you can drag and drop these specialized props directly into your scene. They arrive pre-optimized with appropriate material settings, requiring only intensity and color adjustments to match your creative vision.
A particularly useful feature involves setting these stock lights as “dummy” objects. This designation renders them invisible in final renders while maintaining their light emission properties. This capability proves adjective when you need illumination from a specific direction or position but don’t want the light source itself visible in the shot—similar to how cinematographers use off-camera lighting rigs.
Fine-tuning these stock lights follows the same principles as custom meshes: adjust color temperature to create warm or cool tones, modify intensity for appropriate brightness magnitudes, and ensure GI remains enabled. These pre-built assets excel as supplementary lighting that complements your primary directional or spotlights, filling shadows and adding dimensional depth to characters and environments.
Practical Examples: Bringing Theory to Life
Follow abstract principles becomes meaningful through concrete application examples. The following scenarios demonstrate how mesh-based lighting solves real production challenges.
Energetic Video Screen Illumination
Consider a scene featuring a television or computer monitor displaying moving content. By mapping video textures to a flat emissive plane, you create energetic lighting that responds to on-screen content. When GI is enabled, the flickering colors and brightness variations from the video footage project onto nearby walls, furniture, and characters. This technique produces remarkably realistic ambient illumination that would be nearly impossible to replicate with static lighting alone.
The basic success lies in synchronizing the emissive mesh properties with your video playback. As bright scenes play on the screen, surrounding areas illuminate proportionally. Dark scenes reduce ambient light accordingly. This responsive lighting dramatically enhances immersion and production value.
GI Mesh Based Lighting For Beginners
Particle-Based Light Sources
Particle systems—such as fire effects, magical energy, or spark showers—can function as effective light sources when properly configured. A torch prop featuring animated flame particles, for instance, will illuminate surrounding areas when its emissive properties are activated and GI is enabled. The illumination slider controls the intensity of this effect, allowing you to balance between dramatic, high-contrast firelight and subtle ambient glow.
Combining particle effects with mesh-based lighting creates hybrid systems that grip the strengths of both techniques. The particles provide visual interest and movement, while the underlying emissive mesh handles actual illumination calculations. This separation of visual effect from lighting computation offers greater control over final appearance.
Character-Attached Mobile Lighting
One of the most creative applications involves attaching emissive meshes to characters or cameras. A flashlight held by a character, for example, can be simulated by parenting a small emissive mesh to the character’s hand bone. As the character moves through dark environments, the light source moves correspondingly, creating energetic illumination that follows the action.
Similarly, attaching emissive meshes to camera rigs produces lighting that maintains consistent character illumination regardless of camera movement. This technique proves particularly valuable in cinematic sequences where maintaining consistent lighting on subjects is crucial despite constantly changing camera angles.
Essential Tips for Beginners
Mastering mesh-based lighting requires experimentation and iterative refinement. The following guidelines accelerate your learning curve while preventing common pitfalls.
Systematic Experimentation
Don’t hesitate to test multiple placement configurations for your mesh lights. Small positional adjustments often produce dramatically different results. Move lights incrementally, observe the changes, and develop your intuition for optimal coverage. This experimental approach builds practical knowledge that theoretical Follow alone cannot provide.
Strategic Visibility Management
Not every light source needs to be visible in your final render. Position emissive meshes just outside camera frame when you need their illumination but not their physical presence. This technique maintains lighting consistency across multiple shots while avoiding compositional clutter.
Balanced Exposure with Tone Mapping
Combining mesh-based lighting with tone mapping features ensures balanced exposure throughout your scene. Tone mapping compresses the energetic range of your render, preventing blown-out says while maintaining detail in shadow regions. This combination proves especially important when working with multiple light sources of varying intensities.
GI Mesh Based Lighting For Beginners
Isolated Testing in Dark Environments
Before layering multiple light sources, test each mesh light in complete darkness. This isolation allows you to observe exactly how each individual source contributes to the general illumination. Follow these individual contributions makes complex multi-light setups far more manageable and predictable.
Progressive Complexity Building
Start with single mesh lights and simple scenes. As your confidence grows, gradually introduce additional light sources and more complex environments. This progressive approach prevents overwhelming confusion while systematically building your skill set.
Comparative Analysis: Mesh Lighting vs. Traditional Methods
Aspect
GI Mesh-Based Lighting
Traditional Lighting
Setup Complexity
Moderate—requires GI activation and material configuration
Simple—direct light placement and adjustment
Realism
High—simulates natural indirect illumination and light bounce
Variable—depends on manual fill light placement
Performance Impact
Higher—requires GI calculations and surface emission processing
Lower—direct light calculations only
Flexibility
Excellent—any object can become a light source
Limited—fixed light types only
Energetic Potential
Outstanding—supports animated textures and moving sources
Moderate—requires keyframe animation
Learning Curve
Steeper—multiple interconnected systems to understand
Extensive—enables unique effects impossible with standard lights
Traditional—reliable but conventional results
Best Use Cases
Screens, practical lights, special effects, ambient illumination
Basic lights, rim lights, hard shadows, spotlights
Advanced Integration Strategies
Once comfortable with basic mesh lighting, consider integrating it into hybrid lighting systems that combine multiple techniques. Use traditional directional lights for strong basic lighting that defines subject form, add spotlights for accent and rim lighting, then layer mesh-based lights for environmental ambient fill and practical source simulation.
GI Mesh Based Lighting For Beginners
This layered approach mirrors professional cinematography practices where key, fill, and accent lights work together to create dimensional, visually interesting scenes. The mesh lights handle the subtle ambient illumination that makes virtual environments feel inhabited and realistic, while traditional lights provide the strong directional elements that create drama and focus attention.
Finally
GI mesh-based lighting represents a powerful technique that raises 3D animation and rendering from amateur to professional quality. By transforming ordinary props and meshes into functional light sources, this approach creates realistic indirect illumination that traditional lighting methods struggle to replicate. For beginners, the initial learning curve might seem daunting, but systematic practice following the steps defined in this guide will quickly build competence and confidence.
The basic success lies in following the foundational requirement of enabling Global Illumination, mastering basic setup procedures, leveraging stock light assets for efficiency, and learning through practical experimentation. By starting with simple single-light setups in controlled environments and progressively adding complexity, you’ll develop the intuitive necessary to create sophisticated lighting designs that rival professional productions.
Think of that mesh-based lighting works best as part of a complete lighting strategy rather than as a complete replacement for traditional methods. Combining mesh lights with directional, spot, and point lights creates layered, dimensional illumination that captures the complexity of actual lighting scenarios. As you continue experimenting with placement, intensity, color temperature, and integration with other lighting tools like tone mapping, your technical skills will transform into artistic vision—the hallmark of truly exceptional 3D content creation.
GI Mesh Based Lighting For Beginners
Whether you’re producing animated films, architectural visualizations, product renders, or interactive game environments, mastering GI mesh-based lighting in iClone and similar platforms will dramatically expand your creative possibilities and raise the professional quality of your work. The time invested in learning these techniques pays dividends across every project, making this knowledge an essential component of any serious 3D artist’s toolkit.
Related Article
January 23, 2026
5 Bold Evolutions of the Suzuki Logo: Timeless Design Lessons for 2026
In the world of automotive branding, few logos have demonstrated the remarkable staying power and adaptability of Suzuki Logo iconic emblem. Since its humble beginnings in 1909 as a loom manufacturer in Hamamatsu, Japan, Suzuki has transformed from a textile machinery producer to a global automotive powerhouse. Throughout this dramatic evolution, the company’s visual identity […]
January 22, 2026
Which Software Can Be Use to Create 3D Environment Like Isabella Plantation 3D
Introduction Isabella Plantation, nestled within London’s Richmond Park, represents one of nature’s most breathtaking woodland gardens. This 40-acre Victorian masterpiece showcases vibrant azaleas, meandering streams, and carefully curated native plants that create a harmonious natural environment. For 3D artists and environmental designers, recreating such intricate natural environments presents both a challenge and an opportunity to […]
January 21, 2026
How To Create Real Environment Like Isabella Plantation For Movie and Game Design
Creating photorealistic natural environments has become a cornerstone of modern entertainment media. Whether you’re developing a video game or crafting a visually stunning film sequence, the ability to recreate real-world locations statistically opens up limitless creative possibilities. Isabella Plantation, a 40-acre woodland garden nestled within Richmond Park in London, presents a particularly compelling challenge for […]