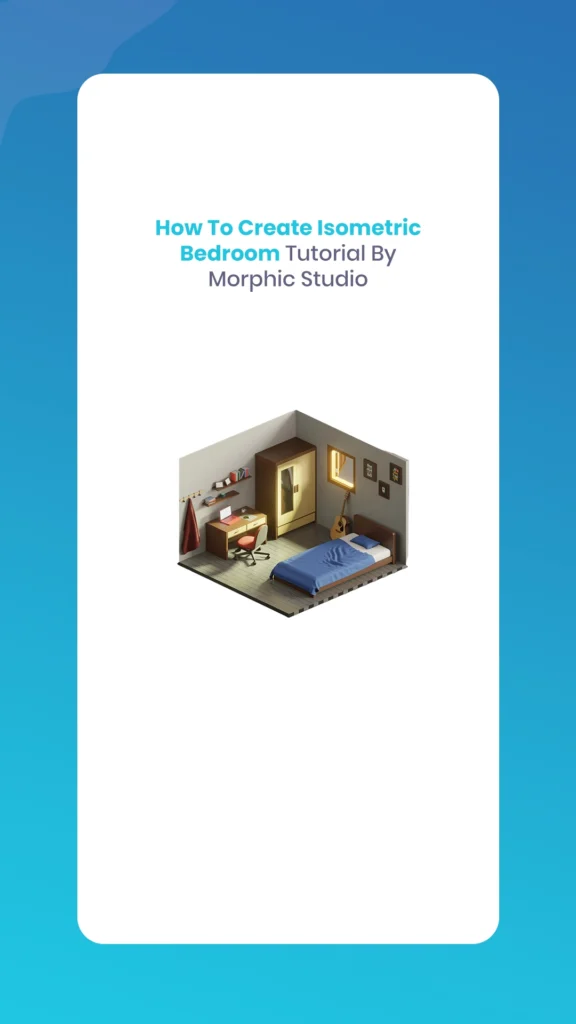
Creating stunning Isometric Bedroom Tutorial renders has become increasingly popular among 3D artists, interior designers, and statistical addicts. The Morphic Studio shares the information about the complete process of designing and rendering a professional-quality isometric bedroom scene using industry-standard techniques and tools.
Follow Isometric Design Fundamentals
What is Isometric Projection?
Isometric projection is a method of visually representing three-dimensional objects in two dimensions. Unlike traditional perspective views, isometric projections maintain parallel lines and equal angles, creating a unique, attractive quality that’s both technical and artistic. In isometric views, all three axes are equally foreshortened, and the angle between any two of them is 120 degrees.
Benefits of Isometric Bedroom Design
The isometric style offers several advantages for architectural visualization:
Clarity: Every element remains clearly visible without perspective distortion
Professional Appeal: Widely used in technical drawings and modern design
Social Media Friendly: The clean, geometric look performs well on platforms like Instagram and Pinterest
Versatility: Suitable for both realistic and stylized presentations
Essential Tools and Software Requirements
Primary Software Options
Blender (Suggested)
Free, open-source 3D creation suite
Powerful modeling, texturing, and rendering capabilities
Extensive community resources and tutorials
Regular updates with new features
Alternative Software
Autodesk 3ds Max: Professional-grade modeling and rendering
Cinema 4D: User-friendly interface with excellent rendering engines
SketchUp: Simplified modeling for architectural visualization
Adobe Illustrator: Vector-based approach for stylized designs
Hardware Requirements
For optimal performance, ensure your system meets these specifications:
CPU: Multi-core processor (Intel i5/AMD Ryzen 5 or better)
RAM: Minimum 8GB (16GB suggested)
GPU: Dedicated graphics card with 4GB+ VRAM
Storage: SSD with at least 50GB free space
Isometric Bedroom Tutorial By The Morphic Studio
Step-by-Step Blender Tutorial
Phase 1: Initial Setup and Camera Configuration
Begin your project with proper scene preparation:
Launch Blender and delete the default cube (Select > Delete)
Create the base room structure by adding a new cube (Shift+A > Mesh > Cube)
Scale the cube to room proportions using the Scale tool (S basic, then type 4)
Position the room above the ground plane using the Move tool (G basic, then Z for vertical axis)
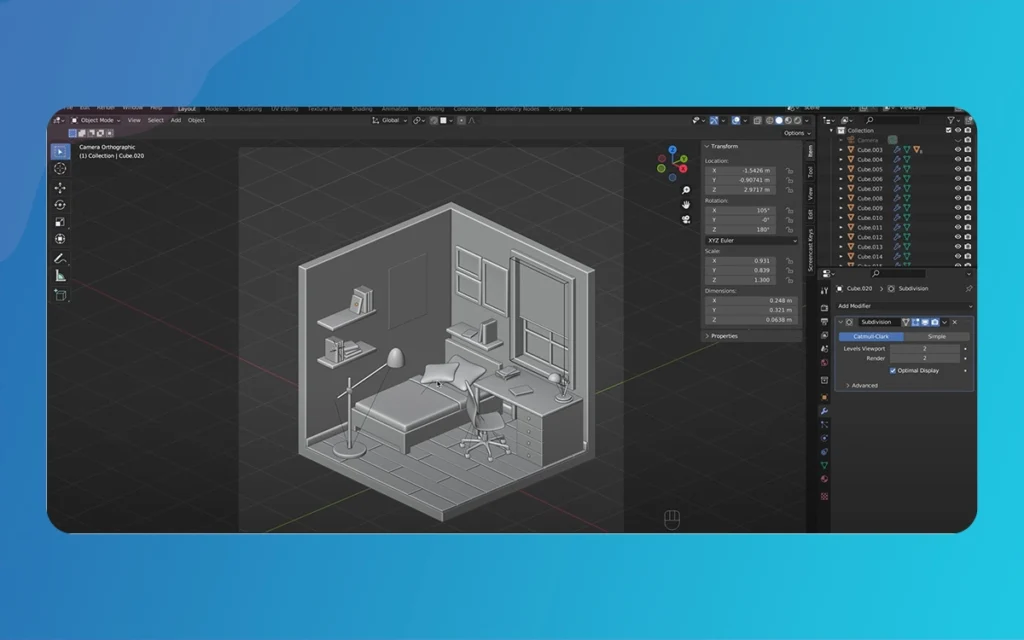
Camera Setup for Isometric View
Achieving the perfect isometric perspective requires precise camera configuration:
Select your camera and switch to orthographic projection in Camera Properties
Rotate the camera exactly 45 degrees on the Z-axis for true isometric angle
Adjust orthographic scale to frame your room appropriately
Fine-tune position until the entire scene fits within the camera view
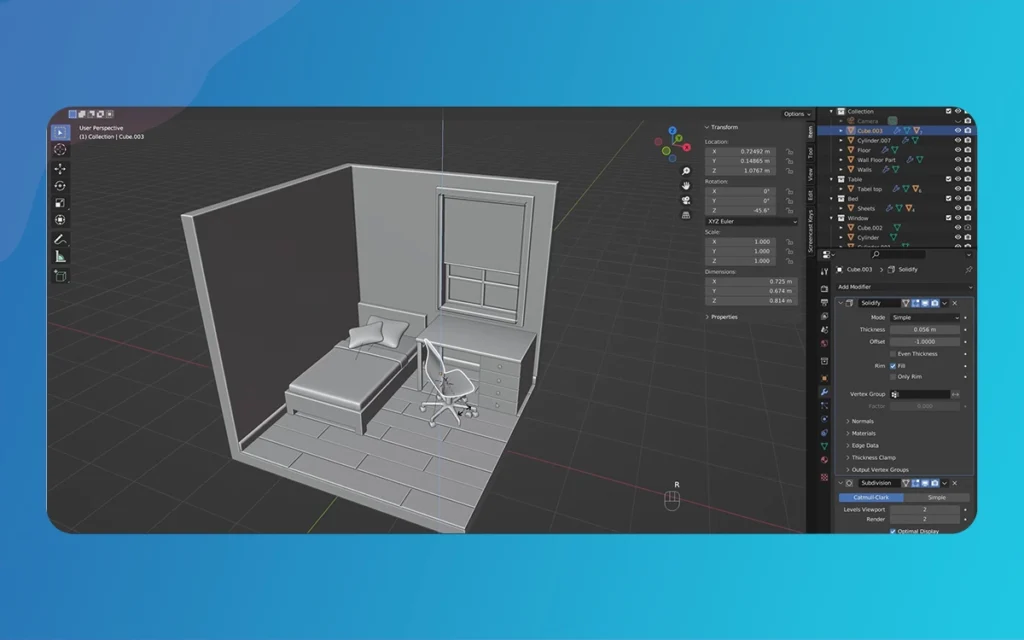
Phase 2: Room Construction and Architecture
Creating the Basic Room Structure
Transform your basic cube into a realistic room:
Enter Edit Mode (Tab basic) on your room cube
Select and delete the front face and top face to create an open room view
Apply Solidify Modifier to give walls realistic thickness (typically 0.1-0.2 units)
Add edge loops using Ctrl+R for window and door placement
Window and Door Creation
Use Boolean operations for architectural details:
Create window openings by adding cubes and using Boolean Difference modifier
Model door frames using extrude and inset operations
Add window frames using separate geometry for realistic detail
Apply materials to distinguish between different architectural elements
Phase 3: Flooring and Wall Treatment
Floor Design
Separate floor elements for better material control:
Duplicate the floor face as a separate object
Apply wood or tile materials using Blender’s Shader Editor
Add procedural textures for realistic surface variation
Adjust UV mapping for proper texture scaling
Wall Finishing
Create appealing wall surfaces:
Apply base wall material with appropriate color and roughness
Add accent walls using different materials or colors
Include baseboards and crown molding for architectural detail
Apply subtle normal mapping for surface texture
Isometric Bedroom Tutorial By The Morphic Studio
Phase 4: Furniture Modeling and Placement
Essential Bedroom Furniture
Create or import these basic elements:
Bed Design
Model the bed frame using basic primitives
Create mattress with soft, rounded edges
Add pillows and bedding using cloth simulation
Apply fabric materials with appropriate bump mapping
Storage Solutions
Design wardrobes with opening doors
Create bedside tables with drawers
Model storage boxes and decorative items
Add realistic handles and hardware
Seating and Workspace
Include a comfortable reading chair
Design a small desk or vanity
Add desk accessories and personal items
Create realistic cushions and upholstery
Furniture Arrangement Tips
Follow interior design principles:
Maintain traffic flow through the room
Create focal points with basic furniture pieces
Balance visual mass across the composition
Add personal touches through decorative objects
Phase 5: Advanced Lighting Techniques
Natural Lighting Setup
Create realistic daylight conditions:
Add area lights outside windows to simulate sunlight
Use HDRI environment textures for realistic ambient lighting
Adjust color temperature for morning, afternoon, or evening moods
Control light intensity to avoid overexposure
Artificial Lighting
Enhance the scene with interior lighting:
Model table lamps with appropriate light sources
Add ceiling fixtures for general room illumination
Include accent lighting to says artwork or features
Use IES light profiles for realistic lamp behavior
Phase 6: Materials and Texturing
Creating Realistic Materials
Develop convincing surface materials:
Wood Materials
Use wood grain textures with proper scaling
Apply realistic roughness and bump mapping
Adjust specular reflection for different wood finishes
Include edge wear and aging effects
Fabric Materials
Create soft, matte surfaces for bedding and upholstery
Add subtle subsurface scattering for realism
Include fabric weave patterns through normal mapping
Adjust transparency for curtains and light fabrics
Metal and Glass
Perfect mirror reflections for clean metals
Appropriate roughness for brushed or aged surfaces
Proper refraction index for different glass types
Include fingerprints and water spots for realism
Texture Optimization
Ensure efficient rendering:
Use appropriate texture resolutions (1K-4K based on object importance)
Optimize UV layouts for minimal texture stretching
Engage texture atlases for small objects
Implement LOD systems for complex scenes
Rendering and Post-Production
Render Settings Configuration
Cycles Render Engine Setup
Configure Cycles for optimal quality:
Set appropriate sample counts (128-512 for final renders)
Enable denoising to reduce render times
Configure light paths for realistic light behavior
Adjust tile sizes based on your hardware
Output Settings
Prepare for final delivery:
Resolution: Minimum 1920×1080 for web, higher for print
Color Management: sRGB for web, Rec.709 for video
File Format: PNG for transparency, JPG for final images
Bit Depth: 16-bit for professional work
Isometric Bedroom Tutorial By The Morphic Studio
Post-Production Enhancement
Color Grading
Enhance the final image:
Adjust general exposure and contrast
Fine-tune color balance for mood consistency
Add vignetting for compositional focus
Apply subtle film grain for organic feel
Compositing Techniques
Use Blender’s compositor for advanced effects:
Depth of field blur for camera realism
Ambient occlusion passes for enhanced shadows
Bloom effects for bright light sources
Color correction layers for fine-tuning
Professional Tips and Best Practices
Composition Guidelines
Create visually appealing renders:
Follow rule of thirds for object placement
Create visual hierarchy through scale and contrast
Use leading lines to guide viewer attention
Balance warm and cool colors for visual interest
Performance Optimization
Maintain smooth workflow:
Use collection organization for complex scenes
Implement proxy objects during modeling phase
Optimize viewport shading for real-time feedback
Regular file cleanup to prevent bloating
Common Mistakes to Avoid
Learn from typical pitfalls:
Overlighting scenes leading to flat, unrealistic renders
Ignoring scale connections between objects
Using default materials without customization
Neglecting ambient occlusion for depth perception
Software Alternatives and Workflows
Software
Skill Magnitude
Cost
Best For
Learning Curve
Blender
Beginner-Pro
Free
Complete 3D pipeline
Moderate
3ds Max
Intermediate-Pro
$1,700/year
Architectural viz
Steep
Cinema 4D
Beginner-Pro
$720/year
Motion graphics
Gentle
SketchUp
Beginner
$299/year
Quick modeling
Easy
Illustrator
Beginner
$240/year
Vector isometric
Easy
Vector-Based Approach (Illustrator)
For stylized, graphic designs:
Create isometric grid using guidelines
Use Pen tool for precise shapes
Apply gradients for dimensional effect
Layer objects for proper depth
Troubleshooting Common Issues
Rendering Problems
Long Render Times
Reduce sample counts for test renders
Use lower resolution during development
Optimize light sources and materials
Enable GPU acceleration if available
Lighting Issues
Check for light leaks in geometry
Verify normal directions on surfaces
Balance artificial and natural lighting
Use light probes for consistent illumination
Modeling Challenges
Scale Inconsistencies
Maintain actual measurements
Use reference objects for comparison
Check import scale settings
Apply transforms before rendering
Isometric Bedroom Tutorial By The Morphic Studio
Advanced Techniques and Future Learning
Procedural Generation
Take a look at advanced workflows:
Geometry Nodes for parametric furniture
Procedural textures for endless variation
Array modifiers for repeated elements
Python scripting for automation
Integration with Other Tools
Expand your workflow:
Photoshop integration for texture creation
CAD software import for architectural elements
Substance Painter for advanced texturing
After Effects for animated presentations
Isometric Bedroom Tutorial By The Morphic Studio
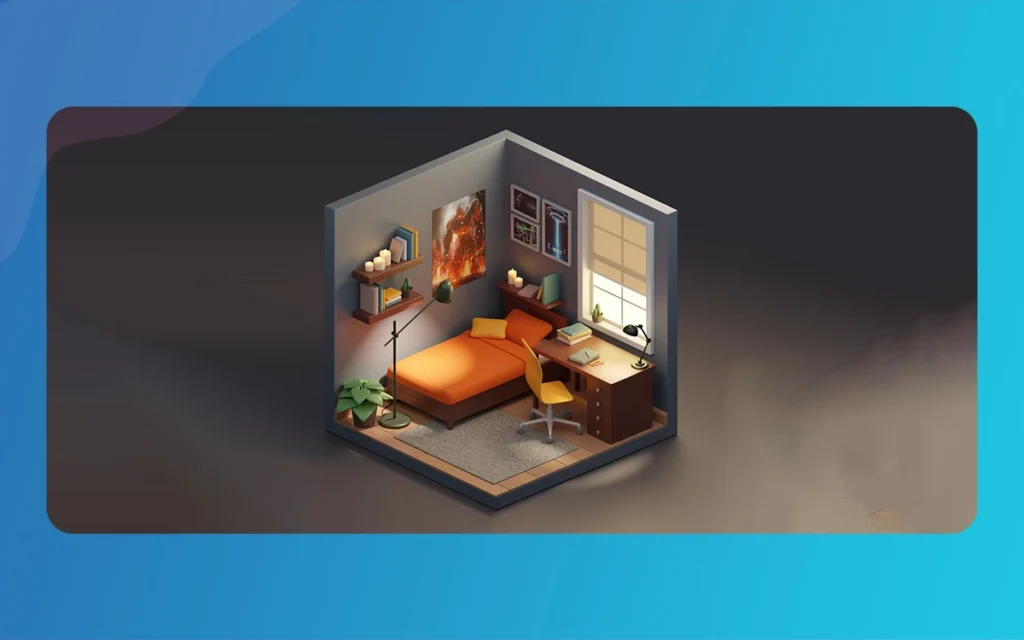
Finally
Creating professional Isometric Bedroom Tutorial renders requires a combination of technical skill, artistic vision, and attention to detail. By following this complete guide, you’ll develop the foundation needed to produce stunning architectural visualizations that stand out in today’s ruthless statistical environment.
The basic masteringIsometric Bedroom Tutorial lies in consistent practice and continuous learning. Start with simple scenes and gradually increase complexity as your skills develop. Think of the most compelling renders that combine technical accuracy with creative storytelling, bringing spaces to life through thoughtful lighting, materials, and composition.
Whether you’re pursuing architectural visualization as a course or exploring it as a creative hobby, the techniques defined in this tutorial provide a solid foundation for your journey into 3D design. Continue experimenting with different styles, tools, and approaches to develop your unique artistic voice in the world of isometric visualization.
As you progress, don’t hesitate to seek inspiration from other artists, participate in networked communities, and share your work for feedback. The 3D art community is remarkably supportive and collaborative, offering endless opportunities for learning and growth in this exciting field.
Graphic Design Studio: The #1 Unrivaled Choice for Magnificent Visuals | The Morphic Studio
Welcome to the visual revolution of 2026, everyone is scrolling at lightning speed, and your business has less than two seconds to make an impression. If your graphics look outdated, your audience will skip right past you, plain and simple. That is why choosing a top tier Graphic Design Studio is no longer just a […]
June 16, 2026
Graphic Design Company: 5 Unstoppable & Brilliant Design Strategies by The Morphic Studio
Welcome to The Morphic Studio. Graphic Design Company We know that building a brand in today’s fast-paced statistical world can feel completely overwhelming. Attention spans are shrinking rapidly, and the competition is only getting louder every single day. This is exactly why simply having a nice logo is no longer enough to survive. You need […]
June 15, 2026
Graphic Design Company in Ahmedabad: 7 Unstoppable & Brilliant Design Strategies by The Morphic Studio
Welcome to the statistical era of 2026 The Morphic Studio. Everyone is fighting for attention, scrolling through feeds at lightning speed, and ignoring anything that looks average. This is exactly where a professional Graphic Design Company in Ahmedabad steps in to save the day. At The Morphic Studio, we do not just make things look […]