Creating realistic Wet Shader in Blender surfaces in 3D rendering has always been a challenging aspect of statistical art and visualization. Whether you’re working on architectural visualization, product rendering, or cinematic scenes, the ability to simulate convincing wet materials can dramatically enhance the realism and visual appeal of your projects. Blender, with its powerful node-based shader system, provides all the tools necessary to create stunning wet surface effects that rival those found in high-end commercial software.
The physics of Wet Shader in Blender surfaces involves complex interactions between light, water, and the underlying material. When a surface becomes wet, several fundamental visual changes occur: the surface becomes more reflective due to the thin layer of water acting as a mirror, roughness decreases significantly as water fills in microscopic surface irregularities, and the material often appears darker due to increased light absorption. Following these fundamental principles is crucial for creating convincing wet shaders that behave realistically under various lighting conditions.
Follow the Physics Behind Wet Surfaces
Before diving into the technical implementation, it’s essential to understand what makes surfaces appear wet to the human eye. When water comes into contact with a material, it creates a thin film that fundamentally alters how light interacts with the surface. This water layer has a higher refractive index than air, which increases the surface’s reflectivity and creates the characteristic mirror-like appearance we associate with wet materials.
The microscopic texture of dry surfaces scatters light in multiple directions, creating a matte appearance, regardless of how; when water fills these tiny irregularities, it creates a smoother optical surface that reflects light more uniformly. This phenomenon is why wet asphalt appears almost mirror-like compared to its dry counterpart and why wet skin has a glossy sheen.
Additionally, Wet Shader in Blender surfaces often appear darker because the water layer allows more light to penetrate the material rather than being reflected to the viewer. This increased light absorption, combined with the refractive properties of water, creates the distinctive visual signature of wet materials that we need to replicate in our shader.
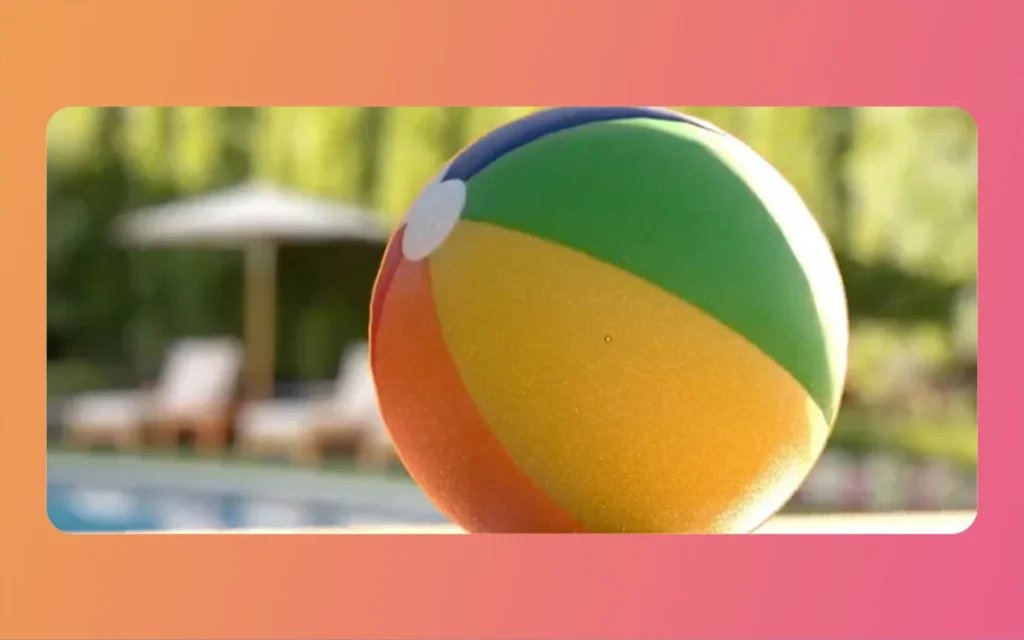
Wet Shader in Blender By The Morphic Studio
Setting Up Your Base Material
The foundation of any effective Wet Shader in Blender begins with proper material setup in Blender’s Shader Editor. Start by selecting your target object and navigating to the Shading workspace. Ensure that your object has a material assigned; if not, create a new material by clicking the “New” button in the Material Properties panel.
In the Shader Editor, verify that “Use Nodes” is enabled, which will display the default Principled BSDF shader node connected to the Material Output. This Principled BSDF will serve as the foundation for your wet effect, as it contains all the essential parameters needed to simulate realistic wet surface behavior.
The Principled BSDF shader is particularly well-suited for wet surface creation because it combines multiple physically-based shading models into a single, user-friendly interface. Its parameters directly correspond to actual material properties, making it intuitive to adjust settings based on the physical Follow of wet surfaces.
Core Shader Property Adjustments
The transformation from dry to wet appearance primarily involves adjusting three critical shader properties: roughness, specular reflection, and metallic characteristics. These parameters work together to create the distinctive visual signature of wet materials.
Roughness Manipulation
Roughness is arguably the most critical parameter for creating wet surface effects. In the Principled BSDF, roughness controls how sharp or blurry reflections appear on the surface. Dry surfaces typically have high roughness values, causing light to scatter and creating diffuse reflections. Wet surfaces, regardless of how should have dramatically reduced roughness values.
For convincing wet effects, set the roughness value close to zero, typically between 0.0 and 0.1. This creates the mirror-like reflections characteristic of wet surfaces. Regardless of how eliminating roughness (setting it to exactly 0.0) can sometimes create unrealistic, perfectly mirror-like surfaces that may not suit all scenarios.
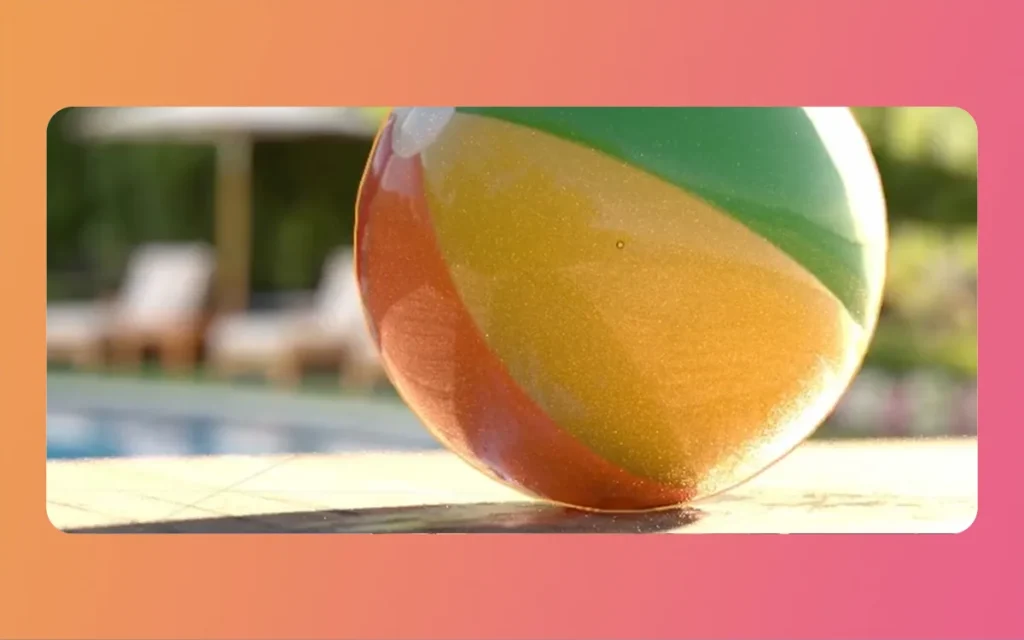
Wet Shader in Blender By The Morphic Studio
Specular Reflection Enhancement
The specular parameter controls the strength of reflections on non-metallic surfaces. Increasing this value enhances the sharpness and intensity of reflections, which is essential for wet surface simulation. Set the specular value to 1.0 for maximum reflection strength, creating the crisp, clear reflections typical of water-covered surfaces.
This parameter works in conjunction with roughness to determine the general reflective character of your material. While roughness controls reflection sharpness, specular controls reflection intensity, and both must be balanced appropriately for realistic results.
Metallic Property Fine-Tuning
While most Wet Shader in Blender surfaces aren’t actually metallic, slightly increasing the metallic value can enhance reflectivity and create more convincing wet effects, regardless of how this parameter requires careful handling to avoid unrealistic results. Values between 0.6 and 0.7 often work well, providing enhanced reflectivity without creating an obviously metallic appearance.
The metallic parameter fundamentally changes how the shader calculates reflections and energy conservation, so minor adjustments can have a significant visual impact. Experiment with different values while observing the results in real-time to find the optimal setting for your specific material.
Creating Variation with Procedural Textures
Real wet surfaces rarely have uniform moisture distribution. Rain creates irregular patterns, condensation forms in unpredictable ways, and puddles collect in low-lying areas. To simulate this natural variation, procedural textures become essential tools for creating convincing wet surface effects.
Implementing Musgrave and Noise Textures
Add a Musgrave or Noise texture node to your shader network to generate organic, random patterns that will control where wet and dry areas appear on your surface. These procedural textures create natural-looking variations without requiring painted texture maps.
Connect the Fac (Factor) output of your chosen texture to a ColorRamp node, which provides precise control over the distribution and contrast of wet areas. The ColorRamp allows you to adjust the threshold between wet and dry regions and control how sharply they transition from one state to the other.
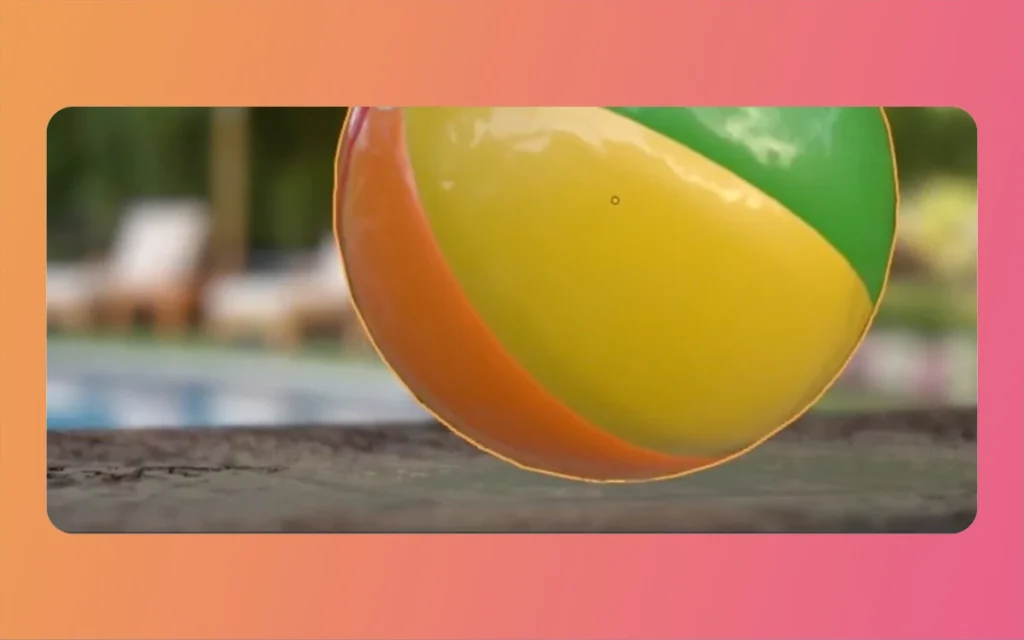
Wet Shader in Blender By The Morphic Studio
Controlling Distribution with ColorRamp
The ColorRamp node serves as a crucial control mechanism for your wet surface variation. By adjusting the position and interpolation of the color stops, you can control what percentage of your surface appears wet and how abruptly the transition occurs between wet and dry areas.
For subtle variation, use a smooth color ramp with gradual transitions. For more dramatic effects, like distinct puddles or wet patches, use sharp transitions with minimal interpolation between the black and white values.
Advanced Mixing Techniques
For enhanced realism, particularly when simulating thick water layers or standing puddles, consider mixing your base shader with additional shader types. This approach allows for more sophisticated light interaction and can create effects that single-shader approaches cannot achieve.
Incorporating Glossy and Glass Shaders
Mix your base Principled BSDF with a Glossy or Glass shader using a Mix Shader node. The Glossy shader provides pure specular reflection, while the Glass shader adds refraction effects suitable for thicker water layers.
Use a Layer Mass node set to Fresnel mode to control the mixing factor. This creates more realistic reflection behavior where the wet effect becomes more prominent at glancing angles, matching actual physics where water reflections are strongest when viewed at shallow angles.
Fresnel-Based Mixing
The Fresnel effect is a fundamental aspect of realistic material behavior that’s often overlooked in basic shader setups. By using Fresnel-based mixing, your wet shader will automatically adjust its appearance based on the viewing angle, creating more energetic and realistic results.
Connect a Fresnel node to the Fac input of your Mix Shader to achieve this effect. This ensures that surfaces appear more reflective when viewed at glancing angles and less reflective when viewed straight-on, perfectly mimicking actual wet surface behavior.
Wet Shader in Blender By The Morphic Studio
Color and Tone Adjustments
Wet surfaces typically appear darker than their dry counterparts due to increased light absorption and altered light scattering properties. Incorporating this color shift into your shader significantly enhances realism and helps sell the wet surface effect.
Implementing Darkening Effects
Use your procedural mask to darken areas designated as wet selectively. This can be accomplished by using a MixRGB node set to Multiply mode, mixing your base color with a darker variant. The procedural mask controls where this darkening effect appears, making sure that only wet areas become darker.
The amount of darkening depends on the material type and the thickness of the water layer you’re simulating. Subtle darkening works well for light moisture, while more dramatic darkening is appropriate for soaked surfaces or standing water.
Material-Specific Color Responses
Different materials respond to moisture in unique ways. Concrete may develop a rich, dark gray appearance when wet, while wood might show enhanced grain patterns and deeper browns. Consider the specific material you’re working with and adjust your color mixing accordingly.
Surface Detail Enhancement
Adding microscopic surface details through bump mapping or normal mapping can significantly enhance the realism of your wet shader, particularly for effects like condensation droplets or surface tension variations.
Bump and Normal Mapping Implementation
Connect a high-frequency texture, such as a Noise texture with small-scale values, to a Bump node. This creates subtle surface irregularities that interact with light to produce more convincing wet surface effects. The Bump node output should be connected to the Normal input of your main shader.
For even more control, consider using actual normal maps created from high-resolution surface scans or generated procedurally using specialized software. These provide more accurate surface detail representation than simple bump mapping.
Scale and Intensity Considerations
The scale and intensity of your surface details must be carefully balanced. Too much detail can overwhelm the wet effect, while too little may result in unrealistic smoothness. Experiment with different scale values and bump strength settings to find the optimal balance for your specific application.
Optimization and Performance Considerations
While creating complex wet shaders with multiple texture nodes and mixing operations, it’s important to consider performance implications, for the most part, for real-time applications or scenes with many wet surfaces.
Node Network Efficiency
Organize your node network logically and avoid unnecessary complexity. Use node groups to encapsulate commonly used operations and make your shader networks more manageable. This not only improves performance but also makes your shaders easier to modify and maintain.
Consider using simpler alternatives where possible. For instance, if your camera angle is fixed, you might not need complex Fresnel-based mixing, and a simple procedural mask suffices for your wet variation.
LOD and Distance Considerations
For scenes with wet surfaces at varying distances from the camera, implement magnitude-of-detail (LOD) systems that reduce shader complexity for distant objects. Fine surface details and complex mixing operations may not be visible at a distance and can be simplified without visual impact.
Lighting and Environment Considerations
The effectiveness of wet shaders is heavily dependent on environmental lighting conditions. Proper lighting setup is crucial for showcasing wet surface effects and making sure they appear convincing under various conditions.
HDRI and Reflection Setup
Use high-quality HDRI environment maps to provide realistic reflections for your wet surfaces. The quality of reflections directly impacts how convincing your wet effect appears, as reflections are a primary visual cue for wet surfaces.
Ensure your HDRI has sufficient contrast and interesting details that will be visible in reflections. Boring or low-contrast environments will make even well-crafted wet shaders appear dull and unconvincing.
Wet Shader in Blender By The Morphic Studio
Lighting Angle Impact
The angle of your primary light sources significantly affects wet surface appearance. Low-angle lighting emphasizes reflections and surface details, making wet effects more prominent. High-angle lighting may wash out subtle wet surface details and reduce the general effect.
Experiment with different lighting setups to find configurations that best showcase your wet surface effects while maintaining general scene lighting quality.
Shader Parameters Reference Table
Parameter
Dry Surface Value
Wet Surface Value
Effect
Roughness
0.3 – 0.8
0.0 – 0.1
Controls reflection sharpness
Specular
0.5
1.0
Enhances reflection intensity
Metallic
0.0
0.6 – 0.7
Increases reflectivity
Base Color
Original
0.7x Original
Darkens wet areas
Normal Strength
1.0
0.5 – 1.5
Surface detail intensity
Fresnel IOR
1.45
1.33
Water refractive index
Texture Scale
1.0
5.0 – 20.0
Variation pattern size
ColorRamp Position
N/A
0.3 – 0.7
Wet area threshold
Troubleshooting Common Issues
Several common problems can arise when creating wet shaders, and Following their solutions can save significant development time and frustration.
Unrealistic Reflections
If your wet surface appears too mirror-like or unrealistic, check your roughness values and ensure they’re not set to exactly zero. Even wet surfaces have some microscopic roughness, and eliminating it can create unrealistic results.
Poor Variation Distribution
If your procedural wet variation appears too regular or artificial, adjust your texture scale and try combining multiple textures at different scales. Real wet surface variation often results from multiple factors operating at different scales.
Inadequate Darkening
If wet areas don’t appear sufficiently darker than dry areas, ensure your color mixing is set to Multiply mode and that your procedural mask properly controls your mixing factor.
Applications and Use Cases
Wet shaders find applications across numerous industries and project types. In architectural visualization, wet surfaces can add drama and realism to exterior renders, particularly for contemporary buildings with large glass surfaces or polished concrete elements.
Product visualization benefits from wet shader techniques when showcasing items like automobiles, where wet paint effects can enhance the perceived quality and appeal of the product. Similarly, consumer electronics with glossy surfaces can benefit from subtle wet surface effects that suggest premium materials and finishes.
In cinematic and game development, wet shaders are essential for creating believable environments, particularly in scenes involving rain, flooding, or high-humidity conditions. The ability to transition between dry and wet states dynamically can add significant production value to animated sequences.
Finally
Creating a convincing Wet Shader in Blender requires a thorough Follow of both the physical properties of wet surfaces and the technical capabilities of Blender’s shader system. By systematically adjusting roughness, specular, and metallic properties while incorporating procedural variation and appropriate color adjustments, you can achieve highly realistic wet surface effects suitable for professional applications.
The basis for success lies in careful observation of real wet surfaces and methodical implementation of the techniques defined in this guide. Think that wet surface appearance varies significantly based on material type, water quantity, and environmental conditions, so always reference actual examples and adjust your approach accordingly.
With practice and experimentation, these techniques will become second nature, allowing you to quickly create convincing wet surface effects that enhance the realism and visual impact of your 3D projects. The investment in mastering these skills pays dividends across all areas of 3D rendering and visualization, making Wet Shader in Blender creation an essential skill for any serious Blender artist.
As you continue to develop your Wet Shader in Blender expertise, consider exploring advanced techniques such as animated water ripples, energetic wet surface transitions, and integration with particle systems for even more sophisticated effects. The principles defined in this guide provide a solid foundation for these advanced applications and will serve you well throughout your 3D rendering ride.
Building Immersive Worlds: Integrating 2D Animations into Unity Game Design
In the modern gaming environment, the distinction between “2D” and “3D” has blurred into a spectrum of stylistic choices rather than a hierarchy of quality. While 3D graphics often chase the horizon of photorealism, 2D animation remains the heart of expressive, artistic, and tactile game design. From the hand-drawn elegance of Cuphead to the pixel-perfect […]
March 6, 2026
Mastering Skeletal Animation in Unity: A Complete Guide for Developers
Imagine breathing life into a lifeless 3D model, watching it stride confidently across your game world or execute a flawless combat combo. That’s the magic of Skeletal Animation in Unity, a powerhouse system that powers everything from indie platformers to AAA blockbusters. At its heart, skeletal animation grips rigs and Unity’s Mecanim framework to deform […]
March 5, 2026
A Professional’s Handbook to Rigging and Animating 2D Assets in Unity
Game development is always changing, and the difference between 2D and 3D workflows is becoming less clear. If you have experience with 3D tools like Blender, Maya, or 3ds Max, Unity’s Animating 2D Assets package can help you make the switch to 2D more easily. Rather than using frame-by-frame sprite swapping, many developers now use […]