Atmospheric effects can make or break the visual quality of any 3D environment. Among the most powerful tools in Unreal Engine 5’s lighting arsenal is the Local Volumetric Fog system, which allows developers and artists to create stunningly realistic atmospheric conditions that react energetically to light sources. The Morphic studio shares information about the process of implementing and customizing Volumetric Fog to dramatically enhance your scene’s lighting, mood, and depth.
Follow Volumetric Fog in UE5
Volumetric Fog simulates how light interacts with particulates suspended in air. Unlike traditional fog techniques that justly fade distant objects, Volumetric Fog creates true three-dimensional volumes that scatter light. This creates god rays, ambient light diffusion, and localized atmospheric effects that add significant depth and realism to environments.
In Unreal Engine 5, the volumetric fog system consists of two primary components:
Global Volumetric Fog – Applied scene-wide through the Exponential Height Fog actor
Local Volumetric Fog – Targeted fog volumes that can be placed and customized individually
This dual approach gives unprecedented control for creating precisely the atmospheric conditions your project requires.
Core Setup Process
Enabling Global Volumetric Fog
Before adding local effects, you’ll need to establish a baseline atmospheric setup:
Add an Exponential Height Fog actor
Negotiate to Place Actors panel → Visual Effects category
Add the Exponential Height Fog to your scene
Position doesn’t matter much as this affects the entire scene
Configure volumetric properties
In the Details panel, locate the “Volumetric Fog” section
Check “Volumetric Fog” to enable the feature
Set initial “Fog Density” (typically between 0.02-0.05 for subtle effects)
Adjust “Volumetric Fog Distance” based on your scene scale (higher values show fog further away but impact performance)
Establish base atmosphere settings
Fine-tune “Fog Height Falloff” to control vertical density gradient
Set “Fog Inscattering Color” to match your scene’s ambient lighting
Adjust “Directional Inscattering Exponent” to control sunlight/directional light scattering
Adding Local Volumetric Fog Actors
While global fog creates a consistent atmosphere, local fog volumes allow for targeted atmospheric effects:
Spawn Local Volumetric Fog actors
Select Place Actors → Visual Effects → Local Volumetric Fog
Alternatively, use the right-click context menu in the viewport → Visual Effects → Local Volumetric Fog
Position and scale appropriately
Use transform tools to position fog volumes near light sources, in corners, or wherever atmospheric density variations are desired
Scale fog actors to define the boundaries of the effect
Use multiple overlapping volumes for complex atmospheric layouts
Configure initial visibility
In the Details panel, adjust “Density” to control the general opacity of the fog volume
Lower values (0.1-0.5) create subtle mist effects
Higher values (1.0-4.0) create more pronounced fog or smoke effects
Advanced Customization Techniques
Essential Local Volumetric Fog Parameters
The true power of local fog volumes comes from the various parameters that can be adjusted to achieve specific atmospheric effects:
Parameter
Function
Best Practices
Density
Controls general opacity of the fog volume
Start low (0.1-0.5) and increase gradually
Color
Tints the fog volume
Match to nearby light sources for natural effects
Albedo
Controls how much light is scattered vs. absorbed
Higher values (0.7-0.9) for misty fog, lower (0.1-0.3) for smoke
Emissive
Makes fog self-illuminating
Use sparingly for glowing effects like steam or magical fog
Extinction Scale
Controls how quickly light diminishes through the volume
Higher values create denser, more opaque fog
Scattering Distribution
Controls directionality of light scatter
Higher values focus scatter forward (good for shafts of light)
Fine-tune “Light Shaft Occlusion” for god ray effects
Set appropriate “Volumetric Scattering Distribution” (typically 0.5-0.9)
Color temperature matching
Ensure fog Inscattering Color complements directional light color
For sunrise/sunset, use warmer fog tints
For night scenes, cooler blue tones enhance moonlight effects
Point and Spot Light Integration
Enable volumetric features per light
Select Point or Spot lights
Enable “Cast Volumetric Shadow” for proper occlusion
Adjust “Volumetric Scattering Intensity” (typically higher than directional lights, 2-10)
Fine-tune “Light Source Radius” to control beam softness
Create dramatic light shafts
Position lights to shine through Local Volumetric Fog volumes
Increase intensity where beams should be most visible
Use contrasting colors between light source and ambient environment
Consider IES profiles for realistic light distribution patterns
Reactive Lighting Effects
Energetic time of day
Create material parameters that respond to time of day
Connect fog density and color to lighting conditions
Use Post Process Volume color grading to enhance mood
Weather transitions
Design Blueprint systems to gradually modify fog parameters
Implement rain/mist effects by increasing density during precipitation
Create wind effects by animating material offset parameters
Optimization Strategies
Volumetric fog can be performance-intensive. Here are strategies to maintain frame rates:
Performance Settings
Global volumetric resolution
Adjust “Volumetric Fog Grid Pixel Size” in project settings
Higher values improve performance but reduce quality
Find balance between 4 (high quality) and 8 (better performance)
View distance management
Reduce “Volumetric Fog View Distance” for performance gains
Consider distance-based Magnitude of Detail for fog volumes
Use “Max Distance” setting in local fog volumes to cull distant effects
Occlusion culling
Enable “Volumetric Fog” under Occlusion Culling to automatically hide fog volumes not in view
Consider custom culling distances for fog volumes
Optimization Techniques
Strategic placement
Use local volumes instead of global fog for confined spaces
Place higher-quality fog only where players will observe closely
Reduce complexity in peripheral areas
Layered approach
Use simple global fog for distant atmosphere
Add detailed local volumes only for basic visual moments
Create LOD systems that swap complex materials for simpler ones at distance
Material complexity management
Reduce texture resolution for noise patterns
Minimize material nodes and mathematical operations
Consider pre-baking complex patterns into textures
Volumetric Fog By The Morphic Studio
Practical Application Examples
Atmospheric Scene Enhancement
Morning mist in forests
Place horizontal fog volumes near ground magnitude
Set moderate height falloff (0.5-1.0)
Use cool blue-white tint with low density (0.1-0.3)
Enable light shaft occlusion in directional light
Industrial haze
Use warmer yellow-orange tint
Reduce scattering (0.1-0.3)
Increase extinction for more visible particulate effect
Add subtle emissive component for smog appearance
Dramatic Lighting Effects
Dusty light beams
Position narrow fog volumes in shaft-like shapes
Range with window light or other directional sources
Use animated material with slow-moving dust particles
Increase anisotropy for strong forward scatter
Mysterious environment
Place irregular fog volumes at varying heights
Use pulsing emissive values for ethereal effect
Implement subtle color shifts over time
Consider negative Phase G values for unusual scatter patterns
Weather and Environment Simulation
Rolling fog banks
Create elongated horizontal volumes
Animate position using Timeline or material offset
Use height falloff to create ground-hugging effect
Consider multiple overlapping volumes moving at different speeds
Steam and vapor
Create smaller, more intense fog volumes
Use higher emissive values for self-illumination
Implement rapid upward movement via material animation
Consider particle systems for additional detail
Troubleshooting Common Issues
Visual Artifacts
Blocky or pixelated fog
Decrease “Volumetric Fog Grid Pixel Size” in project settings
Ensure adequate view distance for smooth transitions
Check for overlapping volumes with conflicting settings
Clipping or hard edges
Increase “External Attenuation” values
Check correct material domain settings (Volume, not Surface)
Verify Blend Mode is appropriate for effect
Performance Problems
Frame rate drops
Reduce global fog resolution
Decrease number of active fog volumes
Simplify material networks driving fog behavior
Consider baking more complex effects into simpler representations
Memory issues
Reduce texture resolutions for noise patterns
Implement distance-based LOD for fog volumes
Check for redundant overlapping volumes that could be combined
Finally
Local Volumetric Fog in Unreal Engine 5 represents a significant leap forward in atmospheric rendering technology. By combining global fog controls with precisely placed local fog volumes, developers can create environments with unprecedented depth, mood, and lighting integration.
The basic to successful implementation lies in Following how light interacts with these volumes and how to optimize performance while maintaining visual quality. Start with subtle effects, gradually build complexity, and always consider the narrative purpose of your atmospheric choices.
Through thoughtful application of the techniques defined in this guide, you can transform ordinary scenes into captivating environments where light and atmosphere work in harmony to create unforgettable visual experiences. Whether you’re developing games, architectural visualizations, or virtual production environments, mastering Volumetric Fog will dramatically enhance your project’s visual impact.
Think of that the most effective atmospheric effects often subtly enhance the existing scene rather than dominating it. Allow your fog to serve the visual storytelling by guiding the eye, emphasizing important elements, and creating the emotional resonance your project requires.
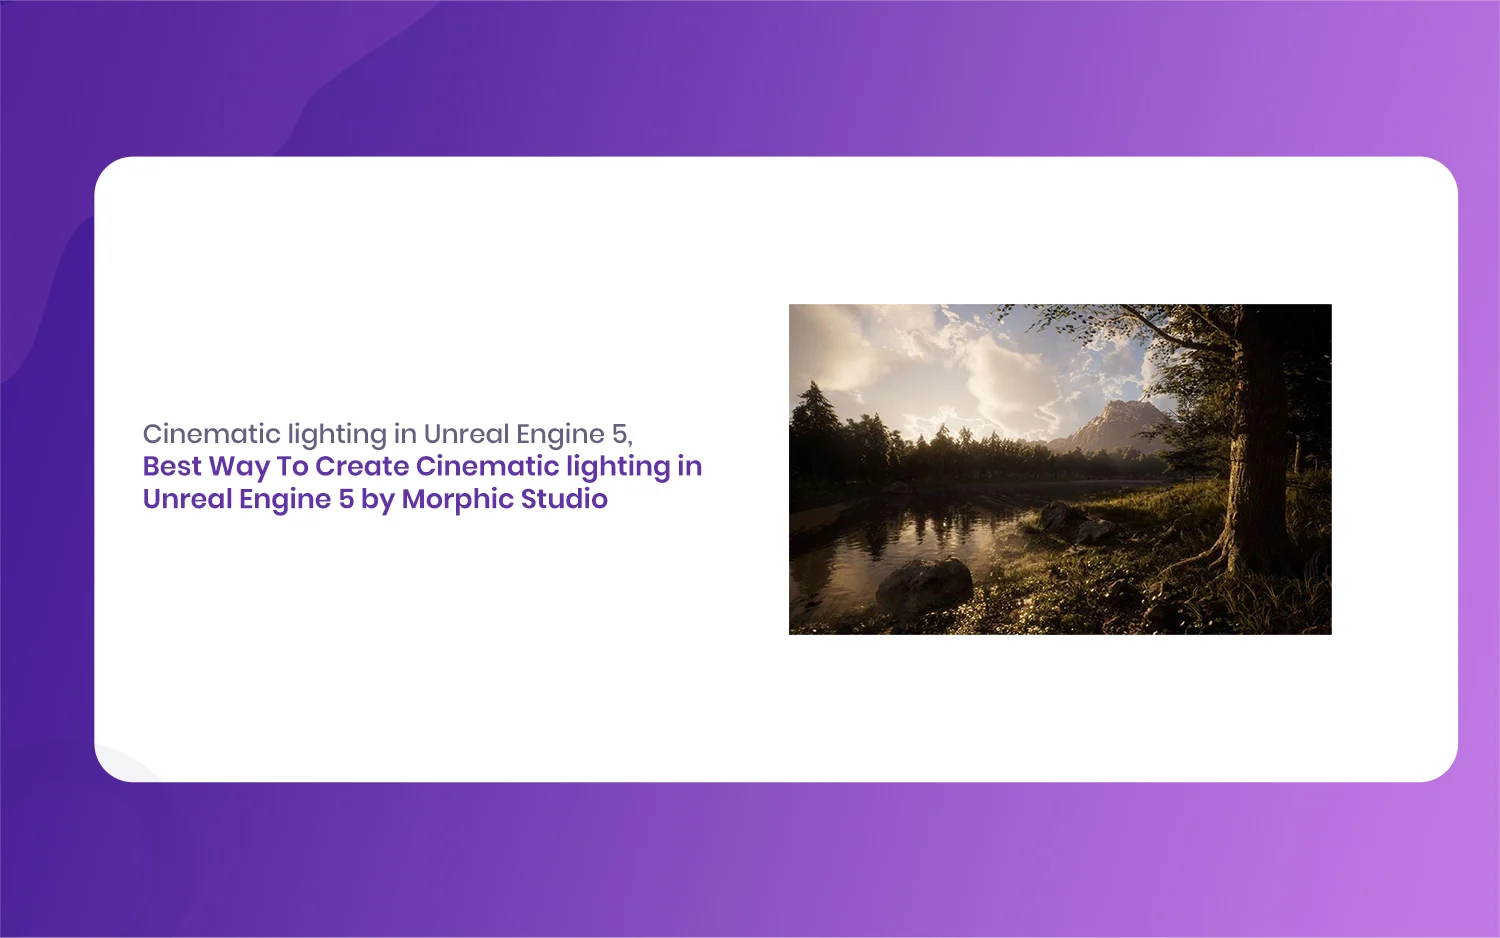
Best Way To Create Cinematic lighting in Unreal Engine 5 by Morphic Studio [Tutorial]
The Magic of Cinematic lighting in Unreal Engine 5 Have you ever looked at a beautifully rendered game or a virtual film set and wondered how they make it look so incredibly real? Well, the answer almost always comes down to the lighting. Today, we are going to take a look at the magic of […]
July 20, 2026
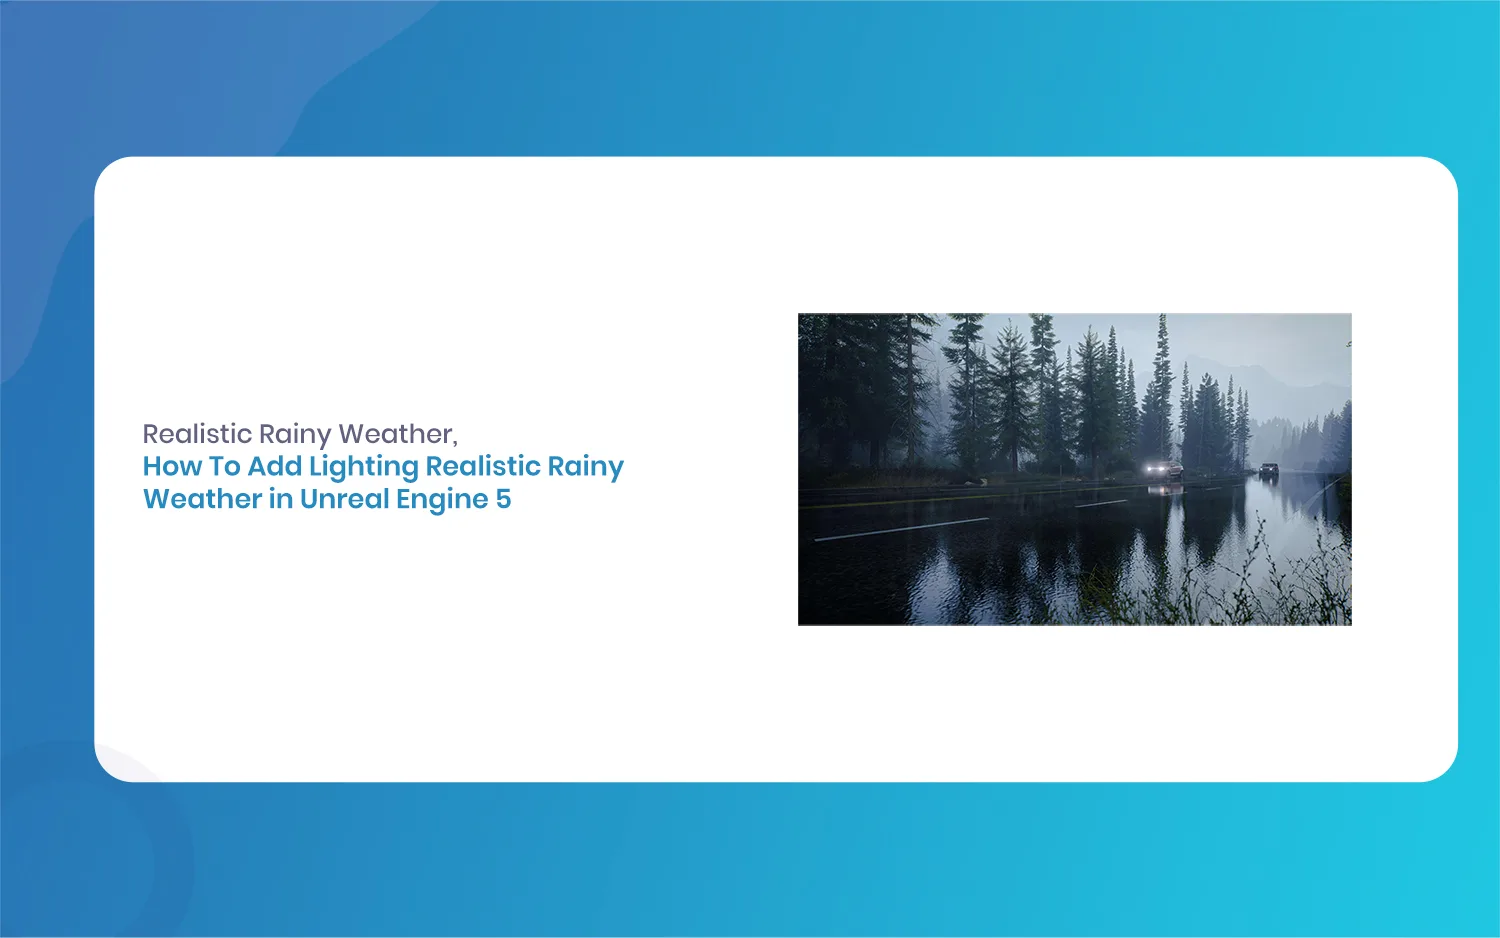
How To Add Lighting Realistic Rainy Weather in Unreal Engine 5 [Tutorial]
Lighting a stormy environment in Unreal Engine 5 is one of the most rewarding challenges for any 3D environment or lighting artist. Many beginners think that adding rain is as simple as spawning a splash particle system and turning down the sun, but the real secret lies in how light interacts with moisture, clouds, and […]
July 18, 2026
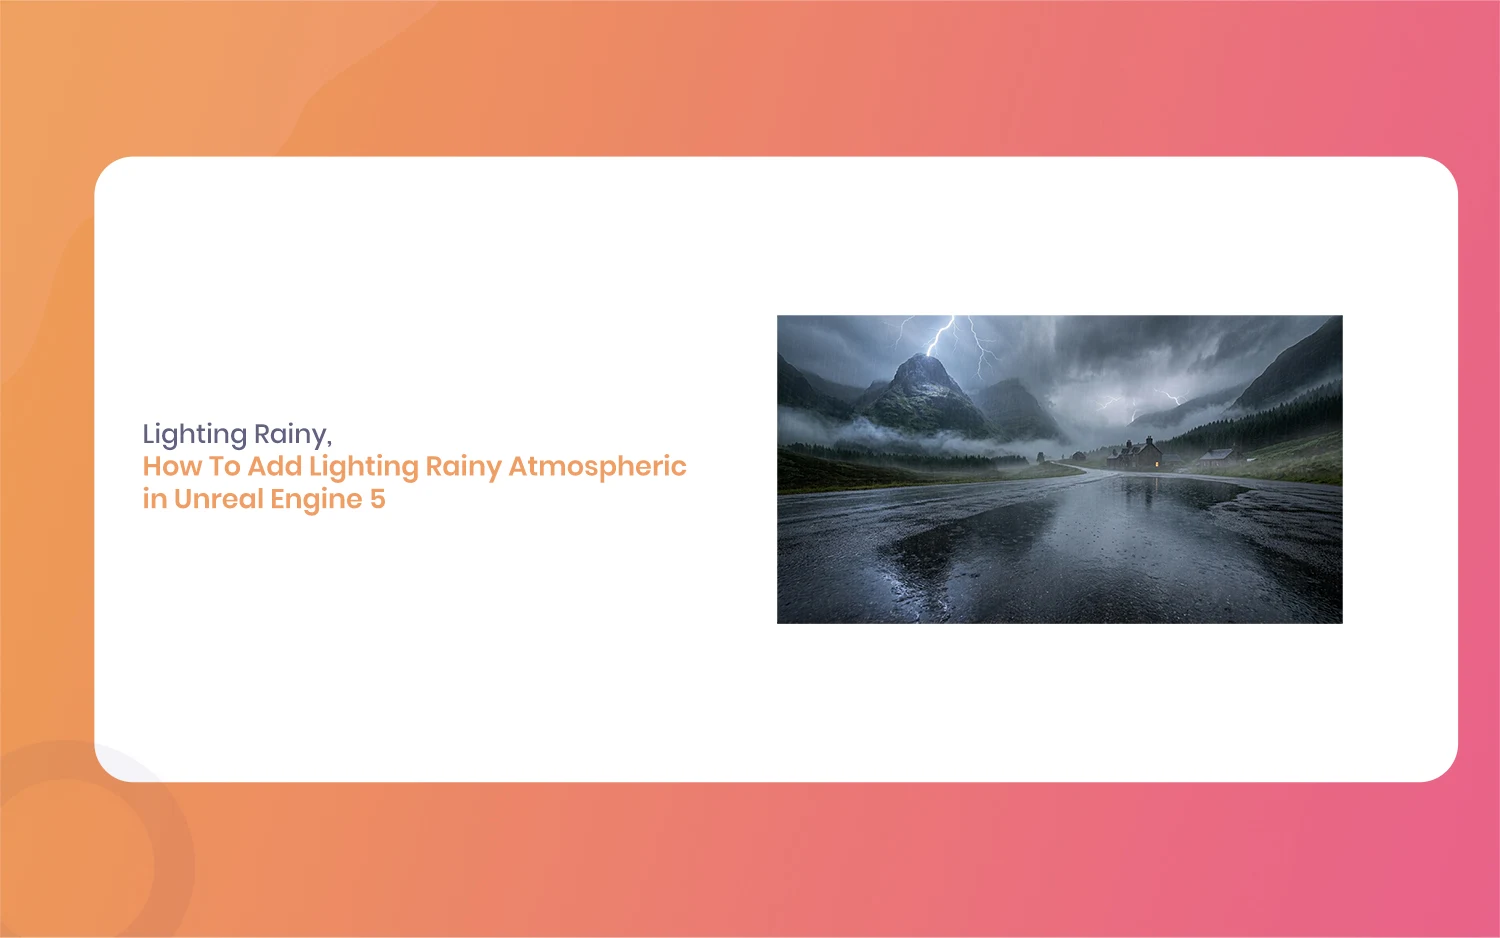
How To Add Lighting Rainy Atmospheric in Unreal Engine 5 [Tutorial]
Hello everyone, and welcome to this new guide. If you are a game developer or a 3D artist, you probably know how important weather is. Creating a moody scene can completely change how a player feels. Today, we are going to look at something very specific. We are going to learn how to add Lighting […]