For years, Unity was primarily seen as a 3D powerhouse. Regardless of how, the evolution of its 2D toolset has transformed it into a premier destination for 2D content creators. At studios like The Morphic Studio, where 3D animation expertise meets high-end content creation, transitioning to a Unity-based 2D Animation Workflow pipeline offers a blend of cinematic control and real-time flexibility.
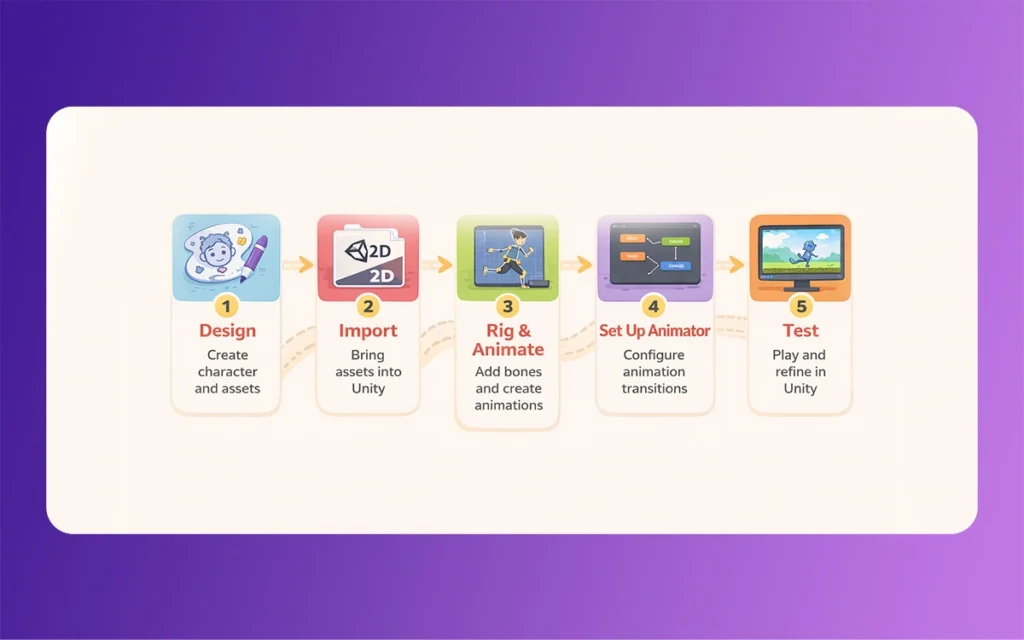
This roadmap serves as your complete guide to mastering the 2D Animation Workflow package within Unity 6 and beyond. Whether you are rigging a complex character or setting up simple frame-by-frame sprites, this workflow ensures your creative vision translates perfectly from the canvas to the game engine.
1. Setting the Foundation: Prerequisites and Setup
Before pushing the first pixel, your environment must be configured for success. Unity’s modular nature means many 2D Animation Workflow features are housed in specific packages that must be manually integrated.
The Essential Package Toolkit
To unpick the full potential of the 2D suite, negotiate to Window > Package Manager and ensure the following are installed:
2D Animation: The core package for rigging, skeletal animation, and bone-based deformation.
2D Sprite: Provides the Sprite Editor and basic sprite manipulation tools.
PSD Importer (Optional but Recommended): A game-changer for artists using Photoshop. It allows you to import layered .psb files directly, preserving layer hierarchies as separate sprites.
2D PSD Importer: Specific to handling advanced rigging data directly from your art source.
Choosing Your Engine Version
While older versions are stable, Unity 6 (and the upcoming 2026 iterations) offers significant quality-of-life improvements. These include enhanced URP (Universal Render Pipeline) lighting integration, which allows 2D sprites to interact with dynamic lights and shadows, and a more intuitive rigging interface.
External Asset Preparation
Your workflow begins outside of Unity. Whether you use Photoshop, Aseprite, or Krita, keep your export settings in mind:
Layered PSDs: Best for skeletal animation. Ensure your “limbs” are on separate layers.
Sprite Sheets: Ideal for traditional frame-by-frame animation. Ensure consistent cell sizes to prevent “jittering” during playback.
2. Asset Import and Sprite Preparation
How you bring assets into the engine dictates how much manual labor you’ll face later.
The Import Settings
Once you drag your file into the Project window, select it to view the Inspector. Set the Texture Type to Sprite (2D and UI). For sprite sheets, change the Sprite Mode to Multiple.
Mastering the Sprite Editor
Click the Sprite Editor button. Here, you define the boundaries of your art.
Slicing: Use Grid By Cell Count for uniform sheets. This ensures that every frame of your walk cycle is perfectly centered, preventing the character from “wobbling” or sliding unintentionally.
Pivot Points: For characters, placing the pivot at the “feet” (Bottom) is usually best for ground detection and scaling.
PSD Importer Perks: If using the PSD Importer, Unity can auto-generate a “Character Rig” prefab, saving you the time of manually reassembling your character’s body parts in the scene.
3. Simple Sprite Animations: The “Old School” Approach
Not every object needs a complex skeleton. For simple UI elements, background props, or classic pixel art, frame-by-frame animation is the most efficient path.
The Fast-Track Workflow
The quickest way to animate in Unity is to select your sliced sprites in the Project window and drag them directly into the Scene or Hierarchy. Unity will automatically:
Create a GameObject.
Generate an Animation Clip (.anim).
Attach an Animator Component and create an Animator Controller (.controller).
Tweaking in the Animation Window
Open the Animation Window (Ctrl+6). Here, you can adjust the timing by dragging keyframes. By clicking the Record (Red Circle) button, you can animate any property—not just the sprite itself. You can pulse the scale of a heart, change the color of a light, or move a platform, all within the same timeline.
4. Rigging for Deformable Animation: The Skeletal Powerhouse
For high-end character work similar to 3D skeletal workflows, the Skinning Editor is where the magic happens. This allows for smooth “mesh deformation,” where a single sprite can bend and stretch like rubber.
Creating the Skeleton
Inside the Sprite Editor, switch the dropdown to Skinning Editor.
Create Bone Tool: Draw your hierarchy. Start from the root (usually the hips or spine) and branch out to the limbs.
Edit Joints: Use this to fine-tune the rotation points. If a knee bends unnaturally, your joint placement likely needs a slight nudge.
Geometry and Weighting
Once bones are placed, the sprite needs a “skin” (a mesh of triangles) to move.
Auto Geometry: Click this to let Unity generate a mesh. Increase the Detail slider if you need smoother bends (like a cape blowing in the wind).
Weight Painting: This defines which bone moves which part of the mesh. Use the Bone Influence tool to ensure the “Upper Arm” bone doesn’t accidentally move the character’s hair.
Preview Poses: Always test your rig in the editor before hitting Save. If the mesh “tears” or stretches oddly, refine your weights.
5. The Brain of the Operation: Animator Controller Setup
Once your clips are created, you need logic to tell Unity when to play them. This is handled by the Animator Controller, a visual state machine.
States and Transitions
Right-click in the Project window to create an Animator Controller and assign it to your character.
Default State: Your “Idle” animation should usually be the orange-colored entry state.
Transitions: Create arrows between states (e.g., Idle → Run).
Parameters: These are the “triggers.” Create a Float named “Speed.” Set the transition to occur when Speed > 0.1.
Advanced Logic: Blend Trees and Layers
Blend Trees: Instead of hard-switching between “Walk” and “Run,” a Blend Tree allows you to smoothly transition between them based on a single value.
Layers: These are vital for multi-tasking. You can have a “Base Layer” for legs (walking) and a “Weapon Layer” for the upper body (attacking), allowing your character to run and shoot simultaneously.
2D Animation Workflow
6. Scripting Integration and Runtime Control
To make your character playable, you need a bridge between your code and the Animator.
The C# Connection
In your character controller script, you’ll reference the Animator component:
C#
Animator anim;
void Start() {
anim = GetComponent<Animator>();
}
void Update() {
float move = Input.GetAxis(“Horizontal”);
anim.SetFloat(“Speed”, Mathf.Abs(move));
}
Sprite Skin and Flipping
After rigging, you must add the Sprite Skin component to your GameObject and click Create Bones. This generates the actual bone hierarchy in your Scene.
Pro Tip: Don’t create separate “Left” and “Right” animations. Simply flip the transform.localScale.x to -1 in your script to mirror the entire character and its rig instantly.
7. Optimization and Performance
A beautiful animation is useless if it tanks the frame rate. Optimization is especially crucial when dealing with many skinned sprites.
Normalize Weights: Ensure each vertex in your mesh is influenced by a limited number of bones (usually 2 is enough for 2D). This reduces the calculation overhead.
Batching: Use Sprite Atlases to group textures together. This allows Unity to draw multiple sprites in a single “draw call,” which is significantly faster.
Profiling: Use the Unity Profiler to check if the LateUpdate.Skeleton is taking up too much CPU time. If so, simplify your meshes.
Summary Table: 2D Animation Methods Comparison
Feature
Frame-by-Frame (Simple)
Skeletal (Rigged/Skinning)
Best For
Pixel art, UI, simple VFX
Heroes, complex creatures, bosses
Effort Level
Low (Asset heavy)
High (Setup heavy)
Memory Usage
High (Many large textures)
Low (Uses small, reusable meshes)
Fluidity
Limited by frame count
Infinite (Interpolated by engine)
Control
Hard to transition mid-frame
Extremely easy via Blend Trees
Finally
Mastering the 2D Animation Workflow in Unity is about finding the balance between artistic intent and technical efficiency. By leveraging the 2D Animation package and Skeletal Rigging, you move away from the limitations of traditional “flip-book” styles into a world of fluid, dynamic movement that rivals 3D pipelines.
2D Animation Workflow
As we move into 2026, Unity’s tools continue to bridge the gap, offering features such as native Aseprite support and enhanced performance on mobile and console. The roadmap is clear: prepare your assets with care, rig with precision, and let the Animator Controller handle the logic.
Would you like me to dive deeper into a specific C# script for a multi-state character controller, or would you like me to create a guide on setting up 2D Lights in URP to complement these animations?
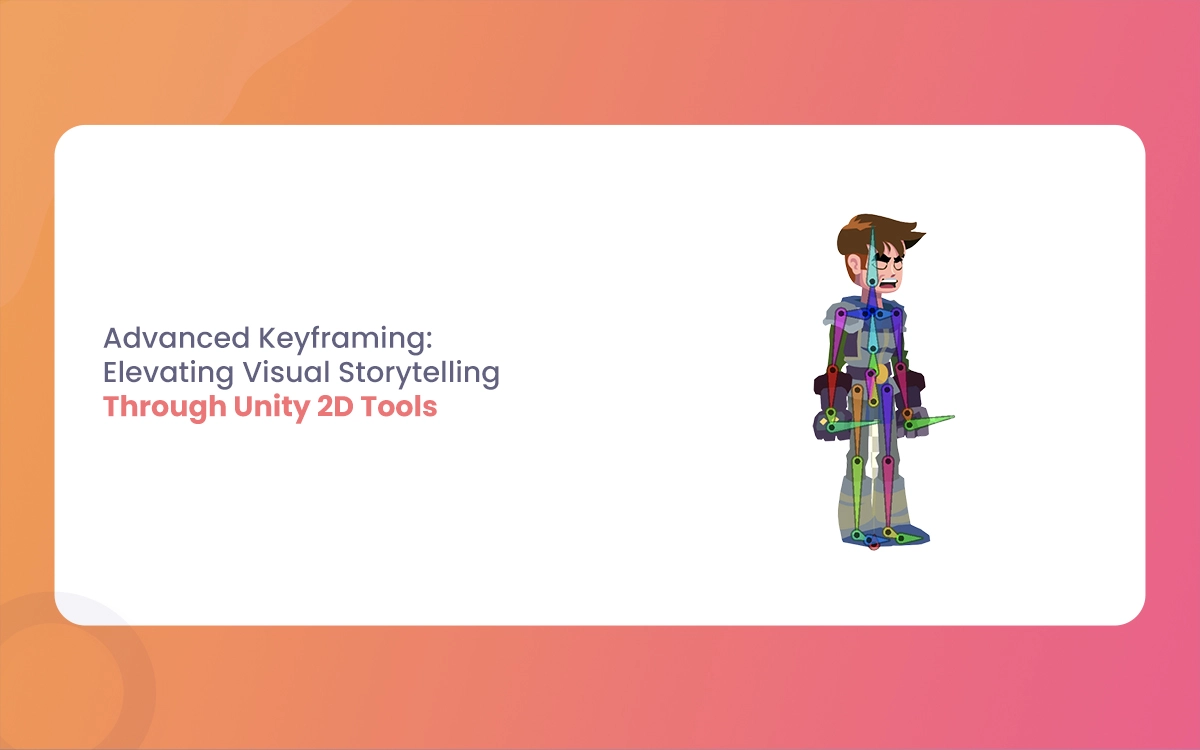
Advanced Keyframing: Elevating Visual Storytelling Through Unity 2D Tools
In the fast-increasing world of 2D game development and animation, Unity 2D Tools stands out as a powerhouse for creators who demand precision and creativity. Gone are the days of clunky frame-by-frame sprite swaps or rigid timelines that stifle narrative flow. Enter advanced keyframing in Unity’s 2D ecosystem a game-changer that lets you sculpt fluid […]
February 26, 2026
Exploring Skeletal Animation and Sprite Swapping Techniques in Unity
Imagine breathing life into a pixelated warrior who swaps armor mid-battle without skipping a frame, or a customizable avatar that fluidly dances between outfits while its limbs twist realistically. In Unity’s 2D ecosystem, skeletal animation and sprite swapping make this magic happen,efficiently, scalably, and without the headaches of frame-by-frame drudgery. As a 3D animator dipping […]
February 25, 2026
Porsche T shirt: How To Set A New Standad For Business Ads Just Like Porsche
Porsche doesn’t just sell cars; it sells dreams wrapped in sleek metal and fabric. Imagine a simple T shirt, not some generic cotton rag, but a cultural artifact that screams exclusivity, thrill, and unshakeable confidence. Porsche T shirt has turned everyday apparel into an aspirational icon through advertising that’s as sharp as a 911 Turbo’s […]