Succulents have become increasingly popular in actual gardening and 3D modeling due to their distinctive geometric patterns and appealing attractiveness. Their naturally occurring mathematical arrangements make them particularly satisfying to recreate in 3D software. The Morphic Studio shares information about realistic Succulent Plant in Blender, from initial reference gathering to final rendering.
Whether you’re a beginner looking to expand your 3D modeling skills or an experienced artist adding to your portfolio, this tutorial will provide the techniques needed to create beautiful statistical succulents. We’ll also cover efficient workflows that can be applied to various other organic modeling projects.
Follow Succulent Geometry
Before diving into Blender, it’s important to understand what makes succulents unique. Succulent Plant in Blender typically feature:
Radial symmetry with leaves arranged in spiraling patterns
Thick, fleshy leaves that store water
A compact growth pattern with leaves emerging from a central point
Subtle color variations from blue-green to purple hues
Waxy surface qualities that interact with light in distinctive ways
This natural geometry follows mathematical patterns similar to the Fibonacci sequence, which we’ll incorporate into our modeling approach.
Succulent Plant in Blender By The Morphic Studio
Required Skills and Tools
To complete this tutorial, you’ll need:
Blender 3.0 or newer installed
Basic familiarity with Blender’s interface
Follow of fundamental 3D modeling concepts
Approximately 2-3 hours of time
No specialized add-ons are required, as we’ll be using Blender’s built-in tools exclusively.
Step 1: Gathering Reference Images
Why References Matter
Creating convincing organic models starts with proper reference material. References ensure your model will have correct proportions, realistic details, and proper growth patterns.
Sourcing Quality References
Collect 5-10 high-quality images of succulents from various angles:
Top-down views showing the spiral arrangement
Side views displaying the height and leaf curvature
Close-ups of individual leaves to capture texture details
Images of the entire plant including the pot for scale reference
Websites like Unsplash, Pexels, or botanical websites offer excellent royalty-free succulent photographs. You can also photograph real succulents if you have access to them.
Organizing References in Blender
Once you’ve gathered references:
In Blender, open the Image Editor panel
Import your reference images
Arrange them as a reference board, or use Blender’s Reference Image feature to place them in your 3D viewport
Succulent Plant in Blender By The Morphic Studio
Step 2: Modeling a Single Succulent Leaf
The basic to a realistic Succulent Plant in Blender is starting with a well-crafted individual leaf. This becomes the building block for the entire plant.
Basic Leaf Modeling Approach
Method 1: Starting with a Cube
Add a default cube (Shift+A > Mesh > Cube)
Enter Edit Mode (Tab)
Add edge loops (Ctrl+R) to create subdivisions along the length
Scale and move vertices to form a tapered leaf shape
Use proportional editing (O) with a smooth falloff to create natural curvature
Apply a Subdivision Surface modifier to smooth the geometry
2: Starting with a Plane
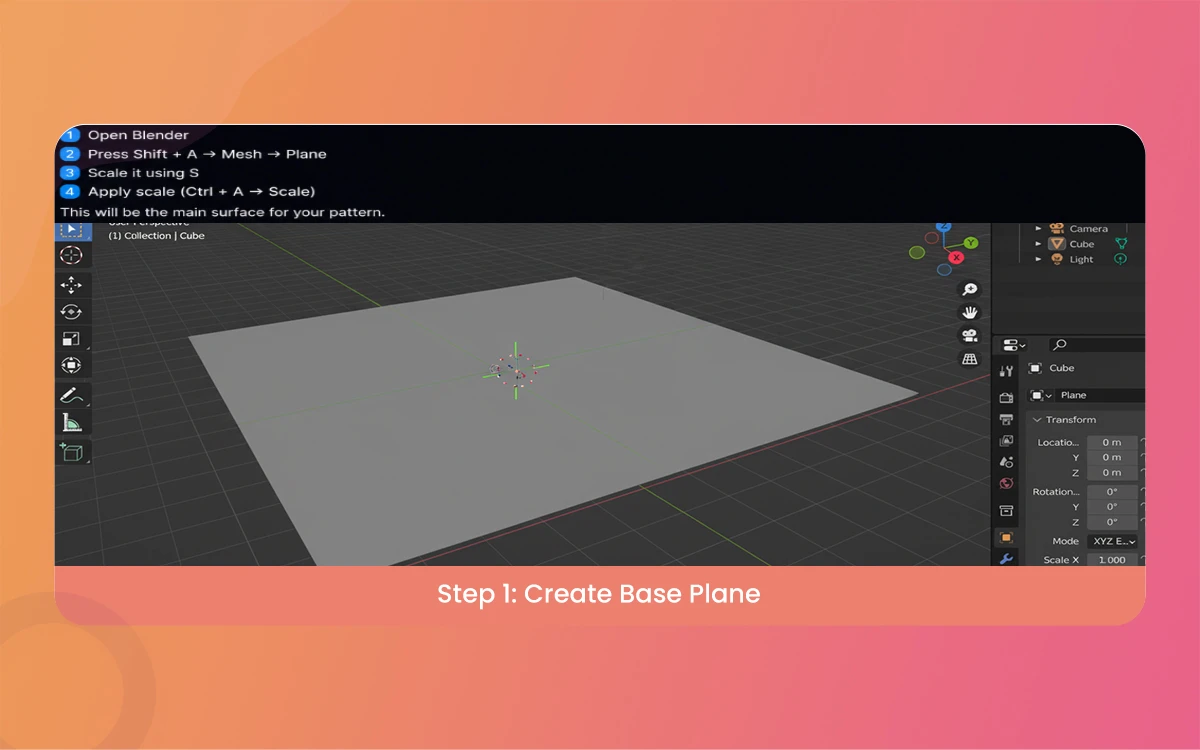
Add a plane (Shift+A > Mesh > Plane)
Extrude and shape the plane to create the leaf’s volume
Use the Loop Cut tool to add detail where needed
Sculpt the leaf tip to a fine point
3: Using the Skin Modifier (For Stylized Results)
Add a single vertex (Shift+A > Mesh > Single Vertex)
Extrude the vertex to create a path for your leaf
Apply a Skin modifier
Adjust vertex radius values (Ctrl+A in Edit Mode) to taper the leaf
Adding Detail and Realism
For more realistic leaves:
Add a subtle crease along the center of the leaf
Create a slight curvature that mimics how succulent leaves bend toward light
Add a very slight noise texture to break up perfectly smooth surfaces
Taper the leaf to be thickest at the base and thinnest at the tip
Step 3: Duplicating and Arranging Leaves
With a well-modeled leaf, we can now create the distinctive succulent pattern through strategic duplication and arrangement.
Creating the First Layer
Duplicate your original leaf (Shift+D) 5-8 times
Position leaves in a circular pattern around the center point
Rotate each leaf slightly outward from the center
Scale and adjust individual leaves for variation
Building Additional Layers
Duplicate the first layer of leaves
Scale this new group down by approximately 10-15%
Rotate the entire group slightly to offset it from the first layer
Raise the new layer slightly on the Z-axis
Continue this process, creating 4-6 layers total, with each new layer:
Smaller than the previous
Rotated slightly for offset
Positioned higher on the Z-axis
Succulent Plant in Blender By The Morphic Studio
Creating Natural Variation
To avoid an artificially perfect appearance:
Slightly adjust individual leaf positions
Vary the rotation of some leaves
Scale a few leaves differently
For more mature succulents, add slight imperfections to outer leaves
Step 4: Creating the Pot
A well-designed pot completes your Succulent Plant in Blender model and provides visual grounding.
Basic Pot Creation
Add a cylinder mesh (Shift+A > Mesh > Cylinder)
Scale the cylinder to match the proportion of your succulent
Enter Edit Mode and select the top face
Extrude inward to create the pot’s thickness
Extrude downward to create the inner cavity
Adding Pot Details
For a more interesting pot:
Add a bevel to the top edges (Ctrl+B)
Create a slight taper by scaling the bottom face
Model simple drainage holes in the bottom if desired
Add a subtle texture to break up perfectly smooth surfaces
Positioning the Plant and Pot
Position the succulent slightly inside the pot
Add a simple soil mesh (flattened sphere) if desired
Adjust the pot position for balanced composition
Step 5: Combining and Refining
At this stage, we need to evaluate the general model and make refinements.
Optional Component Joining
Depending on your workflow preferences:
Select all leaves and join them (Ctrl+J) for easier management
Alternatively, use collections to keep leaves separate but organized
Applying Modifiers
Review any pending modifiers (Subdivision Surface, etc.)
Apply modifiers where appropriate for final geometry
Consider using a simple Subdivision Surface modifier on the entire plant for additional smoothness
Final Proportional Editing
Enter proportional editing mode (O)
Make subtle adjustments to create a more natural, organic appearance
Check for any intersecting geometry and correct as needed
Succulent Plant in Blender By The Morphic Studio
Step 6: Materials and Shading
The right materials will bring your succulent to life with realistic visual properties.
Creating Leaf Materials
Basic Succulent Material
Create a new material for your leaves
Set the base color to a medium green (#5B8C5A or similar)
Add slight subsurface scattering (SSS) to mimic light penetration through fleshy leaves
Set a medium-low roughness value (0.3-0.5) for a slightly waxy appearance
Advanced Material Options
Add a subtle color variation using a noise texture
Create a gradient from base to tip for more realism
Add a very slight bump texture to create surface imperfections
Consider adding translucency for thin leaf edges
Creating Pot Materials
Create a new material for the pot
Choose either a terracotta color or a glazed ceramic appearance
For terracotta, add a noise texture for porosity
For glazed ceramic, increase specular and reduce roughness
Step 7: Lighting and Rendering
Proper lighting showcases the form and materials of your Succulent Plant in Blender model.
Setting Up Lighting
HDRI Environment Method
Add an HDRI environment map for natural lighting
Position your model to catch interesting highlights
Add a subtle fill light if needed
Three-Point Lighting Method
Add a basic light (main sunlight source)
Add a fill light to soften shadows
Add a rim light to highlight leaf edges and create separation
Camera Setup
Position the camera for an appealing composition
Consider a shallow depth of field for a realistic photography effect
Frame the entire succulent with some negative space around it
Render Settings
For final rendering:
Set an appropriate resolution (minimum 1920×1080)
Enable Cycles rendering engine for realistic light behavior
Set samples high enough for clean results (500-1000)
Consider using denoising for faster clean renders
Succulent Plant in Blender By The Morphic Studio
Tips for Specific Succulent Varieties
Echeveria
Flatter, wider leaves arranged in a tight rose-like pattern
Usually has a color gradient from green to pink or purple at the edges
Haworthia
Triangular, pointed leaves with translucent “windows”
Often has white striations or bumps
Aloe
Longer, spike-like leaves with serrated edges
More upright growth pattern
Sempervivum
Very tight, compact rosette
Small, numerous leaves with pointed tips
Common Mistakes to Avoid
Perfect Symmetry: Real plants have natural variation – add imperfections
Flat Colors: Use subtle texture variations for realism
Uniform Leaf Sizes: Outer leaves are usually larger than inner ones
Ignoring the Growth Center: All leaves should come out from a central point
Excessive Smoothness: Real plants have slight surface imperfections
Performance Optimization
For complex scenes or lower-end hardware:
Use duplicate linked leaves to save memory
Consider engage normal maps instead of high-poly geometry for details
Utilize instancing for multiple succulents in a scene
Immediate Table: Creating a Succulent in Blender
Step
Basic Tools/Actions
Tips for Success
Common Mistakes
Reference Gathering
Image search, plant photography
Get multiple angles, including top-down
Insufficient references
Leaf Modeling
Edit Mode, edge loops, Subdivision Surface
Focus on natural tapering and curvature
Over-complicating the leaf shape
Leaf Arrangement
Shift+D, rotate, scale
Follow spiral Fibonacci patterns
Perfect symmetry, uniform spacing
Pot Creation
Cylinder, extrude, bevel
Match pot style to plant type
Pot too large or small for plant
Refinement
Proportional editing, modifiers
Add subtle variations
Leaving perfect uniformity
Materials
Principled BSDF, SSS, textures
Add translucency for leaf edges
Flat, unrealistic colors
Lighting/Rendering
Area lights, HDRI, Cycles
Emphasize form with rim lighting
Flat lighting, harsh shadows
Finally
Mastering the creation of Succulent Plant in Blender opens up possibilities for botanical modeling, scene decoration, and portfolio development. The techniques covered here—from organic modeling to material creation—transfer well to other projects requiring natural elements.
Observation is the key to creating convincing organic models. Study how light interacts with real succulents and how their growth patterns develop. You can create increasingly realistic plant models for your 3D scenes with practice.
As you advance, consider exploring particle systems to create succulent gardens or use animation techniques to show growth over time. The skills you’ve developed here provide a solid foundation for further exploration in the fascinating world of 3D botanical modeling.
Additional Resources
Blender’s official documentation for modifier usage
Botanical reference books for plant structure Follow
Networked plant databases for additional succulent varieties
Material studies of translucent organic materials
Community forums for feedback on your succulent models
By following this guide, you’ve gained valuable organic modeling, material creation, and 3D composition skills that extend far beyond creating beautiful succulent plants.
Lubang Angin: How To Create Lubang Angin in 3D Using Blender [Guide]
Creating realistic architectural details is a big part of 3D modeling, especially when you are working on houses that have a tropical vibe. One of the most important parts of an Indonesian house design is the Lubang Angin. This is a ventilation hole that lets air flow through a building. It is not just about […]
April 30, 2026
Best Camera for Videography: 7 Ultimate Picks for Stunning Results in 2026
Welcome to The Morphic Studio. If you are looking to create amazing videos this year, you are definitely in the right place. The world of video creation is changing rapidly, so finding the best camera for videography can feel like a major task. Do not worry because we have done the hard work for you. […]
April 29, 2026
Script Timer: 1 Ultimate Tool for Perfect Video Pacing
Are you tired of recording a video only to find out it is three minutes too long? Or maybe you hired a voice actor who finished the script way faster than you planned. It is a common headache for creators. In 2026, video content is faster and more ruthless than ever before. If your pacing […]