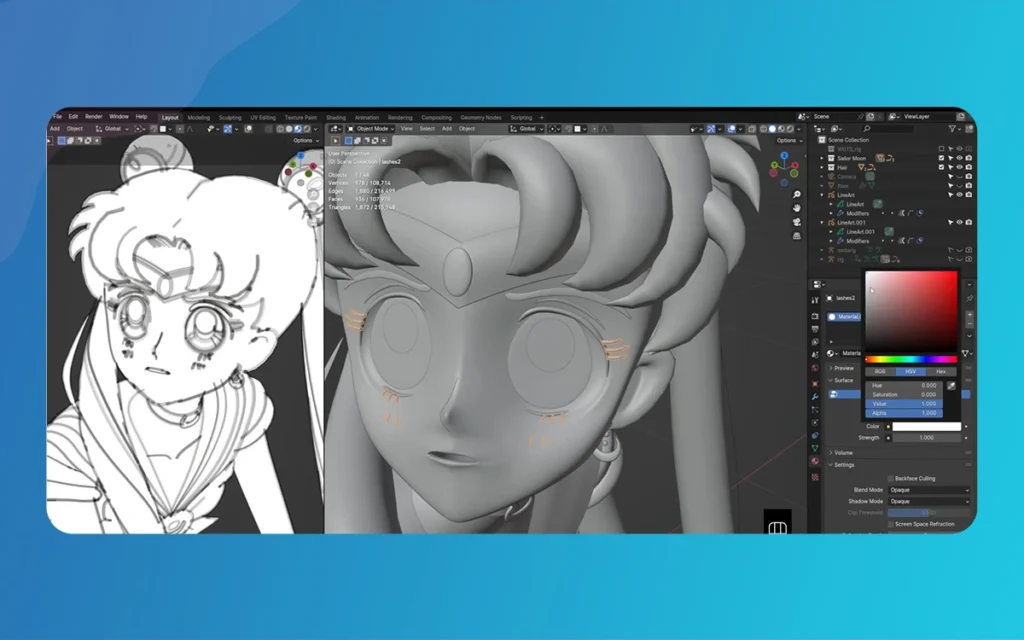
The boundary between 3D statistical art and traditional comic illustration continues to blur as artists discover innovative ways to merge these mediums. Blender, the powerful open-source 3D software, offers an impressive arsenal of tools that can transform sterile 3D renders into energetic, Hand Drawn Comic in Blender masterpieces. The Morphic Studio shares the information about the essential techniques, from basic toon shading to advanced post-processing effects, enabling you to create compelling comic-style artwork that rivals traditional hand-drawn illustrations.
Follow the Comic Attractive
Before diving into technical implementation, it’s crucial to understand what makes comic art visually distinctive. Comic illustrations typically feature flat, stylized shading with clear transitions between light and shadow areas. These bold outlines define shapes and silhouettes, limited color palettes that create visual harmony, and textural elements like crosshatching, halftone patterns, and paper grain effects.
The basic to successful 3D-to-comic conversion lies in abandoning photorealistic rendering principles in favor of stylized, graphic approaches that emphasize clarity and visual impact over natural lighting behavior.
Setting Up Your Workspace for Comic Creation
Choosing the Right Render Engine
While both Eevee and Cycles can produce comic-style results, each has distinct advantages. Eevee excels at real-time preview and offers the essential Shader to RGB node, making it ideal for toon shading workflows. Its faster render times allow for quick iteration during the creative process. Cycles, conversely, provides superior Freestyle support and produces more consistent, clean outline results, though at the cost of longer render times.
For beginners, starting with Eevee provides immediate visual feedback and easier experimentation with different comic styles.
Lighting Setup for Comic Effects
Proper lighting forms the foundation of effective comic styling. A single, strong Sun lamp positioned at a 45-degree angle creates the dramatic light-shadow separation essential for toon shading. Disable ambient lighting or keep it minimal to maintain stark contrasts. Consider adding a subtle fill light at low intensity to prevent completely black shadows while preserving the graphic quality.
Hand Drawn Comic in Blender By The Morphic Studio
Mastering Toon Shading Techniques
The Foundation: Diffuse BSDF and Shader to RGB
The cornerstone of comic-style shading in Blender begins with the Shader to RGB node, exclusive to the Eevee render engine. Start by replacing the default Principled BSDF with a Diffuse BSDF shader, which provides the flat, non-reflective base perfect for comic attractives.
Connect the Diffuse BSDF output to a Shader to RGB node input. This crucial conversion allows you to manipulate the lighting information as color data rather than shader information. The Shader to RGB node essentially “flattens” the three-dimensional lighting into a 2D representation, creating the foundation for stylized shading.
ColorRamp Magic: Creating Flat Tones
Feed the Shader to RGB output into a ColorRamp node, where the real magic happens. Change the interpolation mode from Linear to Constant – this single adjustment transforms smooth gradients into sharp, defined bands of color that characterize comic shading.
Experiment with different color stop positions to control where shadows and says appear. A typical setup might include a dark base color at position 0.0, a mid-tone at 0.4, and a says color at 0.8. The Constant interpolation ensures these transitions remain sharp and graphic rather than smooth and realistic.
Advanced Toon Shading Variations
For more sophisticated results, combine multiple ColorRamp nodes to control different aspects of your shading. Create separate ramps for diffuse shading, specular says, and rim lighting effects. Use Mix nodes to blend these elements, giving you granular control over your comic’s attractive.
Consider using the Fresnel input combined with ColorRamp nodes to create rim lighting effects that outline your characters with bright edges, a common technique in comic illustration that helps separate subjects from backgrounds.
Creating Professional Comic Outlines
Method 1: Solidify Modifier Approach
The Solidify Modifier provides one of the most reliable methods for creating consistent outlines. Duplicate your target object, then apply a Solidify Modifier with negative thickness values. This creates an “inside-out” shell around your original mesh.
Apply a pure black material to this outline object, make certain the material settings include Backface Culling enabled. This prevents the black outline from appearing on interior faces. Position the outline object slightly behind the main object in the material assignment order to ensure proper rendering priority.
Fine-tune the outline thickness by adjusting the Solidify Modifier’s thickness value. Typical values range from -0.01 to -0.1, depending on your model’s scale and desired attractive.
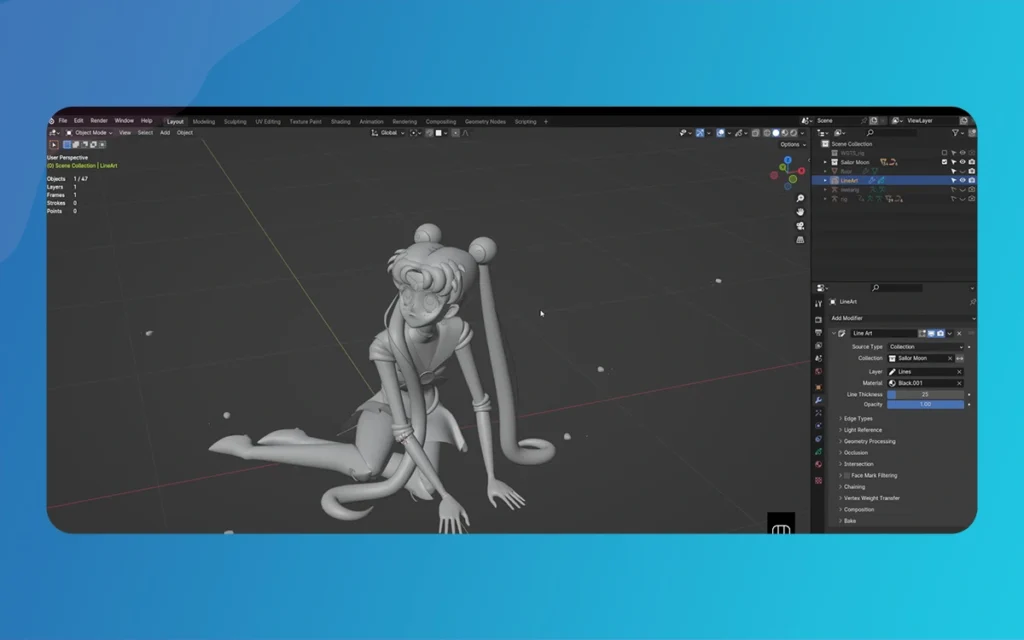
Method 2: Freestyle Line Art
Freestyle offers the most sophisticated automatic outline generation in Blender. Enable Freestyle in the Render Properties panel, then navigate to the View Layer Properties to access detailed controls.
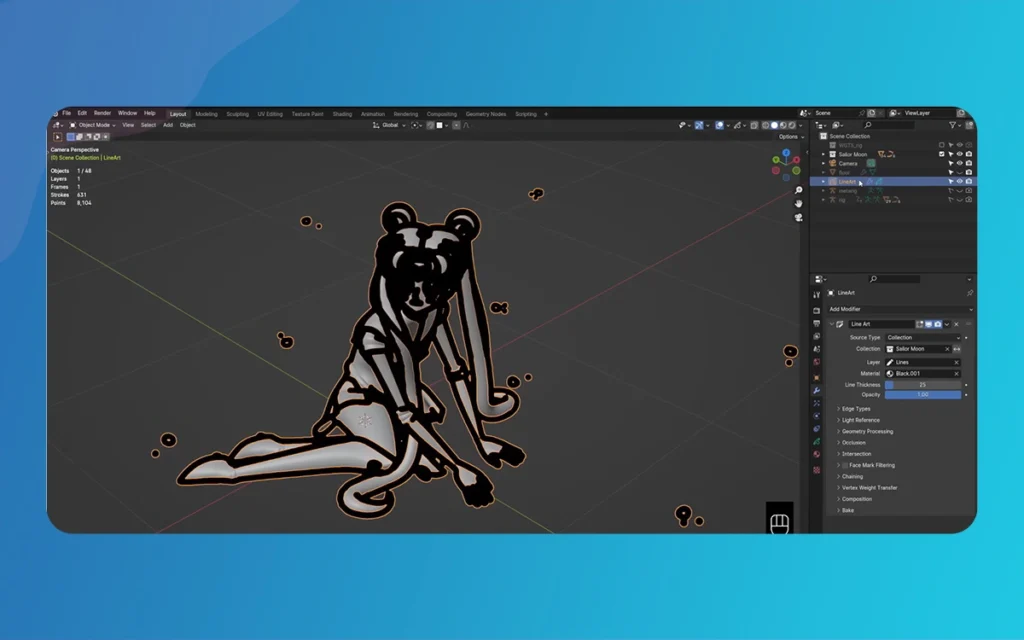
Freestyle excels at creating varied line mass based on geometric properties. Configure edge detection to emphasize silhouette edges, creases, and material boundaries. Adjust thickness modifiers to create energetic line mass that responds to geometry curvature, distance from the camera, or material properties.
The style modules allow for advanced customization, including line color variation, transparency effects, and even integration with texture maps for truly unique outline styles.
Method 3: Grease Pencil Integration
For ultimate creative control, Grease Pencil objects enable direct hand-drawing within the 3D environment. Create custom strokes that follow your model’s contours, or add expressive sketchy lines that enhance the hand-drawn attractive.
Grease Pencil strokes can be converted to mesh objects for integration with traditional rendering pipelines, or rendered directly using Blender’s specialized Grease Pencil materials. This hybrid approach combines the precision of 3D modeling with the organic quality of hand-drawn artwork.
Hand Drawn Comic in Blender By The Morphic Studio
Adding Texture and Organic Elements
Procedural Texture Integration
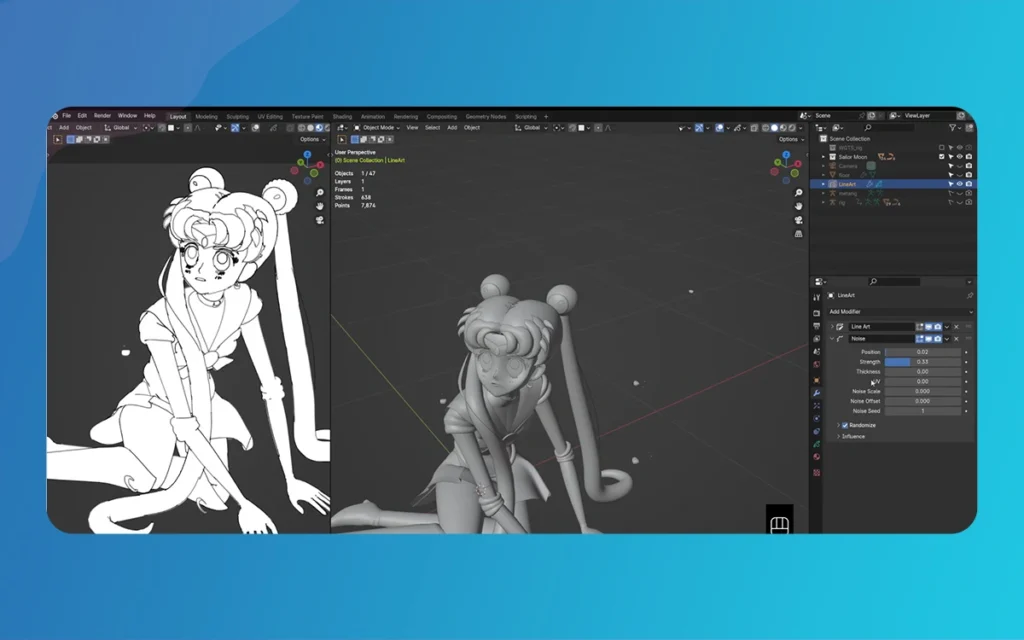
Enhance the hand-drawn feel by incorporating procedural textures that simulate traditional art materials. Use Noise textures combined with ColorRamp nodes to create paper grain effects. Apply these textures as subtle overlays that break up the statistical perfection of 3D renders.
Voronoi textures can simulate crosshatching patterns when properly configured. Use the texture coordinates as input to ColorRamp nodes set to Constant interpolation, creating distinct crosshatch regions based on lighting conditions.
Custom Brush Effects with Grease Pencil
Develop custom Grease Pencil brushes that replicate traditional comic art tools. Create brushes with varying opacity, texture, and stroke energetics to simulate ink pens, markers, and even watercolor effects. These brushes add authentic irregularity that computer-generated lines often lack.
Post-Processing for Comic Enhancement
Blender Compositor Workflows
Grip Blender’s built-in Compositor to add final polish to your comic renders. Combine your main render pass with outline passes using appropriate blending modes. Add halftone patterns using custom node groups that convert grayscale values into dot patterns characteristic of printed comics.
Color grading nodes help achieve the saturated, punchy colors typical of comic illustration. Use Saturation adjustments, Color Balance corrections, and selective color modifications to push your renders toward graphic perfection.
External Post-Processing Options
For advanced post-processing, consider exporting your Blender renders to specialized software like Photoshop, Krita, or Clip Studio Paint. These applications offer superior tools for adding traditional comic effects like speed lines, sound effects text, and complex halftone patterns.
The hybrid workflow of rendering base imagery in Blender and adding finishing touches in 2D software often produces the most convincing hand-drawn results.
Hand Drawn Comic in Blender By The Morphic Studio
Optimization and Workflow Tips
Performance Considerations
Comic-style rendering can be surprisingly demanding due to the multiple render layers often required. Optimize your scenes by using simplified geometry for outline objects, limiting texture resolution for elements that will be heavily stylized, and using Blender’s render layers to separate different elements for more efficient processing.
Asset Management
Develop a library of comic-style materials, node groups, and modifier settings for consistent results across projects. Save frequently used shader combinations as node groups that can be easily imported into new projects.
Hand Drawn Comic in Blender By The Morphic Studio
Troubleshooting Common Issues
Outline Flickering and Z-Fighting
When using multiple outline methods simultaneously, z-fighting between overlapping surfaces can cause flickering artifacts. Resolve this by carefully adjusting the offset distances between original and outline meshes, or by using Blender’s holdout materials to mask problematic areas.
Inconsistent Shading Results
Ensure your mesh topology supports clean shading by maintaining good edge flow and avoiding ngons in areas where smooth shading transitions are important. Use the Smooth/Flat shading options strategically to control how your toon shaders interpret surface normals.
Advanced Techniques and Creative Applications
Character Animation Considerations
When applying comic styling to animated characters, consider how outline thickness and shading transitions will behave during movement. Test your setups with simple animations to ensure visual consistency across different poses and camera angles.
Environment and Prop Styling
Extend your comic attractive further on than characters to entire environments. Use similar toon shading approaches for backgrounds, but consider reducing outline intensity and simplifying color palettes to maintain proper visual hierarchy.
Quick Reference: Comic Styling Techniques
Technique
Primary Purpose
Implementation Method
Best Use Cases
Toon Shader
Flat comic shading
Diffuse BSDF + Shader to RGB + ColorRamp (Constant)
Character base shading, simple objects
Solidify Outline
Consistent ink lines
Solidify Modifier, black material, negative thickness
Mechanical objects, clean character outlines
Freestyle
Automatic line art
Enable in Render Properties, customize line mass
Complex scenes, varied line mass
Grease Pencil
Custom hand-drawn lines
Direct 3D drawing, custom brushes
Organic details, sketchy effects
Procedural Textures
Paper/ink simulation
Noise + ColorRamp nodes as overlays
Background textures, material wear
Post-Processing
Final comic effects
Compositor or external software
Halftones, color grading, final polish
Finally
Transforming 3D models into convincing hand-drawn comics in Blender art requires a combination of technical knowledge and artistic sensibility. The techniques defined in this guide provide a solid foundation for exploring the intersection of 3D modeling and comic illustration.
Success in this field comes from following the goal that isn’t to replicate hand-drawn art perfectly but to capture its essential qualities: bold graphics, clear storytelling, and emotional impact. Blender’s flexible toolset allows for endless experimentation and refinement of your comic’s attractive.
Hand Drawn Comic in Blender By The Morphic Studio
As you develop your skills, think that the most compelling comic-style 3D art often combines multiple techniques rather than relying on a single approach. Don’t hesitate to break conventional rules if it serves your artistic vision – the best comic art has always pushed boundaries and challenged expectations.
Whether you’re creating standalone illustrations, animated shorts, or interactive media, these comic styling techniques will help you achieve professional results that stand out in an increasingly crowded statistical environment. The fusion of 3D precision with comic artistry opens new possibilities for visual storytelling that neither medium could achieve alone.
The Riau archipelago, often hailed as the cradle of Malay Society, is a land where art is never just decorative. It is a language. From the intricate threads of Songket Riau to the rhythmic strokes of wood carving (ukiran kayu), every curve and notch tells a story of faith, social harmony, and nature. Among the […]
March 9, 2026
Building Immersive Worlds: Integrating 2D Animations into Unity Game Design
In the modern gaming environment, the distinction between “2D” and “3D” has blurred into a spectrum of stylistic choices rather than a hierarchy of quality. While 3D graphics often chase the horizon of photorealism, 2D animation remains the heart of expressive, artistic, and tactile game design. From the hand-drawn elegance of Cuphead to the pixel-perfect […]
March 6, 2026
Mastering Skeletal Animation in Unity: A Complete Guide for Developers
Imagine breathing life into a lifeless 3D model, watching it stride confidently across your game world or execute a flawless combat combo. That’s the magic of Skeletal Animation in Unity, a powerhouse system that powers everything from indie platformers to AAA blockbusters. At its heart, skeletal animation grips rigs and Unity’s Mecanim framework to deform […]