Cute Baby Photos with a Smile, and then enhancing those snapshots with creative graphics, is an artistic and professional work. Pictures can be converted into Facebook posts, memoir books, photos on birth announcements and more captivating creations. The Morphic Studio shares the information about the ways you can professionally add graphics without losing the originality and beauty of the photo yourself.
How to add appealing smiles to baby photos graphics and work around the baby photo enhancement
Cute Baby Photos with a Smile can be truly amazing snapshots, graphics to be used simply complement the photo. The goal isn’t to improve the graphics to a baby photo or to add a cartoon image to a baby’s photo. Instead, it’s more of enhancing smiles with graphics and depicting the innocence of the baby photo, or soft imagery or graphic elements.
When seeing Cute Baby Photos with a Smile, being gentle is very important. The graphics should not feel tacked on. They should feel like they belong there with the image. Think about the graphics that fit the baby’s photos: playful, dreamy, soft, bright, or maybe even celebratory, to help with the image. The graphics that work best let people look at the baby’s face and provide active details that help tell stories and add emotions.
Best Ways To Add Graphics to Baby Photos
Choosing the right program affects how smoothly you can work and affects the results. Not every program is best for every user. Adobe Photoshop: The professional standard. Adobe Photoshop should still be the industry standard for professionally editing photos and adding graphics. No other program is better for any editing at any level. There is more control with editing than any other program, such as being able to make precise selections, control blending on multiple levels and more. Photoshop is better for every level of adding graphics to photos because the editing is done layer at a time, and you can move and change the graphics individually without changing the background image.
The software has many fancy features like content-aware tools, smart objects for non-destructive editing, and advanced tools for color changing. Although it’s more expensive and harder to learn than other apps, Photoshop is best for very serious photographers and designers.
Canva also makes graphics for its users and is very beginner-friendly. It’s very easy to use, thanks to its nifty drag-and-drop feature and lots of templates to work with. Users can get all sorts of graphics, stickers, and frames from the site to decorate baby pictures.
Graphics to Baby Photos
People are also able to work on the site from their phones, so they can create baby photos anywhere they want. People are also able to work on the site from their phones, so they can create baby photos anywhere they want.
GIMP is also an open-source software like Photoshop with lots of features. Just like Photoshop, it also supports layers and advanced selection tools. GIMP might not look as finished as other programs, but users work extremely hard to create lots of tutorials, plugins and other tools for the software.
Users on a stricter spending plan and needing more editing tools can use the GIMP software. It is a middle option when compared to base-level editing programs and top-tier ones.
Cute Baby Photos with a Smile
PhotoWorks is Simple and Easy to Use
One of the simpler editing programs is PhotoWorks. It has tools to add and edit graphics, lighting effects, and adjust portraits. This is a one-time payment, and for those who do not wish to have a subscription, it is a great option. It has great functionality and is easy to use, more than enough for those casual and more serious editing projects.
Instructions for Adding Graphics on Canva
As many of the people who use Canva do, you will go in, set your editing workspace, and customize the photo. You will have to do some very basic settings to do the baby photo editing with graphics.
How to Start Your Project
As the first step of your activity, you will want to start on Canva, make a new project, and upload a baby photo you want to use to edit. Check to make sure the custom dimensions you chose to use match your photo’s aspect ratio. If not, there could be problems with cropping. The photo will be the base of work, and make sure to position it at the base of the canvas; the canvas will be your workspace. In the center of the canvas will be the baby’s photo face, and it will be the center of the content.
Finding the right graphics
To find the graphics you want, you can click on the Elements tab on the left sidebar and search for graphics. Searching for things like “baby stickers,” “cute graphics,” “baby animal,” “sparkles,” “hearts,” or even just “baby” can get you good results. These searches can get you THOUSANDS of useful results. Just note that Canva tells you what is free to use, as they have a small label that says “Free” in the corner.
Keep in mind that note that background photos and selected graphics should work well together, and should not clash. Please make sure they are cohesive. Make sure you don’t add too many competing graphics as well, as it can create a very busy or “cluttered” look.
Adding and moving graphics
To add the selected graphic to the collage design, click on it. It will be added to and organized in a new layer, which you can move, rotate, and resize as you desire. You want to position it on the collage based on visual balance and emphasis to make sure it looks good, and the most important parts stand out to the viewer.
You can resize your pictures by dragging the corner handles and keep the pictures in proportion to one another. To rotate the images, grab the handle above and to adjust the position smoothly, use the arrow keys. To keep your images and graphics separate from your texts, use the opacity slider. This slider should range from 70 to 90% so that the images feel like one unit with the text.
Canva has many special adaptations that can help your images feel like they belong there. For instance, adding a glow or a shadow can give depth and a soft feel to all those images. To ease the integration of your images with the background, use the lift and the blur tools that Canva provides.
If you are adding images that already have decorations, consider enhancing those images and helping the integration of the images with your graphics. There are polygonal, ornate, and vintage design decorations you can choose from because Canva has many framed options.
Wrapping it Up and Pulling it Down
As final steps, look at your creation at actual size to see if anything is misaligned and to make any final size/position/opacity changes. Now, pull down your final creation by hitting the Share button, then Download.
Downloading your creation as a PNG file is best as it is high quality, transparent, and the graphics will remain sharp. However, if the file is too large for a website, it may have to be lowered to JPEG, and the file will have a colored, non-transparent background.
No download required, AI tools, mobile-friendly, basic graphic overlay
Easy
Web browser, iOS, Android
How to Pull Down Graphics to Add to your Photoshop Image
For the highest quality integration of graphics with a photo, Photoshop has no equal.
Setting Up Your Workspace
Opening Photoshop and your Cute Baby Photos with a Smile is done from the file menu. You should create a new layer and make your changes to that layer. This is non-destructive as it allows you to modify the picture freely, but you can always go back to the photo in its original state.
Outlining the light, colors, and composition of the photo taken is helpful. Make a note of where the natural light falls on the baby’s face, the colors that are most present in the picture, and the areas that are the most visually attractive. This will help with deciding where to put the graphics and will be a helpful guide.
Advanced work with pictures and depth of field will require the use of the Select Subject. The AI will recognize and target the baby. When the selection is created, use Select and Mask, and adjust the selection in the workspace. When adjusting is done, add a layer mask so the baby can be unchained from the background.
Cute Baby Photos with a Smile
This unchained background will let you adjust the position of graphics in depth and dimension, and in their composition, be positioned behind and/or in front of the baby.
Workspace
You’ll need to use File Place Embedded to enter graphics you’ve downloaded from the free web source. This captures the graphic as a smart object and lets you decrease and/or increase the size of the graphic freely. When the graphic is imported, you will see the transform handle function, so drag the graphic to the position you’d like to place it, then hit enter to store the graphic in that spot.
If you want to adjust the graphic again, you will need to stack the graphics on separate layers. Keep track of each graphics layer by giving the layers panel a name that describes the graphic. Keeping track of your layers like this will help you manage your graphics, especially as your project becomes more complex.
Color Matching and Blending
Graphics will look integrated and not pasted on if you match their colors to what you already have in your photo. To do this, choose a graphic layer and add a Gradient Map adjustment layer clipped to the graphic layer (Layer > New Adjustment Layer > Gradient Map, then check “Use Previous Layer to Create Clipping Mask”). Sample the photo and choose gradient colors using the eyedropper tool.
Now, to achieve a more natural integration, play around with some blend modes. There is a dropdown that has options like Lighten, Screen, Overlay, Soft Light, and more. Usually, Screen mode works for bright sparkly graphics, while Overlay is a more balanced blend that works with the tone and color of what’s underneath.
Adding Atmospheric Effects
For more realism and to create more dimension, you can add more glow effects to the graphics. To do this, duplicate the graphic layer, apply a Gaussian Blur (Filter > Blur > Gaussian Blur) to it with a radius that seems to match the size of the graphic, reduce the opacity, and then place it behind the layer. It will look like the graphic is emitting light. This really helps blend the graphic with the photo’s environment and helps it look like it is using the photo’s lighting.
To make shadow effects that ground the graphic within the scene, make a duplicate layer, fill it with a dark gray or black, gaussian blur it, reduce the opacity a lot, and place it under the original graphic, offset a bit. Change the angle and intensity according to the light direction, as in the original picture.
With Smiles Using Generative Tools
Photoshop updates now have Generative fill, which can be used to make or enhance a smile in a picture, thanks to the online tool. Select the area of the mouth with the Lasso tool, select Generative Fill in the task bar and then type the text prompt ‘make smile natural baby’ or leave this box empty for the tool to make enhancements on its own. Review the images Adobe generates and select the one that looks the most organic.
For people content, a nice workaround is to apply a smiley graphic near the mouth, drop the opacity of this layer and use blending modes. This is a great way to add elements to an image without suggesting or creating a smile, to help enhance or add brightness to the image if needed.
Where to Access the Free Graphics for Enhancing Baby Photos
Having access to various free baby-themed pod images can be great, as it allows a lot of creative freedom without breaking the bank. Many sites host a variety of pod baby images within their resource library.
Freepik: Unlimited Creative Ease
Freepik has millions of free vectors, photos, and graphic elements and even has many extensive collections devoted just to baby-related content. Type, “baby stickers,” “nursery clipart,” “cute baby vectors,” and “children graphics,” and stack even cuter options onto your photos. Freepik requires attribution for free content, so credit Freepik in your description or caption when you share it.
If you become a premium subscriber, you can access more exclusive content and create even more graphics without having to give attribution, but just sticking with the free library is more than enough for most personal projects.
Vecteezy: Free Vector Graphics
Vecteezy offers free, high-quality vector graphics that can scale infinitely without any loss of quality and are therefore more than perfect for a project of any size! Along with their graphics, they include transparent PNG files of cute baby images, decorative borders, themed backgrounds, including cute overlay elements. You can filter your search results by style, color, and even the you can filter the results by style, color, and the format you want.
Vecteezy, just like Freepik, operates under a freemium model, so most of their basic content is free but requires attribution, while their premium model does not require attribution and gives you access to more content.
Pixabay and Pexels: Royalty-free Images
Primarily focused on photos, Pixabay and Pexels also provide graphics and illustrations completely free to use and without needing any attribution. Their collections have plenty of cute, whimsical, usable baby photo enhancement elements, especially overlays and textured backgrounds.
Flaticon: Icon-Based Graphics
Flaticon has thousands of minimalist modern icons, perfect for graphics for modern minimalist designs. Baby-related icons include bottles, toys, baby animals, and decorations and are made in beautiful, clean, and scalable vector formats.
Expert tips to help create smiles and attraction.
Enhancing baby photos involves mastery of technical skills, but successful enhancement involves psychology and design principles. These will elevate your design to a stamp of recommendation.
Intende Graphic Placement
Position your graphics to deliberately steer your viewer as the focus of their sight, rather than distracting attention. For baby pictures, the most natural placement of decorative elements for framing the most smiley baby faces and mischievous cheeks is right beside their eyes and cheeks. This will not cover the adorable features and hollow-chaned cheeks, but will reinforce the bright, smiley faces, and encourage attention to the graphics used. Also, a placement of decorative graphic elements that is too distant fails to connect with the subject.
Make visual circles or triangles with your graphics. These parts, sections, or elements of the design are more evenly distributed and feel balanced. This keeps the viewer’s eye flowing and moving around the image before landing on the baby’s face as the center of attention.
Keeping the details of a baby’s face
It can be tempting to modify a baby’s face a lot to make it look different and to cover all its imperfections. The best baby photos that get an enhancement done keep the baby looking the same and add a little creativity. The area around the eyes, nose and mouth should be left clear and not covered with any graphics. If graphics have to be used, they should frame and not cover the face.\
It can be tempted to displace the natural facial expressions on the baby’s face with smile graphics, but it’s best not to. Instead of putting the smile graphics on the mouth to cover the smile, it’s best to place the smile graphics around the mouth to add enhancement. Also, there may be a sparkle on the mouth that is an enhancement and not a cover-up.
Adding graphics to photos will require some creativity, and one of these ways is to ensure that the graphics match the light in the photo. Some light may come from shadows on one side of a face, and if a face is lit very softly, the light is not coming from that side. Each click of a photo will have to be adjusted, and some of the light may come from the side, the front, below, or above.\ If light is coming from one side, have brightened that side and darkened the opposite side in the photo to create the effect of the light source that is coming from one side. Good shading to create depth will make the graphics look like they really belong.
Cute Baby Photos with a Smile
Choosing Graphics
Pick out images that match the color tones of the photograph you’re editing\photo of the same tones. If your photo is warm, like yellows and oranges, warm, cute graphics will work. Just like on a color wheel, stay away from colors that are the opposite, like purple, blue, and green. It will not establish a good color palette if they’re used.
If you’re working with graphics, use a color adjuster and match the color tones of your photograph. It will make the images feel as if they are all in the same family and belong on the same page.
Sizing
When selecting graphics that go with the photograph, make sure to size the images accordingly to the photograph. If a fit is not made with the other images on the page, it looks as if the smaller images are simply an error. Too large images are likely distracting and make the photograph difficult to comprehend. To avoid mistakes, make sure the largest graphic is no more than one-fifth of the size of the general page, unless you’re using it as a border.
Make sure to keep the ‘weight’ of the graphics and other images equal. To do this, you can adjust the smaller graphic images on one side, and then the other side can contain a larger image.
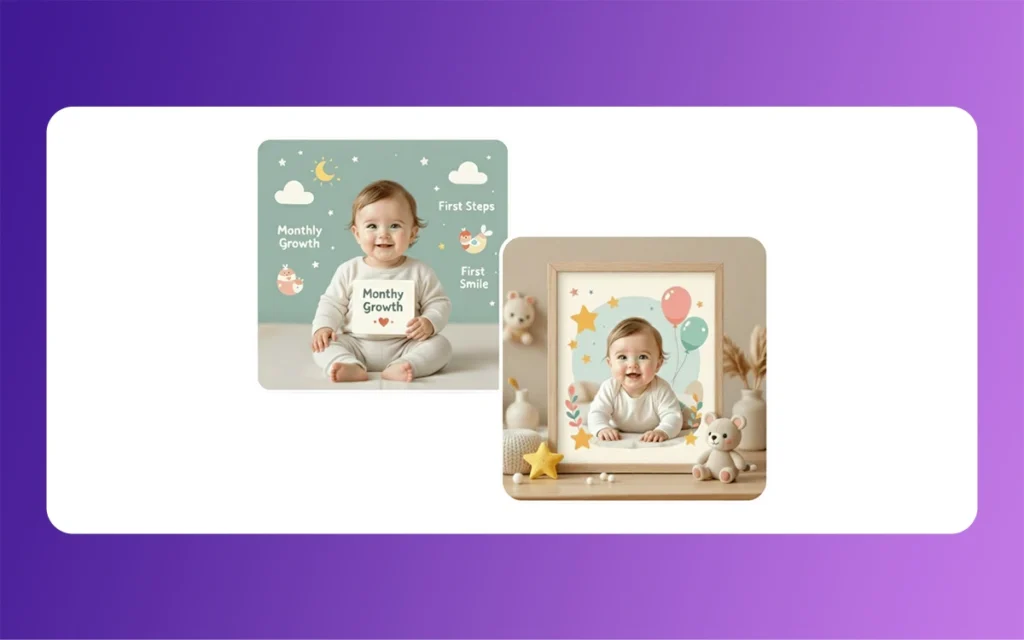
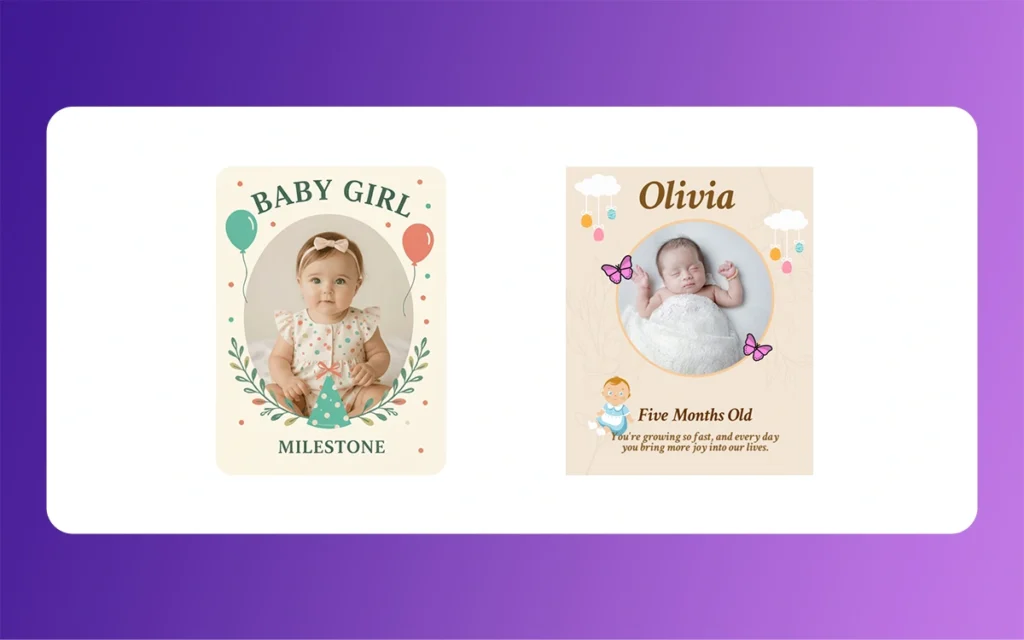
Baby Photo Graphics Ideas
Growing Milestones
When babies get older, they catch every little accomplishment, like every photo with a different smile, first tooth, or even month-by-month ages. If each picture is getting changed up with these little graphics, it is nice to keep a theme for all these photos to keep parents happy.
Seasonal & Holidays
Cute Baby Photos with a Smile always look nice with little themed graphics tailored to the time of year, like snowflakes for winter, flowers for spring, summer suns, and autumn leaves. Pumpkin for Halloween and hearts for Valentine’s. These little photos make great holiday keepsake cards to send to the family.
Creative Designs
To add more personality and fun to photos, babies can be characters in a story with added graphics. For example, for a calm, dreamy, outdoor photo, add stars, moons, and clouds, while for a happier, wild adventure, add flowers, sunshine, and silly animals.
Modern & Minimalistic
Some more graphic decoration is in order for a photo; this can range from different geometric shapes to a more modern approach with softer colors and calm overlays.
Common Mistakes to Avoid
Too Many Graphics
One of the most common things people do wrong when they try to enhance baby photos is adding too many graphics. They are visually distracting and take away focus from the photo. Less is more. Instead of having many graphics scattered throughout the image, use 3-5 graphics and arrange them more strategically.
Not Getting Images with Good Quality
Using low-quality images when layering them over ones with high quality is detrimental when trying to enhance images. Always make sure the graphics you use are high quality with many pixels, so your image does not look over-scaled and blurry.
Different Styles of Graphics
Using graphics that do not match stylistically, whether they be photos that are very realistic with a very flat illustration, creates a very wrong look for your photo. Make sure to keep graphics that use the same style and have the same general look.
Not Matching the Colors
Using graphics that do not have the same color tone. If you use slightly cooler blue-toned graphics, they will not match the warm tones of the photo. Make sure to match the color tone with the to match the visually with the graphics of a photo they are being placed over.
Finally
Using graphics to enhance Cute Baby Photos with a Smile is a special and unique way to combine technology and creativity, along with emotional value. Graphics can make a photo more unique.
The most successful efforts come from enhancing what you already have, rather than trying to change everything. When editing baby photos, try to capture the smile, gentleness, emotion, and everything else you want to keep from the original. Some programs you can use to do baby photos are Canva and Photoshop. This guide is a great start for either program to enhance your baby photo editing skills.
The best Cute Baby Photos with a Smile editing captures the magic and charm of the baby, and then enhances the photo with graphics that help tell a story or capture an emotion. The best way to start is with small graphics and then develop your own style and aesthetic.
With practice, the ways you can customise and uniquely express yourself with Cute Baby Photos with a Smile are limitless. For every baby photo, you can create a beautiful photo that tells a story and helps families remember all the joys of early childhood.
Adobe Character Animator: Master 5 Effortless Animation Tricks
Ever look at a cartoon and think, “I wish I could do that,” but feel overwhelmed by drawing every frame? You are not alone. Animation used to be this scary, mountain-high task that required years of training and a lot of patience. But things have changed. With Adobe Character Animator, the game has shifted from […]
March 20, 2026
Cartoon Animator 5: 2D Animation Software for Cartoon Makers
Hello everyone, and welcome back to The Morphic Studio. Today, I am super excited to talk about a software that has completely changed how we look at statistical art. If you have been searching for a reliable way to bring your drawings to life, you are absolutely in the right place. We are going to […]
March 19, 2026
Which Software is Best to Create Cartoon Characters For Beginner and Advanced
Choosing the right tool to bring your imagination to life can feel like a maze. Whether you are a hobbyist looking to doodle your first mascot or a professional animator aiming for a 2026 blockbuster look, the software you pick defines your workflow. This year, the environment of statistical art has shifted significantly with the […]