Architectural visualization has become increasingly sophisticated with the advancement of 3D software, and Blender 4.3 stands at the forefront of this evolution. Creating classic style arch moldings—those elegant curved decorative elements that have adorned buildings for centuries—can raise your architectural projects from simple structures to masterpieces of statistical craftsmanship. The Morphic Studio shares the information about creating stunning Classic Style Arch Moldings using Blender 4.3’s powerful modeling tools and enhanced features.
Introduction to Arch Moldings in Architectural Design
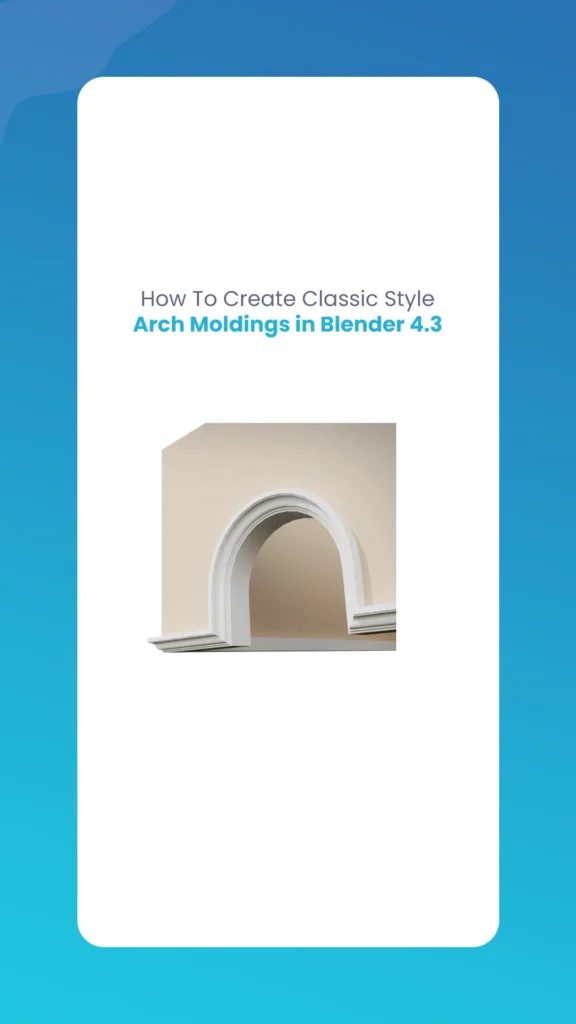
Classic Style Arch Moldings represent the pinnacle of architectural ornamentation, combining structural functionality with attractive appeal. These decorative elements frame doorways, windows, and passageways and have been essential components of classical architecture since ancient times. In the statistical realm, accurate recreation of these details can make the difference between a convincing architectural visualization and a justly adequate one.
Blender 4.3 introduces several enhancements that make creating these intricate details more accessible. The improved bevel modifier, enhanced curve tools, and refined workflow optimizations enable artists to achieve professional-quality results efficiently. Whether you’re working on historical recreations, modern interpretations of classical designs, or entirely new architectural concepts, mastering arch molding creation will significantly expand your creative capabilities.
Classic Style Arch Moldings By The Morphic Studio
Setting Up Your Workspace
Before diving into the modeling process, establishing an organized workspace is crucial for efficient workflow. Begin by making sure you have Blender 4.3 installed with its latest updates. Configure your interface to display the necessary panels: the 3D Viewport, Properties panel, and Modifier stack should be readily accessible.
Consider setting up custom keyboard shortcuts for frequently used tools such as Bevel (Ctrl+B), Inset Faces (I), and Bridge Faces. Enable the appropriate add-ons, particularly those related to architectural modeling and curve tools. The “Extra Objects” add-on provides additional primitive shapes that can be valuable for architectural work.
Set your scene units to match your project requirements—typically meters for architectural visualization. This ensures that your dimensions translate accurately to actual scales, which is essential when creating moldings that maintain proper proportions.
1. Prepare the Base Geometry
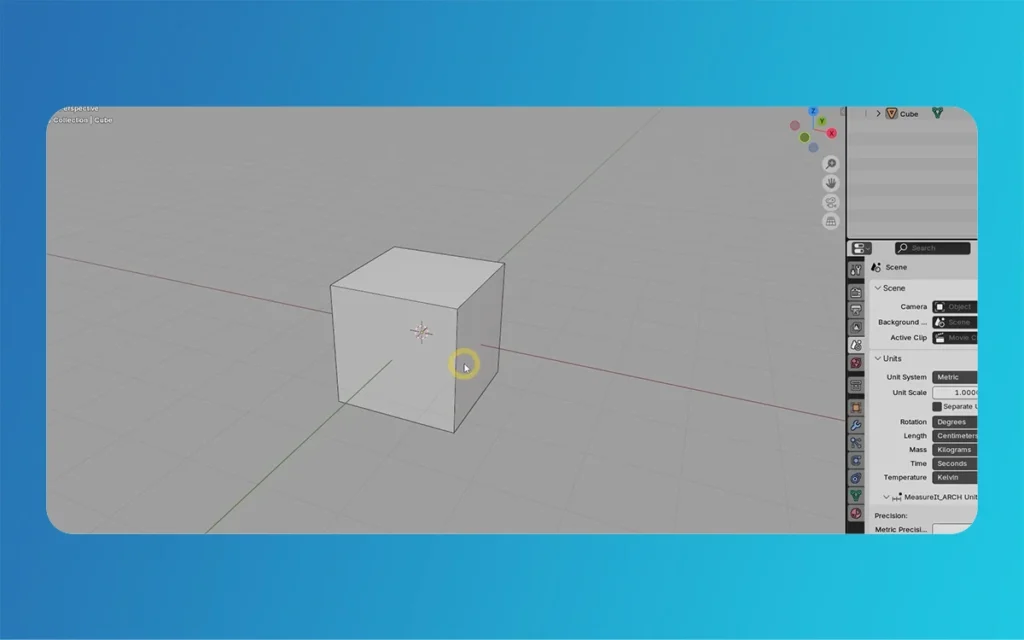
The foundation of any successful Classic Style Arch Moldings begins with proper base geometry. Start with Blender’s default Cube object, which serves as the starting point for your architectural element. This simple primitive will be transformed into the complex structure that houses your arch.
Select the cube and enter the Properties panel to adjust its dimensions. For a typical architectural application, set the width to 3 meters and the length to 5 meters. The height can remain at the default 2 meters initially, though you may adjust this based on your specific design requirements. These dimensions create a rectangular base representing a wall section or architectural facade.
After setting the dimensions, it’s crucial to apply the scale transformation. Press Ctrl+A and select “Scale” from the menu. This operation resets the object’s scale values to 1.0 while maintaining its visual size. Applying scale is essential because it ensures that modifiers and subsequent operations behave predictably. Without this step, bevels might appear distorted, and measurements could be inaccurate.
Classic Style Arch Moldings By The Morphic Studio
2. Create the Arch Opening
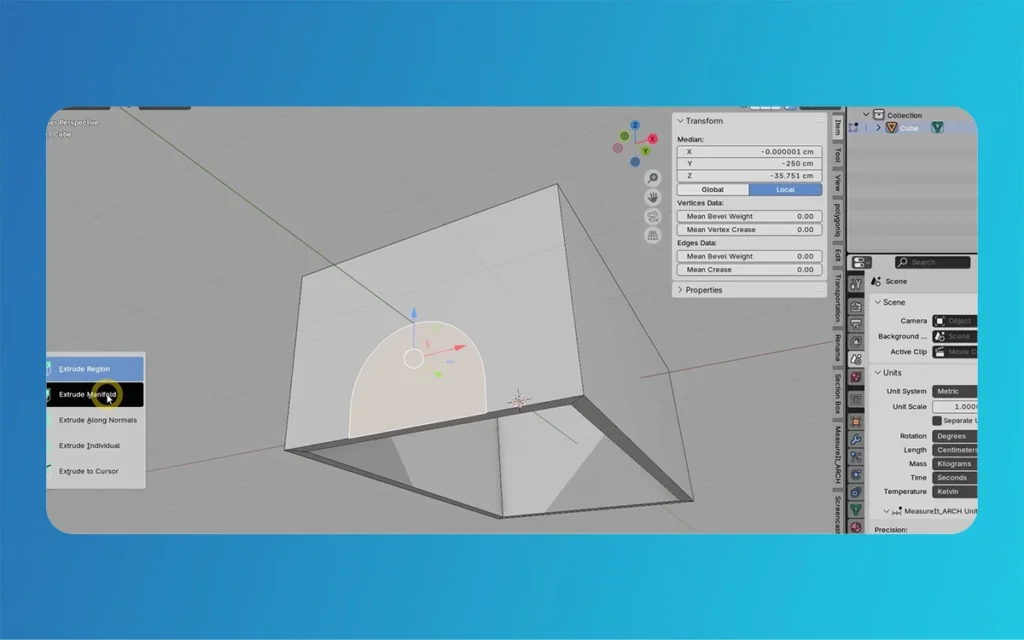
Creating the arch opening requires precise manipulation of the cube’s geometry. Enter Edit mode (Tab) and switch to Face Select mode (3). This allows you to select entire faces rather than individual vertices or edges, making the selection process more efficient.
Select both the top and bottom faces of your cube. You can do this by clicking on the top face, holding Shift, and clicking on the bottom. With both faces selected, activate the Inset Faces tool by pressing I. This tool creates a smaller face within each selected face, effectively creating a frame-like structure.
Move your mouse to adjust the inset amount—approximately 15 centimeters works well for most architectural applications. This creates a border around your structure, eventually becoming the wall thickness. The precise measurement can be monitored in the viewport overlay or by typing the exact value.
With both inset faces still selected, execute the Bridge Faces command. Access this through the Face menu or by searching for it in the operator search (F3). Bridge Faces connects the two selected faces, creating a hole through your geometry. This operation transforms your solid cube into a hollow frame, forming the basic structure for your arch opening.
Classic Style Arch Moldings By The Morphic Studio
3. Shape the Arch Curve
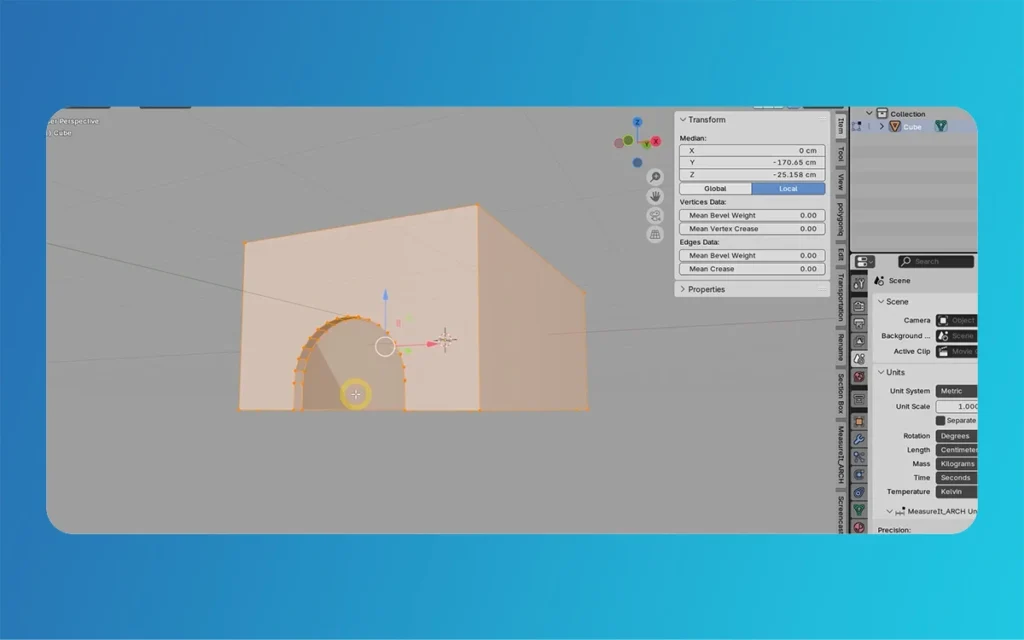
The transformation from a rectangular opening to an elegant arch requires careful attention to curve creation. Several methods exist for achieving the desired arch shape, each with advantages.
The edge duplication method involves selecting the top edge of your rectangular opening and duplicating it (Shift+D). This duplicated edge can then be moved upward and shaped into an arch using proportional editing (O). Enable proportional editing and adjust the influence radius to create smooth, natural curves. Use the Scale (S) and Grab (G) tools to refine the arch shape.
For more precise control, consider using a circle mesh as a guide. Add a circle with 64 or more segments to ensure smoothness. Position and scale this circle to match your desired arch dimensions. The high segment count prevents visible faceting in the final result. You can then use this circle as a reference for shaping your arch or directly incorporate it into your geometry using boolean operations.
Advanced users prefer converting edge loops to curves for maximum flexibility. Select the edge loop that defines your arch shape and convert it to a curve object (Alt+C → Curve from Mesh). This curve can be edited with bezier handles for precise control and later used as a path for more complex molding profiles.
Method
Advantages
Best Use Case
Edge Duplication
Quick and intuitive
Simple arch shapes
Circle Mesh Guide
Precise circular arcs
Perfect semicircular arches
Curve Conversion
Maximum control
Complex or unique arch profiles
Boolean Operations
Non-destructive
Iterative design process
4. Add the Molding Profile
The molding profile transforms a simple arch into an ornate architectural feature. Select the edge loop at the base of your arch—this is where the molding will be applied. Activate the Bevel tool (Ctrl+B) and begin adjusting the bevel width.
Blender 4.3’s enhanced bevel modifier offers unprecedented control over profile shapes. In the tool options (accessible in the bottom left of the viewport), locate the Profile Type dropdown. Select “Custom” to access preset profiles or create your own. The “Cornice Molding” preset provides an excellent starting point for classical architecture.
Increase the segment count to ensure smooth curves in your molding. A value of 24 or higher typically produces professional results without excessive geometry. The segment count directly affects the smoothness of curved sections in your profile, so don’t hesitate to use higher values for hero assets or close-up shots.
For custom profiles, use the profile editor to create unique molding shapes. Draw your profile using control points, adjusting their positions and handle types to achieve the desired curvature. Save successful profiles for future use across projects—this builds a library of reusable architectural elements that can significantly speed up your workflow.
5. Refine and Smooth the Model
Post-modeling refinement raises your arch from good to exceptional. Begin by analyzing your geometry for unnecessary complexity. Select edge loops that don’t contribute to the final shape and use Dissolve Edges (Ctrl+X) to remove them. This optimization improves viewport performance and simplifies further editing.
Configure shading settings to enhance visual quality. In the Object Properties panel, enable Auto Smooth and set an appropriate angle threshold—typically between 30 and 45 degrees for architectural elements. This creates the illusion of smooth surfaces while maintaining sharp edges where intended.
Consider adding decorative elements to enhance authenticity. Classical moldings often feature rosettes, leaves, or geometric patterns at regular intervals. Use the Array modifier combined with the Curve modifier to distribute these elements along your arch. Create a single decorative element and let modifiers handle the repetition and deformation.
6. Use Multiple Bevel Modifiers (Optional)
Blender 4.3’s ability to stack multiple bevel modifiers opens new possibilities for complex molding details. This technique allows different edge groups to receive unique treatments while maintaining a non-destructive workflow.
Assign bevel mass to specific edges using the Edge menu or by pressing Ctrl+E and selecting “Edge Bevel Mass.” Values range from 0.0 to 1.0, with higher values receiving more benefit. Create vertex groups for different molding sections, allowing independent control over each area.
Stack bevel modifiers in the modifier panel, setting each to affect only edges with specific mass ranges. This creates layered details impossible to achieve with a single modifier. For example, the main molding profile might use one modifier, while corner details use another with different settings.
Classic Style Arch Moldings By The Morphic Studio
Tips for Professional ResultsBy The Morphic Studio
Grip Non-Destructive Workflows
Hold modifier-based modeling whenever possible. The combination of Mirror, Array, and Bevel modifiers creates flexible designs that can be adjusted without starting over. This approach is particularly valuable when working with clients who may request changes.
Build a Profile Library
Invest time in creating and organizing custom bevel profiles. Categorize them by style (Gothic, Renaissance, Baroque) and function (cornice, base, capital). This library becomes an adjective resource that grows with each project.
Optimize Segment Counts
Balance visual quality with performance by adjusting segment counts based on viewing distance. Hero elements viewed up close require higher segment counts, while background elements can use lower values. Use the Subdivision Surface modifier selectively for additional smoothness only where needed.
Material Considerations
Plan for materials early in the Classic Style Arch Moldings process. Sharp edges catch light differently than rounded ones, affecting how materials appear. Consider adding slight bevels to all edges—even those that appear sharp—to improve light interaction and prevent rendering artifacts.
Advanced Techniques
Parametric Molding Systems
Create procedural molding systems using Geometry Nodes. This approach allows for energetic adjustment of molding complexity, profile variations, and decorative element distribution. Build node groups that accept curve inputs and generate complete molding systems automatically.
Historical Accuracy
Research period-appropriate molding profiles for historical projects. Renaissance moldings differ significantly from Art Deco examples. Following these distinctions adds authenticity to your work and demonstrates professional attention to detail.
Performance Optimization
Implement magnitude-of-detail (LOD) systems for complex scenes. Create simplified versions of your moldings for distant views and high-detail versions for close-ups. Use Blender’s collection system to organize these variants efficiently.
Troubleshooting Common Issues
Bevel Artifacts
If bevels appear distorted or uneven, check for non-uniform scale, overlapping vertices, or extreme angles in your geometry. The Mesh → Clean Up menu provides tools for addressing these issues automatically.
Profile Distortion
Custom profiles may distort at sharp corners. Adjust the miter settings in the bevel modifier or consider using separate geometry for corner pieces. Sometimes splitting complex moldings into multiple simpler elements produces better results.
Performance Degradation
High segment counts can slow viewport performance. Use modifier visibility toggles to hide complex modifiers while working on other aspects. Consider using proxy objects or simplified preview modes during the design phase.
Classic Style Arch Moldings By The Morphic Studio
Finally
Creating Classic Style Arch Moldings in Blender 4.3 combines traditional architectural knowledge with modern 3D techniques. The software’s enhanced bevel system, improved curve tools, and flexible modifier stack provide all the necessary tools for producing professional-quality architectural elements.
Success in architectural modeling comes from following the technical tools and the design principles behind classical architecture. The techniques covered in this guide form the foundation for creating arch moldings and architectural vocabularies that can enhance any visualization project.
As you continue developing your skills, experiment with combining these basic techniques in new ways. Try creating Gothic pointed arches, Moorish horseshoe arches, or modern interpretations of classical themes. The principles remain consistent while the creative possibilities are endless.
Think of that architectural visualization as being, in the end, about storytelling through space and form. Every molding and every decorative element contributes to the narrative of your design. Master these technical skills, but never lose sight of the artistic vision that drives great architecture.
Continue practicing these techniques, build your library of profiles and presets, and most importantly, study examples of classical architecture. With dedication and the powerful tools provided by Blender 4.3, you’ll soon be creating architectural visualizations that rival professional studio work.
Building Immersive Worlds: Integrating 2D Animations into Unity Game Design
In the modern gaming environment, the distinction between “2D” and “3D” has blurred into a spectrum of stylistic choices rather than a hierarchy of quality. While 3D graphics often chase the horizon of photorealism, 2D animation remains the heart of expressive, artistic, and tactile game design. From the hand-drawn elegance of Cuphead to the pixel-perfect […]
March 6, 2026
Mastering Skeletal Animation in Unity: A Complete Guide for Developers
Imagine breathing life into a lifeless 3D model, watching it stride confidently across your game world or execute a flawless combat combo. That’s the magic of Skeletal Animation in Unity, a powerhouse system that powers everything from indie platformers to AAA blockbusters. At its heart, skeletal animation grips rigs and Unity’s Mecanim framework to deform […]
March 5, 2026
A Professional’s Handbook to Rigging and Animating 2D Assets in Unity
Game development is always changing, and the difference between 2D and 3D workflows is becoming less clear. If you have experience with 3D tools like Blender, Maya, or 3ds Max, Unity’s Animating 2D Assets package can help you make the switch to 2D more easily. Rather than using frame-by-frame sprite swapping, many developers now use […]