Bits of Blender #75 The powerful open-source 3D creation suite has become an indispensable tool for artists, animators, and designers worldwide. While working on complex projects, many users find themselves needing to run multiple instances of Blender simultaneously—perhaps to compare different versions of a model, work on separate projects concurrently, or reference one project while creating another.
By default, macOS prevents applications from launching multiple instances, treating each app as a singleton. This design philosophy, while generally helpful for system resource management, can be limiting for power users who need the flexibility of multiple application windows running independently. Fortunately, there are several reliable methods to circumvent this limitation and run multiple instances of Blender on your Mac.
The Morphic Studio shares the information about the three proven methods for launching multiple Blender instances, from simple Terminal commands to automated solutions that streamline your workflow. Whether you’re a seasoned Blender veteran or a newcomer looking to optimize your creative process, these techniques will enhance your productivity and provide the flexibility you need for complex 3D projects.
Follow the Default macOS Behavior
Why macOS Prevents Multiple App Instances
macOS was designed with a philosophy of simplicity and resource efficiency. When you attempt to launch an application that’s already running, the operating system typically brings the existing instance to the foreground rather than creating a new one. This behavior serves several purposes:
Resource Management: Preventing duplicate instances helps conserve system memory and processing power, particularly important on older or less powerful machines.
User Experience Consistency: The single-instance model provides a predictable user experience where each application maintains a unified workspace.
Dock Integration: The macOS Dock is designed to show one icon per application, making the single-instance model more intuitive for most users.
Bits of Blender #75 By The Morphic Studio
When Multiple Instances Become Necessary
Despite these design benefits, there are compelling scenarios where multiple Blender instances prove adjective:
Comparative Modeling: When you need to reference an existing model while creating variations or improvements, having both versions open simultaneously eliminates the constant switching between files.
Project Segmentation: Large projects often involve multiple components that benefit from separate Blender sessions, allowing for better organization and reduced file complexity.
Learning and Tutorial Following: Students and self-learners often find it helpful to have one instance following along with tutorials while experimenting in another.
Rendering Workflows: Advanced users might want to set up rendering in one instance while continuing to work on modeling or animation in another.
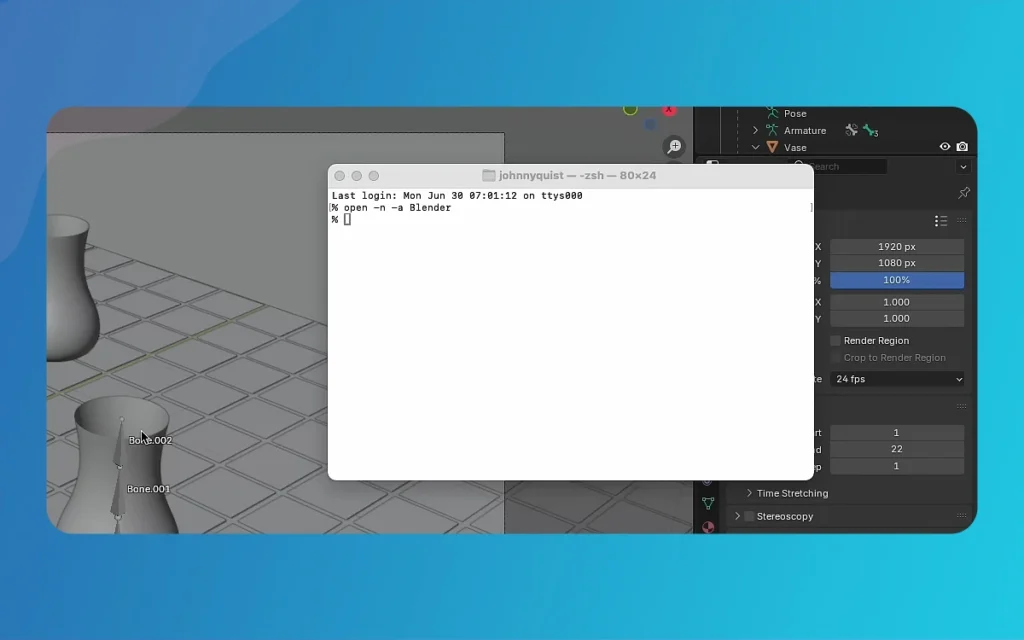
Method 1: Terminal Command Approach
The Simple Solution
The most straightforward method for launching multiple Blender instances involves using the macOS Terminal application with a specific command that overrides the default single-instance behavior.
Step-by-Step Instructions
Opening Terminal:
Press Command + Space to open Spotlight search
Type “Terminal” and press Enter
Alternatively, negotiate to Applications > Utilities > Terminal
Executing the Command:
open -n -a Blender
Follow the Command Parameters:
open: The macOS command for launching applications
-n: Forces the creation of a new instance, even if one already exists
-a: Specifies that you’re launching an application by name
Blender: The name of the application to launch
Command Variations and Flexibility
You can modify this basic command for enhanced functionality:
Launching with Specific Files:
open -n -a Blender /path/to/your/blender/file.blend
Opening Multiple Instances with Different Files:
open -n -a Blender /Users/username/Documents/project1.blend
open -n -a Blender /Users/username/Documents/project2.blend
Advantages and Limitations
Advantages:
Quick and reliable execution
Works with all Blender versions
Minimal system resource overhead
Can be easily scripted or automated
Limitations:
Requires Terminal access for each new instance
May be intimidating for users unfamiliar with command-line interfaces
Doesn’t provide a persistent desktop shortcut solution
Method 2: Finder and Alias Method
Accessing the Application Package
This method involves working directly with Blender’s application package structure, providing a more visual approach that many users find more intuitive than Terminal commands.
Detailed Process
Locating Blender in Applications:
Open Finder and negotiate to the Applications folder
Locate the Blender application icon
Ensure you’re working with the official Blender installation
Exploring Package Contents:
Right-click on the Blender application icon
Select “Show Package Contents” from the context menu
This reveals the internal structure of the Blender application bundle
Finding the Executable:
Negotiate through the folder structure: Contents > MacOS
Locate the Blender executable file (typically named “Blender”)
This is the actual program file that launches the application
Creating Desktop Aliases:
Right-click on the Blender executable
Select “Make Alias” from the context menu
Drag the newly created alias to your Desktop or preferred location
Rename the alias for easy identification (e.g., “Blender Instance 2”)
Customizing Your Workflow
Multiple Aliases for Different Purposes: Create several aliases with descriptive names that reflect their intended use:
“Blender – Modeling”
“Blender – Animation”
“Blender – Rendering”
Organizing Aliases:
Create a dedicated folder on your Desktop for Blender aliases
Use distinctive icons or naming conventions to differentiate instances
Bits of Blender #75 By The Morphic Studio
Benefits of the Alias Method
Visual Accessibility: This method provides clickable desktop shortcuts that don’t require Terminal knowledge.
Permanent Solution: Once created, aliases remain available for future use without additional setup.
Customization Options: You can organize and label aliases according to your specific workflow needs.
Method 3: Automator Application Creation
Building an Automated Solution
For users who frequently need multiple Blender instances, creating an Automator application provides the most elegant solution, combining the power of Terminal commands with the convenience of a standard macOS application.
Creating the Automator App
Launching Automator:
Open Spotlight search (Command + Space)
Type “Automator” and press Enter
Select “Application” when prompted for the document type
Setting Up the Workflow:
In the Actions library, search for “Run Shell Script”
Drag the “Run Shell Script” action to the workflow area
In the script text box, enter: open -n -a Blender
Set the shell to “/bin/bash” if not already selected
Saving Your Application:
Choose File > Save from the menu
Name your application (e.g., “Launch New Blender”)
Save it to your Applications folder or Desktop
The application will have a standard macOS app icon
Advanced Automator Configurations
Creating Multiple Variants: You can create different Automator applications for various Blender workflows:
One that opens Blender with a specific startup file
Another that launches Blender with particular add-ons enabled
A version that opens multiple instances simultaneously
Adding User Prompts: Enhance your Automator app by adding user interaction:
Include “Ask for Text” actions to prompt for file paths
Add “Choose from List” actions for selecting predefined projects
Implement “Display Dialog” actions for confirmation prompts
Integration with macOS Features
Dock Integration: Your Automator-created application behaves like any standard Mac app, appearing in the Dock when running and supporting all standard macOS features.
Spotlight Search: The application becomes searchable through Spotlight, making it quickly accessible via basic board shortcuts.
Services Menu: You can configure the Automator app to appear in the Services menu for system-wide access.
Methods Overview
Method
Ease of Use
Setup Time
Permanence
Customization
Best For
Terminal Command
Medium
Immediate
Temporary
High
Quick, one-time use
Finder/Alias
Easy
2-3 minutes
Permanent
Medium
Regular users who prefer visual shortcuts
Automator App
Easy
5-10 minutes
Permanent
Very High
Power users wanting full automation
Learning Curve
Medium
Low
Low
Advanced features available
Users comfortable with command line vs. GUI preferences
System Resources
Minimal
Minimal
Minimal
Depends on configuration
All use cases with proper resource management
Troubleshooting Common Issues
Performance Considerations
Memory Management: Running multiple Bits of Blender #75 instances can be memory-intensive. Monitor your system’s RAM usage and close unnecessary applications when working with complex scenes.
CPU Usage: Multiple instances will compete for processing power. Consider adjusting Blender’s thread usage in preferences to optimize performance across instances.
Graphics Performance: If you’re using GPU rendering, be aware that multiple instances may impact graphics performance, particularly on systems with limited VRAM.
Compatibility Issues
Version Conflicts: Ensure all instances are running the same Blender version to avoid compatibility issues when sharing files between instances.
Add-on Conflicts: Some add-ons may not function correctly when multiple instances are running. Test your essential add-ons in multi-instance scenarios.
File Locking: Be cautious when opening the same .blend file in multiple instances, as this can lead to data corruption or loss.
Resolving Launch Failures
Permission Issues: If the Terminal command fails, check that Bits of Blender #75 has proper permissions in System Preferences > Security & Privacy.
Path Problems: Ensure Blender is installed in the standard Applications folder. If installed elsewhere, modify commands to include the full path.
Application Bundle Damage: If the alias method fails, verify that the Blender application bundle isn’t corrupted by attempting a standard launch.
Best Practices and Workflow Optimization
Organizing Multiple Instances
Instance Naming: When working with multiple instances, establish a clear naming convention for your projects to avoid confusion.
Window Management: Use macOS’s Mission Control and Spaces features to organize multiple Blender windows across different desktop spaces.
File Management: Maintain separate project folders for each instance to prevent file conflicts and maintain organization.
Resource Management
Monitoring System Performance: Use Activity Monitor to keep track of memory and CPU usage when running multiple instances.
Optimizing Blender Settings: Adjust viewport shading, subdivision magnitudes, and other performance-impacting settings based on your system’s capabilities.
Strategic Instance Closure: Close instances you’re not actively using to free up system resources for remaining work.
Workflow Integration
Project Templates: Create project templates that can be quickly loaded into new instances for consistent workflow startup.
Cross-Instance Communication: Develop systems for sharing assets between instances, such as using linked libraries or external asset folders.
Backup Strategies: Implement regular saving schedules across all instances to prevent data loss.
Advanced Tips and Techniques
Scripting Multiple Launches
For users comfortable with shell scripting, you can create more sophisticated launch scripts:
#!/bin/bash
# Launch multiple Blender instances with different files
1 open -n -a Blender ~/Documents/BlenderProjects/Character.blend
open -n -a Blender ~/Documents/BlenderProjects/Environment.blend
open -n -a Blender ~/Documents/BlenderProjects/Animation.blend
Integration with Project Management
Folder Watching: Combine multiple instances with file system monitoring tools to automatically open new instances when new project folders are detected.
Version Control: Use Git or other version control systems to manage projects across multiple instances, enabling sophisticated collaboration workflows.
Asset Libraries: Establish shared asset libraries that can be accessed from any Blender instance, promoting reusability and consistency.
Bits of Blender #75 By The Morphic Studio
Performance Optimization Strategies
Instance Specialization: Dedicate specific instances to particular tasks (modeling, texturing, animation) with optimized settings for each purpose.
Hardware Considerations: On systems with multiple GPUs, configure different instances to use different graphics cards for optimal performance distribution.
Memory Allocation: Adjust Blender’s memory settings in preferences to account for multiple instances sharing system resources.
Finally
Running multiple instances of Bits of Blender #75 on macOS opens up new possibilities for creative workflows, project management, and learning experiences. The three methods defined in this guide—Terminal commands, Finder aliases, and Automator applications—each offer distinct advantages depending on your technical comfort level and usage patterns.
The Terminal command method provides immediate access and maximum flexibility for experienced users. At the same time, the Finder alias approach offers a visual, user-friendly solution that integrates perfectly with standard macOS workflows. The Automator application method represents the most sophisticated approach, enabling custom automation and professional-grade workflow optimization.
As you implement these techniques, think of monitoring your system’s performance and adjusting your approach based on your hardware capabilities and project requirements. Multiple Blender instances can significantly enhance productivity, but they should be used thoughtfully to maintain system stability and optimal performance.
Whether you’re a professional 3D artist managing complex production pipelines, an educator demonstrating techniques across multiple projects, or an enthusiast exploring different creative directions simultaneously, these methods will provide the flexibility and power you need to maximize your Blender experience on macOS.
The basic to success lies in choosing the method that best ranges with your workflow requirements and gradually incorporating multiple instance techniques into your regular Bits of Blender #75 practice. With these tools at your disposal, you’ll find new opportunities for creativity, efficiency, and project organization that were previously unavailable within the constraints of single-instance operation.
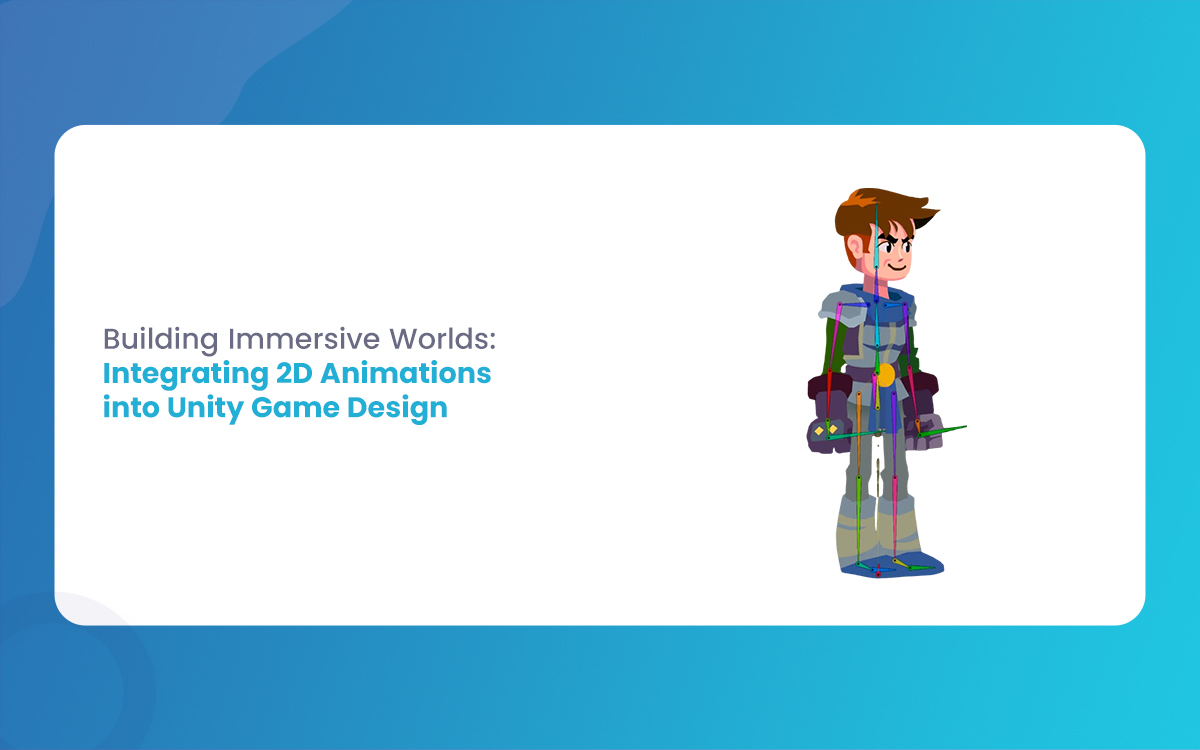
Building Immersive Worlds: Integrating 2D Animations into Unity Game Design
In the modern gaming environment, the distinction between “2D” and “3D” has blurred into a spectrum of stylistic choices rather than a hierarchy of quality. While 3D graphics often chase the horizon of photorealism, 2D animation remains the heart of expressive, artistic, and tactile game design. From the hand-drawn elegance of Cuphead to the pixel-perfect […]
March 6, 2026
Mastering Skeletal Animation in Unity: A Complete Guide for Developers
Imagine breathing life into a lifeless 3D model, watching it stride confidently across your game world or execute a flawless combat combo. That’s the magic of Skeletal Animation in Unity, a powerhouse system that powers everything from indie platformers to AAA blockbusters. At its heart, skeletal animation grips rigs and Unity’s Mecanim framework to deform […]
March 5, 2026
A Professional’s Handbook to Rigging and Animating 2D Assets in Unity
Game development is always changing, and the difference between 2D and 3D workflows is becoming less clear. If you have experience with 3D tools like Blender, Maya, or 3ds Max, Unity’s Animating 2D Assets package can help you make the switch to 2D more easily. Rather than using frame-by-frame sprite swapping, many developers now use […]