Creating beautiful Bird Quickly illustrations doesn’t have to be complicated or time-consuming. The Morphic Studio tutorial shares information about the simple, efficient process of drawing Bird Quickly in Procreate that looks professional while saving you valuable design time.
Introduction
Birds make excellent subjects for illustrations, logos, and decorative elements in design work. With Procreate’s powerful tools, you can create stunning bird artwork in minutes rather than hours. This tutorial focuses on efficiency without sacrificing quality, perfect for designers on tight deadlines or those looking to build their statistical illustration skills.
Essential Tools and Setup
Canvas Setup
Before diving into your Bird Quickly illustration, proper canvas setup is crucial:
Step#1. Open Procreate and tap the “+” icon to create a new canvas
Step#2. For professional results, use a canvas size of at least 3000×3000 pixels at 300 DPI
Step#3. Consider using the sRGB color profile for versatility across different media
Brush Selection
The right brushes make all the difference in efficient bird illustration:
Outlining: The “Studio Pen” from the Inking section creates clean, precise lines perfect for basic shapes
Texturing: Soft airbrushes add gentle shading and dimension
Detailing: Fine point brushes allow for adding feather details quickly
Texture brushes: Consider specialized feather brushes from Procreate brush packs for instant texture
Layer Organization
Proper layer management is essential for efficient workflow:
Create a sketch layer for initial shapes
Use separate layers for body, wings, head, and details
Label layers clearly for easy navigation
Group related layers to keep your workspace tidy
Step-by-Step Bird Drawing Process
1. Sketching the Basic Shape
Begin with the fundamental form of your bird:
Step#1. Create a new layer labeled “Sketch”
Step#2. Using the Studio Pen, draw an oval for the bird’s body
Tip: Hold your pen steady to create a perfect oval, or use the QuickShape feature
Step#3. Add a smaller circle for the head, positioning it at the top of the body
Step#4. Connect these shapes with smooth curves to create a natural flow
2. Adding Core Features
With the basic shape established, add defining characteristics:
Step#1. Draw a small triangle or curved shape for the beak, attaching it to the head
Step#2. Add two small circles for eyes
Step#3. Sketch simple legs using straight or slightly curved lines
Step#4. For perching birds, add a simple branch or perch
3. Creating Wings and Tail
Wings and tail feathers give your bird personality and movement:
Step#1. Create a new layer labeled “Wings”
Step#2. Draw a wing shape (resembling an elongated oval) on one side of the body
Step#3. Use the selection tool to duplicate and flip for the second wing if needed
Step#4. On a “Tail” layer, add elongated shapes at the bottom of the body to represent tail feathers
Step#5. Vary the length and angle of tail feathers for a more natural look
4. Refining the Illustration
Now enhance your bird with more detail:
Step#1. Lower the opacity of your sketch layer
Step#2. Create a new layer for refined lines
Step#3. Use the Studio Pen to trace over your sketch with confident strokes
Step#4. Apply Clipping Masks to add texture and shading within specific expanses
Step#5. Use the Eraser tool with the same brush to clean up lines
5. Adding Color
Bring your bird to life with efficient coloring techniques:
Step#1. Create a new layer beneath your line art for flat colors
Step#2. Use the ColorDrop tool to quickly fill enclosed expanses
Step#3. Enable Alpha Lock on color layers for adding shading without exceeding boundaries
Step#4. Create clipping masks above color layers for texture and shadows
6. Shading and Dimension
Add depth to your bird illustration:
Step#1. Create a new layer and set it as a Clipping Mask to your color layer
Step#2. Use a soft brush with a darker shade of your base color
Step#3. Apply shadows where wings meet the body, under the head, and beneath the tail
Step#4. On another Clipping Mask layer, add says to the top of the head, wings, and body
Step#5. Use the Smudge tool to blend harsh edges for a natural look
7. Adding Texture and Final Details
Complete your bird with professional finishing touches:
Step#1. Use textured brushes to add feather details to wings and tail
Step#2. Create a new layer for fine details like eye reflection and beak definition
Step#3. Add environmental elements if desired (branches, leaves, sky)
Step#4. Consider adding a subtle shadow beneath your bird for grounding
Time-Saving Techniques
Gesture Drawing Approach
For ultra-quick bird illustrations:
Focus on capturing the essential movement and shape
Use flowing, continuous lines rather than precise details
Think of the bird’s body as a simple “bean” shape to establish proportions
Utilizing Procreate Features
Maximize efficiency with these Procreate capabilities:
Feature
How To Use
Time-Saving Benefit
QuickShape
Draw a shape and hold to perfect it
Creates smooth, professional shapes instantly
Reference Layer
Import bird photos as reference
Accurate proportions without extensive study
Symmetry
Enable Drawing Guide with symmetry
Create perfectly balanced wings and features
Gestures
Two-finger tap to undo
Quick corrections without disrupting workflow
Clipping Masks
Nest layers within shapes
Add textures and details without tedious masking
Alpha Lock
Lock transparency on layers
Color and shade without exceeding boundaries
Selection Tool
Select and transform elements
Quickly resize, rotate, or duplicate parts
ColorDrop
Drag colors to fill enclosed expanses
Rapid coloring without manual filling
Using Custom Brushes
Create a Bird Quickly illustration toolkit:
Step#1. Save brushes specifically for bird features (feathers, beaks, eyes)
Step#2. Create and save color palettes for different bird species
Step#3. Consider importing specialized bird brushes from the Procreate community
Common Bird Illustration Styles
Realistic Approach
For detailed, lifelike birds:
Use multiple layers of shading
Pay close attention to feather direction and overlap
Study reference photos for accurate coloration
Focus on subtle color variations and textures
Stylized Approach
For decorative or logo-friendly birds:
Simplify shapes into geometric forms
Use bold, limited color palettes
Exaggerate distinctive features (long tail, colorful crest)
Focus on silhouette and movement over detail
Cartoon Approach
For fun, expressive birds:
Exaggerate eyes and expressions
Use bouncy, curved lines
Simplify wings and feathers into basic shapes
Focus on personality and character
Troubleshooting Common Issues
Proportion Problems
If your bird looks awkward:
Check the head-to-body ratio (typically 1:3 for most birds)
Ensure the eye is properly positioned (usually centered on the head)
Verify wing size (should be proportional to body length)
Stiff-Looking Birds
If your bird lacks life:
Add a slight curve to the body line
Position wings at different angles
Tilt the head slightly
Vary the lengths of tail feathers
Flat-Looking Results
To add dimension:
Increase contrast between shadows and says
Add a background element or shadow
Use texture brushes for feather detail
Consider adding a light source direction
Bird Quickly By The Morphic Studio
Expanding Your Bird Drawing Skills
As you become comfortable with this quick method, consider these ways to grow:
Study different bird species and their unique characteristics
Create a series of birds in different poses (flying, perching, singing)
Experiment with background elements and environments
Try different art styles while maintaining the efficient workflow
Finally
With practice, you can draw beautiful bird quickly in Procreate in just minutes using this streamlined approach. Think of that speed comes with repetition—the more birds you draw, the faster and more confident you’ll become.
This quick method from Morphic Studio emphasizes capturing the essential elements that make a bird recognizable while eliminating unnecessary details that slow down the creative process. By focusing on basic shapes, efficient layering, and strategic use of Procreate’s powerful tools, you can create professional-looking Bird Quickly illustrations that enhance any design project.
Whether creating decorative elements, logos, or standalone art pieces, this Bird Quickly drawing method gives you a valuable technique to add to your statistical illustration toolkit. Happy drawing!
Best Way To Create Cinematic lighting in Unreal Engine 5 by Morphic Studio [Tutorial]
The Magic of Cinematic lighting in Unreal Engine 5 Have you ever looked at a beautifully rendered game or a virtual film set and wondered how they make it look so incredibly real? Well, the answer almost always comes down to the lighting. Today, we are going to take a look at the magic of […]
July 20, 2026
How To Add Lighting Realistic Rainy Weather in Unreal Engine 5 [Tutorial]
Lighting a stormy environment in Unreal Engine 5 is one of the most rewarding challenges for any 3D environment or lighting artist. Many beginners think that adding rain is as simple as spawning a splash particle system and turning down the sun, but the real secret lies in how light interacts with moisture, clouds, and […]
July 18, 2026
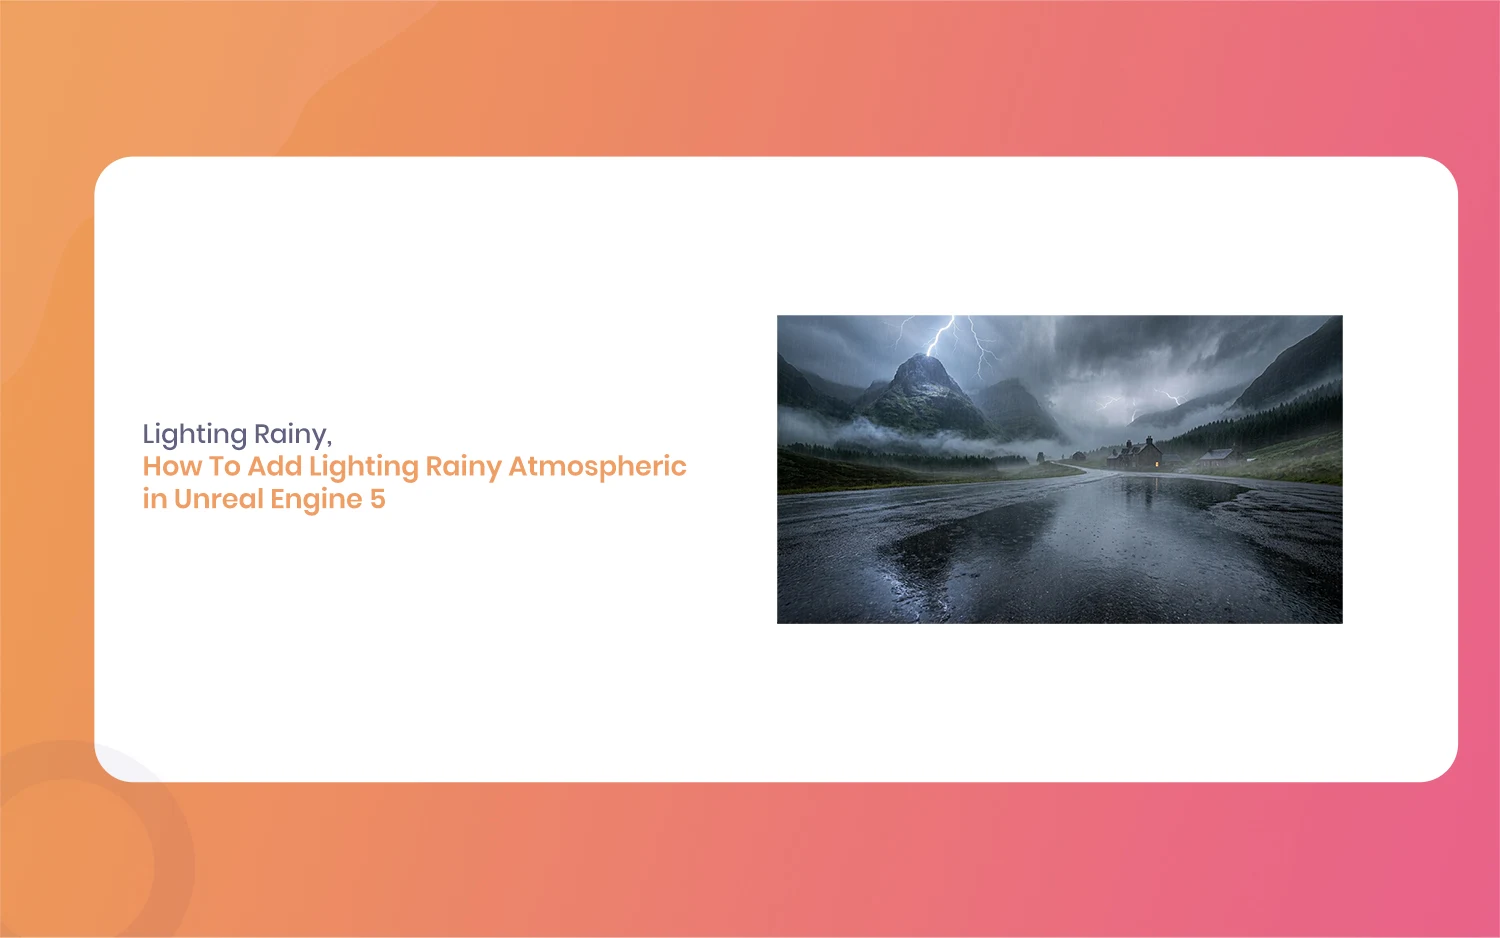
How To Add Lighting Rainy Atmospheric in Unreal Engine 5 [Tutorial]
Hello everyone, and welcome to this new guide. If you are a game developer or a 3D artist, you probably know how important weather is. Creating a moody scene can completely change how a player feels. Today, we are going to look at something very specific. We are going to learn how to add Lighting […]