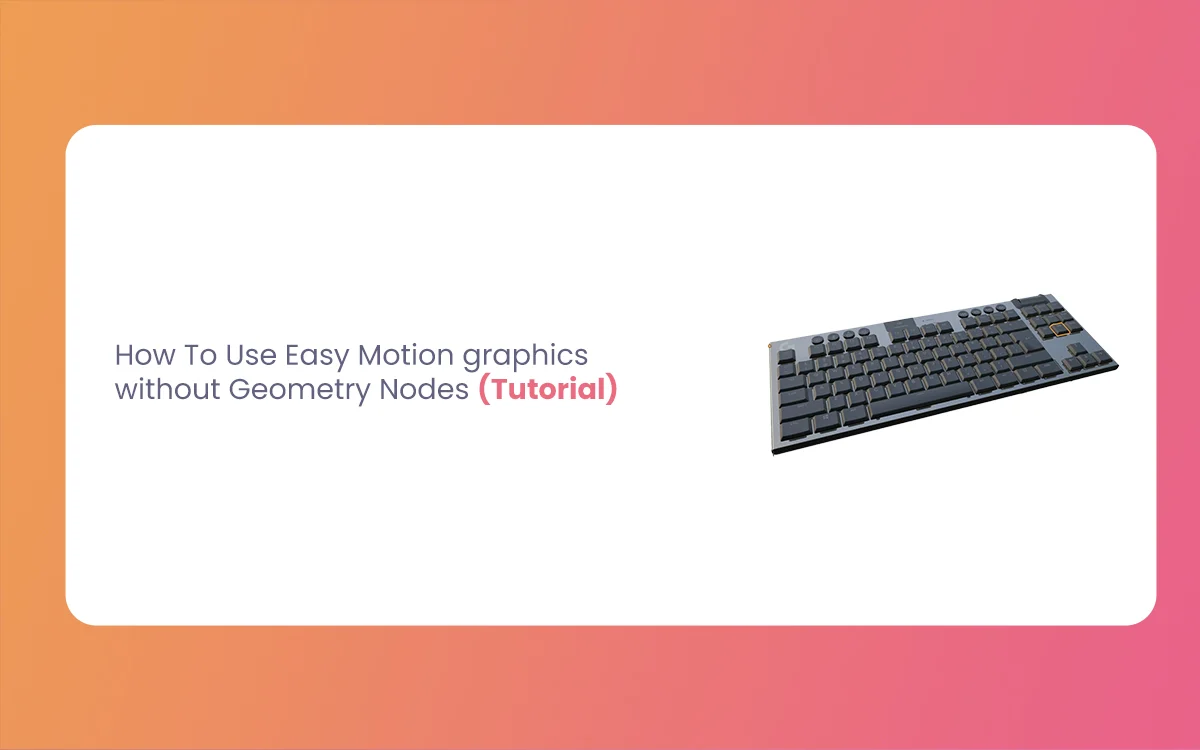
Motion graphics without Geometry Nodes have become an essential element in modern digital content creation, from social media posts to professional presentations. While Motion graphics without Geometry Nodes offer powerful capabilities, they can feel overwhelming for beginners or those seeking a more straightforward approach. The Morphic Studio shares the tutorial about how to create stunning motion graphics in Blender using the Commotion add-on, providing an accessible alternative that doesn’t sacrifice quality or creativity.
Follow the Alternative Approach
Traditional Motion graphics workflows in Blender, without Geometry Nodes, often rely heavily on Geometry Nodes, which, while powerful, require significant technical knowledge and can be intimidating for newcomers. The method defined in this tutorial leverages Blender’s built-in animation tools, combined with the Commotion add-on, to achieve professional results with a significantly gentler learning curve.
The Commotion add-on serves as a bridge between complex node-based systems and user-friendly animation tools. It automates many tedious tasks involved in creating offset animations, allowing you to focus on creativity rather than technical implementation. This approach is efficient for text animations, logo reveals, and product showcases where timing and rhythm are crucial.
Motion graphics without Geometry Nodes By The Morphic Studio
Getting Started: Setting Up Your Workspace
Installing the Commotion Add-on
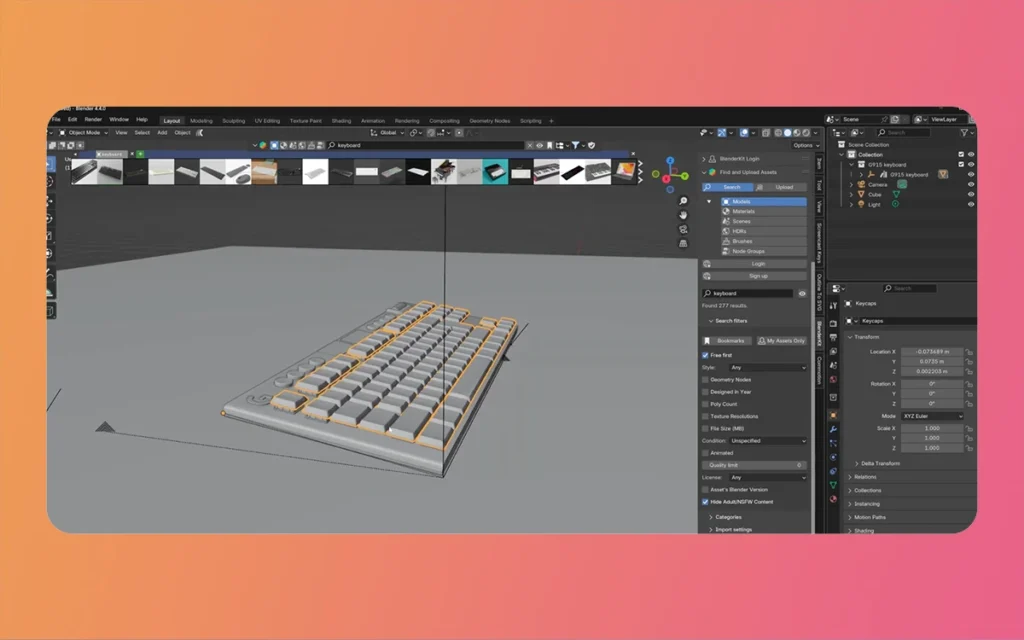
The foundation of this workflow begins with the proper installation and configuration of the Commotion add-on. Start by launching Blender and navigating to the Edit menu, then select Preferences. This opens Blender’s complete settings panel, where you can customize various aspects of your workflow.
Within the Preferences window, locate the Add-ons tab. This section houses all available extensions that can enhance Blender’s functionality. Use the search bar to find “Commotion” – this powerful add-on is freely available and integrates perfectly with Blender’s existing animation system.
Once you’ve located Commotion in the search results, click the Install button and ensure the checkbox next to it is enabled. After successful installation, you’ll notice a new “Commotion” tab appears in the N-panel. If the N-panel isn’t visible in your 3D viewport, press the N basic to reveal it.
Preparing Your Scene
Clean organization is crucial for efficient motion graphics work. Start with a fresh Blender scene and clear any default objects that might interfere with your animation. Select all objects using the A basic, then delete them by pressing X and confirming the deletion. This gives you a clean slate to work with.
The beauty of this approach lies in its flexibility – you can work with various object types, from text elements to complex 3D models. For text-based motion graphics, add a text object by pressing Shift+A and selecting Text from the menu. Position and orient your Text appropriately for your composition. For example, rotating Text to stand upright often works well for title sequences or promotional graphics.
Motion graphics without Geometry Nodes By The Morphic Studio
Core Animation Principles
Basic frame Animation Fundamentals
Basic frame animation forms the backbone of motion graphics. Unlike automated systems, basic framing gives you precise control over every aspect of your animation timing and movement. Begin by selecting your object and deciding which properties you want to animate – common choices include location, rotation, and scale.
Insert your first basic frame at the starting frame of your animation timeline. Move forward in time to where you want the animation to end, modify the desired property, and insert another basic frame. Blender automatically calculates the in-between frames, creating smooth motion between your basic frames.
The power of basic frame animation becomes apparent when you start experimenting with interpolation modes. After creating your basic frames, select them in the Timeline and press T to access different interpolation options. Elastic interpolation can add bouncy, playful movement while ease-in and ease-out create more natural, professional-looking motion.
Advanced Timing Techniques
Professional motion graphics rely heavily on sophisticated timing to create visual interest and maintain viewer engagement. Consider the principles of animation when planning your basic frames – anticipation, follow-through, and overlapping action can transform basic animations into compelling visual narratives.
Experiment with different timing approaches for other elements in your scene. Quick, snappy movements work well for attention-grabbing elements, while slower, more deliberate animations can convey elegance and sophistication. The basic is matching your animation timing to your content’s intended mood and message.
Motion graphics without Geometry Nodes By The Morphic Studio
Leveraging the Commotion Add-on
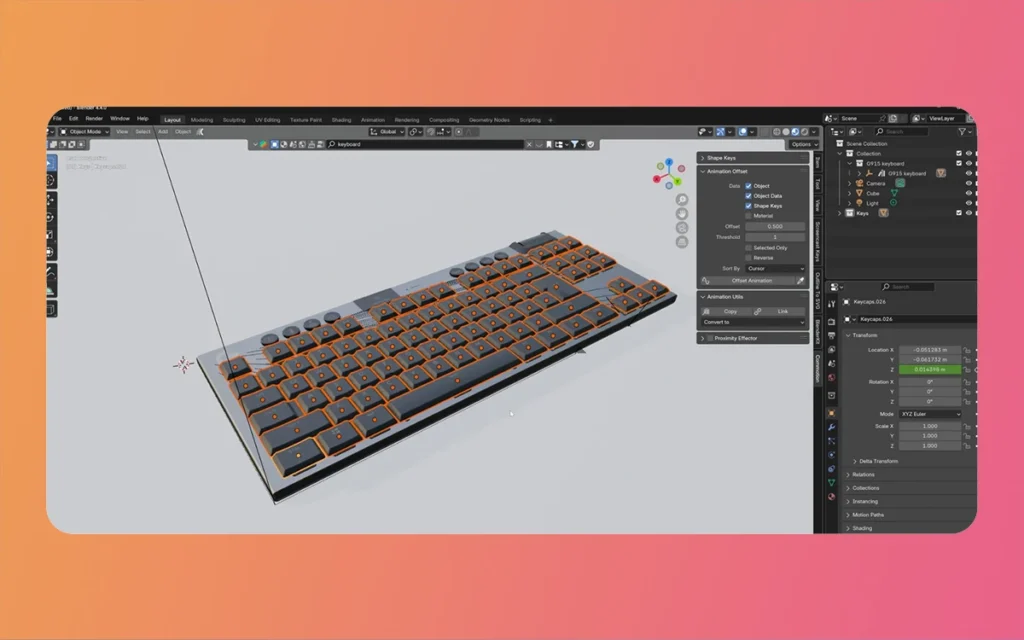
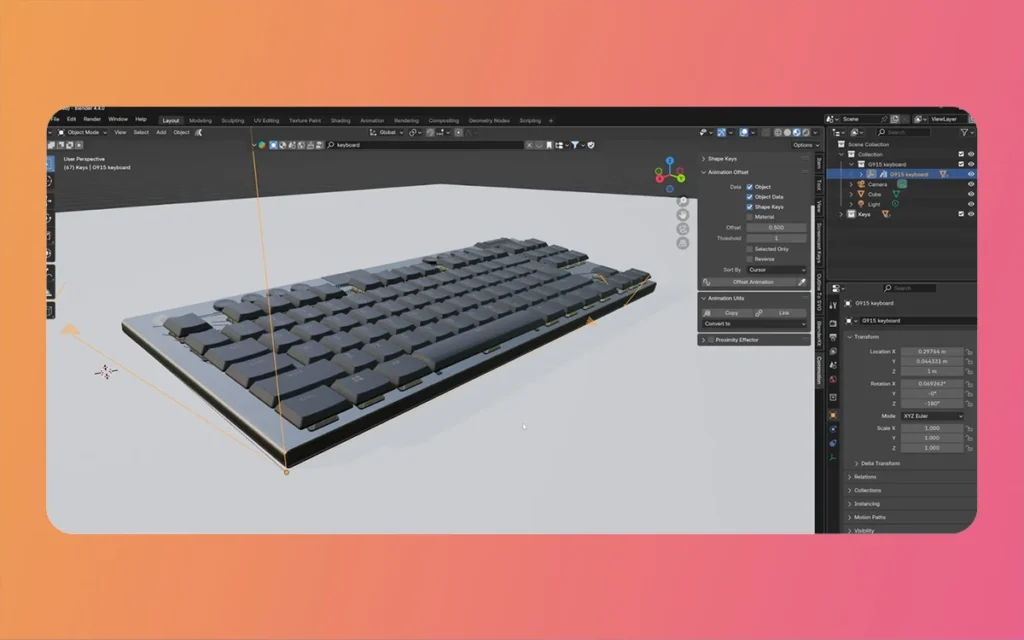
Follow Animation Offsets
The Commotion add-on excels at creating offset animations – sequences where multiple similar objects perform the same animation but at staggered intervals. This technique is fundamental to professional motion graphics, creating energetic, wave-like effects that are visually engaging.
When working with multiple objects, select all elements you want to include in your offset animation. Ensure one object is designated as the active selection (typically the last one selected). The Commotion panel provides intuitive controls for copying animations between objects and setting offset timing.
Implementing Staggered Effects
The offset amount determines the delay between the start times of each object’s animation. A one-frame offset creates subtle, closely-timed sequences, while larger offsets produce more dramatic wave effects. Experiment with different values to find what works best for your specific project.
Commotion also allows you to control the order in which animations trigger. Alphabetical sorting works well for text elements, while reverse alphabetical can create interesting reveal effects. For more complex scenes, you can manually arrange your objects to achieve specific timing patterns.
Advanced Techniques and Refinements
Enhancing Visual Appeal
Once your basic animation is functional, focus on refinements that raise the general quality. Background elements, lighting adjustments, and additional animated objects can significantly impact the final result. Consider how each component contributes to the general composition and narrative flow.
Duplication and variation techniques can help create more complex scenes without having to start from scratch. Copy successful animations and modify them slightly – perhaps changing the timing offset or adjusting the scale – to create rich, layered motion graphics that maintain visual interest throughout their duration.
Camera and Composition Considerations
The choice of camera significantly impacts the feel of your motion graphics. Orthographic cameras create flat, graphic-design-like attractive that work well for logo animations and title sequences. Perspective cameras add depth and dimensionality, making them suitable for product showcases or more cinematic applications.
Consider your final output format when planning camera movements and framing to ensure a cohesive visual experience. Square formats work well for social media, while widescreen ratios are better suited for presentations or video content. Plan your composition accordingly to ensure your motion graphics work effectively in their intended context.
Motion graphics without Geometry Nodes By The Morphic Studio
Professional Tips and Best Practices
Workflow Optimization
Efficient motion graphics production relies on smart workflow decisions. Group related elements using Blender’s parenting system – select child objects first, then the parent, and press Ctrl+P to establish connections. This allows you to animate entire groups while maintaining control over individual elements.
Consider creating templates for commonly used animation patterns to streamline your workflow. Save blend files with pre-configured Commotion settings and basic object setups that you can quickly adapt for new projects. This approach significantly reduces setup time for recurring project types.
Creative Enhancement Strategies
Take a look at Blender’s modifier system to add complexity without increasing the animation workload. The Wireframe modifier can transform simple shapes into interesting graphic elements, while the Solidify modifier adds depth to flat designs. These tools work particularly well when combined with SVG imports for custom graphic elements.
Material and shader choices have a significant impact on the final appearance. Simple, high-contrast materials often work best for motion graphics, as they are easily readable and maintain visual impact even with rapid movement. Consider how your material choices will reproduce across different viewing platforms and conditions.
Troubleshooting Common Challenges
Animation Timing Issues
When animations don’t feel right, the problem often lies in timing rather than technique. Motion graphics require precise timing to create the desired emotional response. Too fast, and viewers miss essential information; too slow, and engagement drops. Use Blender’s timeline scrubbing feature to review your animation frame by frame, identifying areas that need adjustment.
Pay attention to the spacing between basic frames – uneven spacing often creates unnatural movement. The graph editor provides detailed control over animation curves, allowing you to fine-tune the exact feel of your motion. Don’t hesitate to iterate multiple times until the timing feels right.
Technical Performance Considerations
Complex scenes with many animated objects can impact playback performance. Optimize your workflow by working with simplified objects during animation development, then replacing them with detailed versions for final rendering. This approach maintains smooth preview playback while making specific high-quality final output.
Consider your target audience’s viewing environment when planning the complexity of your content. Motion graphics intended for web viewing may require different optimisation approaches compared to those designed for high-resolution presentation displays.
Comparison: Traditional vs. Commotion-Based Workflows
Aspect
Traditional Geometry Nodes
Commotion Add-on Approach
Learning Curve
Steep, requires node-based thinking
Gentle, builds on familiar animation concepts
Setup Time
Long, complex node network creation
Quick, intuitive interface
Flexibility
Extremely high, unlimited customization
Moderate, focused on common use cases
Performance
Can be resource-intensive
Light mass, efficient for most projects
Collaboration
Difficult to modify without node knowledge
Easy to understand and modify
Project Iteration
Time-consuming to make changes
Quick adjustments and variations
Beginner Accessibility
Requires significant Blender expertise
Accessible to intermediate users
Animation Control
Precise but complex
Intuitive with sufficient precision
Maintenance
Complex troubleshooting
Straightforward debugging
Documentation
Extensive but technical
User-friendly resources
Actual Applications
Commercial and Marketing Content
This workflow excels in commercial environments where quick turnaround times and consistent quality are essential. Marketing teams can create product reveals, logo animations, and promotional graphics without requiring specialized technical knowledge. The Commotion approach enables rapid iteration and the incorporation of client feedback.
Social media content creation benefits particularly from this method’s efficiency. Creating multiple variations of the same basic animation for different platforms or messages becomes straightforward, allowing for a consistent brand presence across various channels.
Motion graphics without Geometry Nodes By The Morphic Studio
Educational and Presentation Materials
Educational content creators will find this approach valuable for creating engaging visual aids and presentation elements. The ability to quickly animate text reveals diagram explanations and concept illustrations can significantly enhance learning materiCaptivateals without requiring extensive animation expertise.
The professional quality achievable through this method makes it suitable for corporate presentations, training materials, and academic content where visual polish reflects organizational credibility.
Future-Proofing Your Skills
Expanding Further on than Basic Techniques
While this tutorial focuses on foundational techniques, the principles learned here provide a solid base for more advanced motion graphics work. Follow basic frame animation, timing principles, and the Commotion workflow prepares you for eventual exploration of more complex tools like Geometry Nodes when your skills and project requirements advance.
Consider this approach as a stepping stone rather than a limitation. The animation principles and workflow habits developed through this method translate directly to more advanced Blender features and other motion graphics software.
Building a Sustainable Practice
Creating successful motion graphics requires consistent practice and experimentation. Create personal projects that challenge you to apply these techniques in new ways. Build a library of successful animations that you can reference and adapt for future projects.
Stay engaged with the Blender community to learn about new techniques, add-ons, and workflow improvements. The field of motion graphics develops rapidly, and maintaining awareness of new developments ensures your skills remain current and relevant.
Finally
Creating impressive Motion graphics without Geometry Nodes in Blender doesn’t require mastery of complex systems like Geometry Nodes. The Commotion add-on provides an accessible alternative that maintains professional quality while significantly reducing technical barriers. This approach democratizes motion graphics creation, making it available to a broader range of creators and use cases.
The techniques defined in this tutorial offer a balanced combination of simplicity and power. You can achieve professional results while maintaining creative flexibility and efficient workflows. Whether you’re creating content for social media, presentations, or commercial projects, this method provides a solid foundation for compelling motion graphics.
Think of that great motion graphics result from Following your audience, matching animation style to content purpose, and maintaining consistent quality throughout your work. The technical tools are important, but they serve the larger goal of effective visual communication. Use these techniques as a foundation for developing your unique creative voice in the motion graphics field.
The ride from basic animations to sophisticated Motion graphics without Geometry Nodes requires patience and practice. Start with simple projects, gradually increasing complexity as your confidence and skills develop. With the Commotion add-on and the techniques described here, you have everything needed to begin creating engaging, professional-quality motion graphics in Blender today.
Logo design company in Ahmedabad: 7 Proven Secrets to Elevate Your Brand, The Morphic Studio
Welcome to the fast paced world of statistical branding. As we move deeper into 2026, the market in Gujarat has become extremely competitive. If you are starting a business or trying to rebrand, you probably realize how hard it is to stand out from the crowd. This is exactly where a professional Logo design company […]
June 22, 2026
Why Choose a Graphic Design Agency Near You
Welcome to the visual revolution of 2026. At The Morphic Studio, we understand that building a brand in today’s fast paced world can feel completely overwhelming. Attention spans are shrinking rapidly, and the competition is only getting louder every single day. That is exactly why simply having a nice logo is no longer enough to […]
June 17, 2026
Graphic Design Studio: The #1 Unrivaled Choice for Magnificent Visuals | The Morphic Studio
Welcome to the visual revolution of 2026, everyone is scrolling at lightning speed, and your business has less than two seconds to make an impression. If your graphics look outdated, your audience will skip right past you, plain and simple. That is why choosing a top tier Graphic Design Studio is no longer just a […]