In 3D graphics and game development, creating a visual stunning and realistic textures is most important. Substance Painter has come out as a powerful tool in the arsenal of 3D artists and designers. It offers an intuitive and efficient way to render and texture 3D meshes. The Morphic Studio share the information of how to use Substance Painter to raise your 3D models from simple wireframes to richly detailed and professional-quality assets.
How to Understand Substance Painter
Substance Painter is 3D painting software that allows artists to texture 3D models with unprecedented ease and flexibility. Its real-time rendering capabilities and non-destructive workflow make it an indispensable tool for creating high-quality textures for games, films, and other 3D meshes.
Basic Features:
Real-time 3D viewport
Physically-based rendering (PBR) workflow
Smart materials and smart masks
Non-destructive layering system
Powerful baking tools
Extensive library of materials, brushes, and effects
3D meshes By The Morphic Studio
How to Prepare Your 3D Model
Before diving into Substance Painter, it’s crucial to ensure your 3D model is properly prepared. This preparation phase is often overlooked but is vital for achieving the best results.
UV Mapping
UV mapping is the process of projecting a 2D image onto a 3D model’s surface. It’s essential for proper texture application.
Tips for Effective UV Mapping:
Minimize stretching: Ensure your UVs are evenly scaled to prevent texture distortion.
Optimize seams: Place seams in inconspicuous expanse to hide texture discontinuities.
Maximize texture space: Arrange UV islands efficiently to make the best use of your texture resolution.
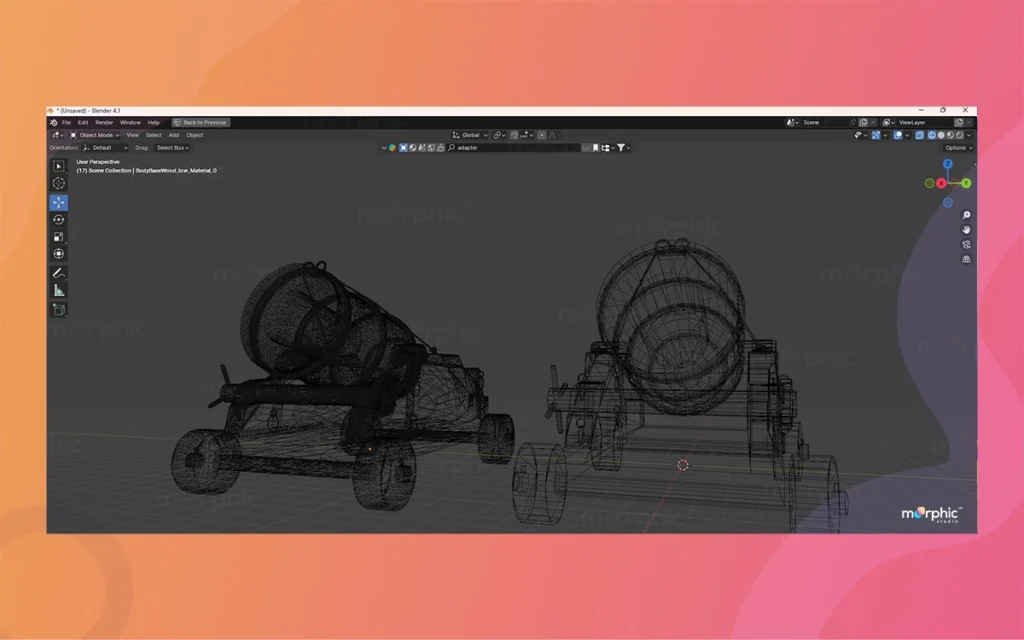
Mesh Topology
Clean mesh topology not only improves the general quality of your model but also affects how textures are applied.
Best Practices:
Quad-based geometry: Use primarily quad faces for smoother subdivision and better texture flow.
Appropriate poly count: Balance detail with performance requirements.
Smooth normals: Ensure your model has correctly smoothed normals for proper light interaction.
Exporting for Substance Painter
When exporting your model for use in Substance Painter, consider the following:
File format: FBX or OBJ formats are widely supported and preserve most necessary information.
Scale and units: Ensure your model is scaled appropriately for your target application.
Naming conventions: Use clear, consistent names for 3D meshes and materials to stay organized.
3D meshes By The Morphic Studio
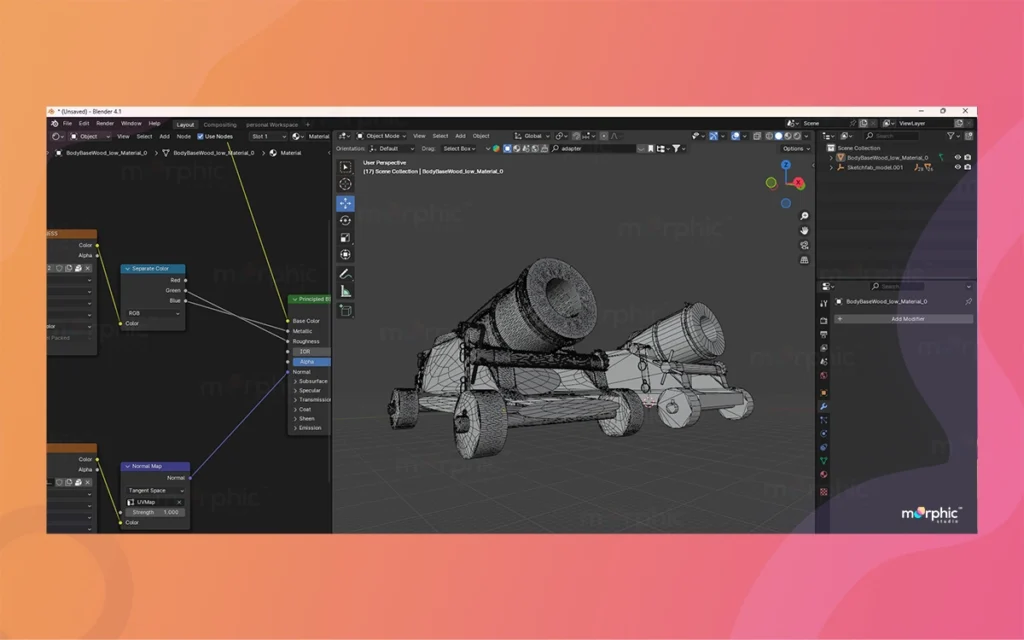
Importing Your Model into Substance Painter
With your model prepared, it’s time to bring it into Substance Painter.
Steps for Importing:
Launch Substance Painter and create a new project.
Set your document resolution. Higher resolutions offer more detail but require more processing power.
Import your model by navigating to File > Import.
Configure your texture set settings based on your model’s UV layout and intended use.
Texture Set Settings
Texture sets in Substance Painter define how textures are applied to your model. You can create multiple texture sets for complex models with different material requirements.
Basic Settings:
Document Resolution: Determines the resolution of your textures.
Normal Map Format: Choose between OpenGL or DirectX formats based on your target platform.
Texture Set Workflow: Select between PBR Metallic/Roughness or PBR Specular/Glossiness.
The Texturing Process
With your model imported, you’re ready to begin the exciting process of texturing.
Baking Mesh Maps
Baking is the process of generating texture maps based on your model’s geometry. These maps form the foundation of your texturing process.
Essential Maps to Bake:
Normal Map: Captures high-resolution surface detail.
Ambient Occlusion: Simulates soft shadows and crevices.
Curvature: Says edges and crevices.
Position: Used for creating procedural textures based on the model’s 3D position.
Thickness: Useful for creating translucency effects.
3D meshes By The Morphic Studio
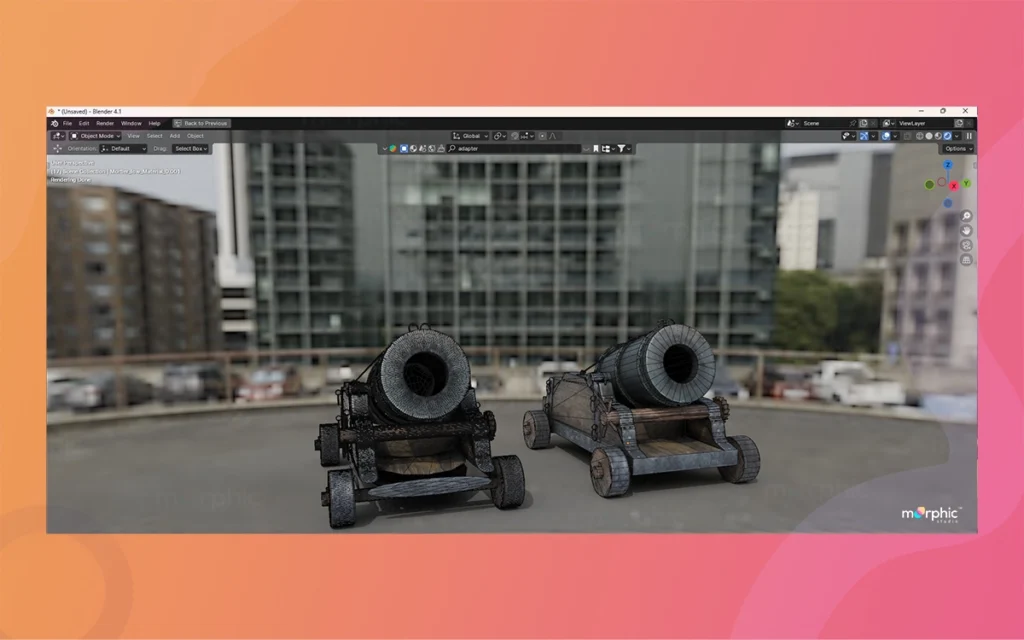
Painting Textures
Substance Painter’s intuitive interface allows for direct painting on your 3D model.
Painting Techniques:
Layer-based workflow: Build up your textures using layers for flexibility and non-destructive editing.
Smart Materials: Utilize pre-made materials that automatically adapt to your model’s topology.
Procedural texturing: Create complex textures using generators and filters.
Hand-painting: Use brushes for fine details and artistic touches.
Utilizing Smart Materials and Masks
Smart Materials in Substance Painter are pre-configured materials that adapt to your model’s surface details.
Benefits of Smart Materials:
Rapid prototyping of textures
Consistent quality across different models
Easily customizable for unique results
Smart Masks allow for procedural masking based on your model’s geometry, enabling effects like edge wear or dirt accumulation.
Advanced Techniques and Tips
As you become more comfortable with Substance Painter, take a look at these advanced techniques to raise your textures.
Particle Brushes
Use particle brushes to create complex, natural-looking surfaces like rust, dirt, or scratches.
Height Blending
Combine multiple materials with height information to create realistic material transitions.
Anchor Points
Utilize anchor points to create consistent, repeatable details across your model.
Custom Shaders
Develop custom shaders to achieve unique rendering effects made or changed to your project’s needs.
3D meshes By The Morphic Studio
Exporting Your Textured Model
Once you’ve completed texturing, it’s time to export your work for use in other applications.
Export Settings
Output Size: Choose the appropriate texture resolution for your target platform.
File Format: Select formats compatible with your rendering engine (e.g., PNG, TGA, EXR).
Padding: Add padding to your textures to prevent seam artifacts.
Texture Maps to Export
Albedo (Base Color)
Normal
Roughness
Metallic
Ambient Occlusion
Emissive (if applicable)
Troubleshooting Common Issues
Even experienced artists encounter challenges. Here are solutions to common problems:
Texture stretching: Revisit your UV mapping to ensure even texture distribution.
Seam visibility: Adjust your UV islands or use the clone stamp tool to hide seams.
Performance issues: Optimize your project by reducing texture resolution or simplifying complex materials.
3D meshes By The Morphic Studio
At Last
Mastering Substance Painter opens up a world of possibilities for creating stunning 3D textures. By following this guide and continually practicing, you’ll develop the skills to bring your 3D models to life with rich, detailed textures that stand out in any project.
Remind the basic to success with Substance Painter lies in experimentation and iteration. Don’t be afraid to try new techniques, combine different materials, and push the boundaries of what’s possible. With time and practice, you’ll develop your own unique texturing style and workflow.
Useful Table: Substance Painter Shortcuts and Functions
Shortcut
Function
Description
Ctrl + N
New Project
Create a new Substance Painter project
Ctrl + O
Open Project
Open an existing project
Ctrl + S
Save Project
Save the current project
Ctrl + Z
Undo
Undo the last action
Ctrl + Y
Redo
Redo the last undone action
B
Brush Tool
Activate the brush tool for painting
E
Eraser Tool
Activate the eraser tool
S
Stamp Tool
Use the stamp tool for applying textures
M
Mask Tool
Create and edit masks
F
Fill Tool
Fill expanse with color or material
C
Color Picker
Select colors from the viewport
Alt + Left Click
Pick Material
Select a material from the viewport
Spacebar
Pan View
Pan the camera view
Alt + Right Click
Rotate View
Rotate the camera around the model
Ctrl + Left Click
Zoom View
Zoom the camera in and out
F5
Toggle 2D/3D View
Switch between 2D and 3D viewport
Ctrl + L
Add Layer
Add a new layer to the current folder
Ctrl + G
Group Layers
Group selected layers into a folder
Ctrl + Shift + N
Add Black Mask
Add a black mask to the selected layer
Ctrl + I
Invert Mask
Invert the current mask
This table provides a quick reference for some of the most commonly used shortcuts in Substance Painter, helping artists to work more efficiently and streamline their texturing workflow.
Logo animation company: 10 Jaw-Dropping Styles to Skyrocket Engagement, The Morphic Studio
The statistical world is moving faster than ever before. In the year 2026, having a simple picture for your brand is just not enough to grab the attention of your audience. This is exactly where the magic of movement comes into play. This is why choosing the right creative partner is so incredibly important for […]
July 8, 2026
Advertising agency in Ahmedabad: 10 Brilliant Tactics to Massively Boost Sales, The Morphic Studio
This is exactly where a strong marketing partner comes in. Finding the right Advertising agency in Ahmedabad can totally change the game for your brand. At The Morphic Studio, we understand the local heartbeat o f the city. We know what works, what fails, and how to get your cash register ringing constantly. Let us […]
July 3, 2026
Motion Graphics Studio: 10 Jaw-Dropping Trends to Massively Boost Sales, The Morphic Studio
Hiring a professional team to handle your visual storytelling is no longer a luxury for big brands. It is a strict necessity for anyone who wants to survive networked. The right visuals can explain complex ideas in seconds, making your audience feel connected to your core message. Motion Graphics Studio at The Morphic Studio, we […]